[转载]DotLiquid-Asp.net模板引擎 – loogn – 博客园.
以前用过一段时间的PHP,感觉非常不错,其中最让我难忘的就是Smarty模板引擎,当时就微微地想ASP.NET里有没有像这样的模板引擎呢?不过由于之后的工作内容都用不到,或者说没有想到用模板,这想法也没导致我做一些事情,就不了了之了。
现在也是工作需要,用模板是一个不错的选择。之前没用过这种东西,盲搜一片没找到自己想要的,于是自己就试着写写,大思路用的是Smarty的,用html页面做为模板,生成aspx页面,把数据放在HttpContext.Items里,代码如下:
html模板:
<select>
{foreach $l in $list}
<option value=”{$l.Age}”>{$l.Name}</option>
{/foreach}
</select>
生成的aspx页面:
<%
if (HttpContext.Current.Items[“SMARTY_TEMPLATE_DIR“]==null)
{
Response.Write(“no direct access allowed“);
Response.End();
}
%>
<div><%=DotSmarty.Smarty.GetTemplateArg(“title“) %></div>
<% var list = DotSmarty.Smarty.GetTemplateArg(“list“) as System.Collections.Generic.IList<SmartyTest.User>; %>
<select>
<% foreach (var l in list){ %>
<option value=”<%=l.Age %>”><%=l.Name %></option>
<%}%>
</select>
调用如:
List<User> list = new List<User>();
list.Add(new User() { Age=1, Name=“name111“});
list.Add(new User() { Age = 2, Name = “name222“ });
smarty.Assign(“title“, “标题“);
smarty.Assign(“list“, list, TemplateArgType.List);
smarty.Display(“user/userInfo.htm“);
看起来很像Smarty,可越写难度越大!唉,能力有限,将来有能力再说吧,现在只能放弃。
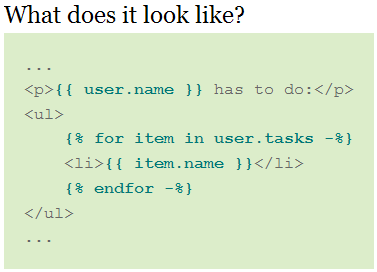
前几天幸运地听说了DotLiquid,网址是:http://dotliquidmarkup.org。上面曰:“DotLiquid is a templating system ported to the .net framework from Ruby’s Liquid Markup.It’s easy to learn, fast and safe“。我想我终于找到了ASP.NET中的smarty了,更有图说明:
这里先介绍一下她的几个主要的概念:
Filter:”Filters are simple methods(过滤器是一些简单的方法)”
如标准Filter中的upcase,{{ “looGn” | upcase }} 值为”LOOGN”。
Tag:”Tags are used for the logic in your template(标签用于实现模板中的逻辑)”。
如标准Tag中的assign,{% assign freestyle = false %} 定义值为false的freestyle变量。
Block:其实block也是tag,如if..else,for..in, 可以说Block是有endtag的Tag。
如:{% for i in (1..5) %}
{{ i }}
{% endfor %}
下面跟大家分享一下这几天对她的理解及代码实现:
下载过发布的压缩包DotLiquid v1.5.zip里会有v3.5和v4.0两个版,引用DotLiquid.dll的对应版本到自己项目即可。其实她真的是easy to learn!看一个handler的代码:
{
context.Response.ContentType = “text/plain“;
Template template = Template.Parse(“模板内容:{{hw}}“);//用模板内容做为参数解析得到Template对象
string result = template.Render(Hash.FromAnonymousObject(new { hw = “Hello World!“ }));//用模板所需的元素做为参数呈现处理后的结果
context.Response.Write(result);
}
一切的一切,其实就这两步!关键是!我们如何应用!”技术不是秘密,秘密是如何善用技术!” 不记得在哪看得一句话,不过无所谓啦!
第一步: 从文件读入模板内容。模板大多数不是程序中的一个字符串变量,可能存在文件、数据库里等,这里说的是html文件模板。TemplateHelper如下
{
#region Template路径 static TemplateHelper()
{
//可用文件配置,例子中用了字典
_map = new Dictionary<string, string>(50);
_map.Add(“master“, “~/template/master.htm“);
_map.Add(“index_content_main“, “~/template/index_content_main.htm“);
_map.Add(“list_content_main“, “~/template/list_content_main.htm“);
_map.Add(“list_content_script“, “~/template/list_content_script.htm“);
_map.Add(“detail“, “~/template/uc/detail.htm“);
} #endregion private static Dictionary<string, string> _map; public static bool ContainsKey(string key)
{
return _map.ContainsKey(key);
}
public static string GetTemplateURL(string key)
{
try
{
return _map[key];
}
catch (KeyNotFoundException e)
{
KeyNotFoundException ne = new KeyNotFoundException(e.Message + “key:“ + key);
throw ne;
}
catch (Exception e)
{
throw e;
}
}
/*这个方法限制了文件模板路径必要配置,如果需要可以添加直接以文件路径为参数的方法,
*不过感觉这里配置起来是个好的习惯 */
public static Template GetFileTemplate(string templateKey, Encoding encoding)
{
Template template = HttpContext.Current.Cache[templateKey] as Template;
if (template == null)
{
string path = HttpContext.Current.Server.MapPath(GetTemplateURL(templateKey));
template = Template.Parse(File.ReadAllText(path, encoding));
CacheDependency dependency = new CacheDependency(path);
HttpContext.Current.Cache.Add(templateKey, template, dependency, Cache.NoAbsoluteExpiration,
Cache.NoSlidingExpiration, CacheItemPriority.Default, null);//把模板缓存起来
}
return template;
} public static Template GetFileTemplate(string templateKey)
{
return GetFileTemplate(templateKey, Encoding.UTF8);
}
}
第二步:include文件。DotLiquid的include是一个标准Tag,如{% include top %}。调用include需要给Template.FileSystem赋值,它是一个IFileSystem接口,在IFileSystem里只有一个方法:
{
string ReadTemplateFile(Context context, string templateName);
}
很显然,解析到include top时会把top做为templateName调用Template.FileSystem.ReadTemplateFile方法,以此来实现include。所以实现IFileSystem的类要以templateName参数返回对应的内容:
{
private Encoding _encoding = Encoding.Default; public IncludeFileSystem(){} public IncludeFileSystem(Encoding encoding)
{
_encoding = encoding;
} public string ReadTemplateFile(Context context, string templateName)
{
bool isOptional = false; //是否可选
string templateKey = templateName;
if (templateName.EndsWith(“_optional“))
{
isOptional = true;
templateKey = templateKey.Replace(“_optional“, “”);
}
if (templateKey.StartsWith(“content_“))
{
object ns = context.Environments[0][“ns“];
if (ns == null)
{
ns = Path.GetFileNameWithoutExtension(HttpContext.Current.Request.RawUrl);
}
templateKey = ns + “_“ + templateKey;
}
object result = HttpContext.Current.Cache[templateKey];
if (result == null)
{
if (isOptional && !TemplateHelper.ContainsKey(templateKey))
{
return string.Empty;
}
string path = HttpContext.Current.Server.MapPath(TemplateHelper.GetTemplateURL(templateKey));
result = File.ReadAllText(path, Encoding.UTF8);
CacheDependency dependency = new CacheDependency(path);
HttpContext.Current.Cache.Add(templateKey, result, dependency, Cache.NoAbsoluteExpiration,
Cache.NoSlidingExpiration, CacheItemPriority.Default, null);
}
return result.ToString();
}
}
这里的ReadTemplateFile有 点复杂,其实就是根据templateName来读文件,缓存,至于开始的判断后面再说。在适当的地方设置一下Template.FileSystem 可。Template.FileSystem = new IncludeFileSystem();我写在了Application_Start事件处理程序里。
第三步:提供测试数据。下面为了简单,没从数据库读取:
{
public static Family GetFamily()
{
Family family = new Family()
{
Host = “孙悟空“,
Address = “大佛山小石村“,
Count = 4,
Desc = “快乐的一家人!“
};
return family;
} public static List<Member> GetMembers()
{
List<Member> members = new List<Member>() {
new Member(){ ID=1, Name=“孙悟空“, Age=42, Sex=true, Relation=“本人“, Desc=“下等战士,重情重义、绝不欺骗朋友、喜欢帮助人,就算对着敌人也会帮助他。 多次救了地球和全人类。“ },
new Member(){ ID=2, Name=“牛琪琪“, Age=40, Sex=false, Relation=“妻子“, Desc=“孙悟空和琪琪结婚了,孙悟空没老可琪琪老了!“},
new Member(){ ID=3, Name=“孙悟饭“, Age=22, Sex=true , Relation=“长子“, Desc=“拥有极高的潜力,每次遇到危险时都会发挥出强大力量来保护自己。“},
new Member(){ ID=4, Name=“孙悟天“, Age=15, Sex=true , Relation=“次子“, Desc=“天赋极高,可老想着泡妞!“},
};
return members;
} public static Member GetMemberInfo(int id)
{
return GetMembers().Single(m => m.ID == id);
}
}
public class Family:Drop
{
public string Host { get; set; } public string Address { get; set; } public int Count { get; set; } public string Desc { get; set; }
}
{
public int ID { get; set; } public string Name { get; set; } public int Age { get; set; } public bool Sex { get; set; } public string Relation { get; set; } public string Desc { get; set; }
}
第四步:实现母版编程 。一直感觉ASP.NET中母版很不错,Asp.net页面的对象模型来实际母版和用户控件也是顺理成章的事。要用DotLiquid的include标签来实现母版应该怎么做呢?这里说说我的解决方法。先看母版模板文件master.htm
<html xmlns=“http://www.w3.org/1999/xhtml“>
<head>
<title>{{title}}</title>
<link href=“/css/style.css“ rel=“stylesheet“ type=“text/css“ /> <script type=“text/JavaScript“ src=“/js/JQuery-1.6.1.min.js“></script>
{
% include content_script_optional %}</head>
<body>
<div id=“root“>
<div class=“top“>
<h2>
Top in master</h2>
</div>
{% include content_main %}
<div class=“bottom“>
<h2>
Bottom in master
</h2>
</div>
</div>
</body>
</html>
对,关键还是在templateName上,”content_main”和”content_script_optional” 中的”content”和”optional”是两个约定,还记得IncludeFileSystem.ReadTemplateFile方法吧,就是有点复杂的那个!content指明这里是包含”内容模板(名词来自内容窗体)”,optional指明这个include可以没有,模板里到这就可以了,再看ReadTemplateFile方法有个object ns;默认是请求文件名,因为a页面可以用master.htm,b页面也可以用master.htm,ns默认就是”a”或”b”,这样做只是为了找到a或b的模板。假如index_content_main.htm首页模板:
<table class=”tb” style=”width:400px;”>
<caption>家庭:{{f.Host}}
<a href=”/list.ashx”>查看成员</a>
</caption>
<tr>
<th>户主:</th><td>{{f.Host}}</td>
</tr>
<tr>
<th>地址:</th><td>{{f.Address}}</td>
</tr>
<tr>
<th>家庭成员数:</th><td>{{f.Count}}</td>
</tr>
<tr>
<th>描述:</th><td>{{f.Desc}}</td>
</tr>
</table>
</div>
index.ashx为访问接口:
{
context.Response.ContentType = “text/plain“;
Template template = TemplateHelper.GetFileTemplate(“master“);
string html = template.Render(Hash.FromAnonymousObject(new { title = “dotliquid demo index“,f=WebHelper.GetFamily()}));
context.Response.Write(html);
}
嘿嘿,这里有点怪吧,代码里看不出来和index页面有半点关系,template是根据master.htm得到的。这主要归功于那两个约定和一个ns默认值,如果把index.ashx改名为abc.ashx,上面呈现的代码就要这样写了:
这几步到些完结!完整例子会附下载!
扩展:还记得代码图右边的几个主要概念吧,下面是三个例子,我写的一个,他们的两个!
{
public static string Text(bool? input, string trueText, string falseText, string nullText)
{
if (input == null) return nullText;
return input == true ? trueText : falseText;
}
public static string Text(bool input, string trueText, string falseText)
{
return input ? trueText : falseText;
}
}
这个是自己的Filters类,里面的每个方法都可以是一个Filter,{% true | text: “男” , “女” %} 此值为”男” ,调用第二个重载,text为方法名称(注意大小写),true是第一个参数input,”男”是第二个参数trueText,”女”是第三个参数 falseText。Filter要注册才可用,Template.RegisterFilter(typeof(TemplateFilters)); 这个我也写在Application_Start。
{
int _max;
public override void Initialize(string tagName, string markup, List<string> tokens)
{
base.Initialize(tagName, markup, tokens);
_max = Convert.ToInt32(markup);
}
public override void Render(Context context, StreamWriter result)
{
result.Write(new Random().Next(_max).ToString());
}
} public class Scale : Block//概率出现,用的单词应该不当!~
{
int _max;
public override void Initialize(string tagName, string markup, List<string> tokens)
{
base.Initialize(tagName, markup, tokens);
_max = Convert.ToInt32(markup);
}
public override void Render(Context context, StreamWriter result)
{
if (new Random().Next(_max) == 0)
base.Render(context, result);
}
}
还是要先注册,Template.RegisterTag<Rd>(“rd”);Template.RegisterTag<Scale>(“scale”);
用法分别是 {% rd 10 %} 值为0到10任意一个数字, {% scale 10 %}这里有10%的概率出现{% endscale %}。