[转载]【原创】构建高性能ASP.NET站点 第七章 如何解决内存的问题(前中篇)—托管资源优化—监测CLR性能 – ASP.NET 架构 – 博客园.
CLR计数器的使用
我们使用系统自带的性能监测工具来跟踪和监测垃圾回收器。
下面,首先介绍几个常用的CLR性能监测计数器,我们一般查看.NET CLR Memory分类下的计数器:
Percent Time in GC 表明了从上次垃圾回收机制运行之后到现在这段时间内,运行垃圾回收机制所花的时间占总时间的百分比。不要超过10%。 Gen 0 heap size 这个数值不是表明当前托管堆中Gen 0对象所占的大小,而是指:还可以分配的Gen 0对象的大小 Gen 1 heap size 表明当前Gen 1 对象所占的托管堆的空间大小 Gen 2 heap size 表明当前Gen 2 对象所占的托管堆的空间大小 Large Object Heap size 当前LOH的大小 # Byte in all Heaps 是上面Gen 0 heap size,Gen 1 heap size,Gen 2 heap size,Large Object Heap size所有的种和,也就是整个托管堆所占的空间大小 # Gen 0 Collections 从系统开启之后到现在,垃圾回收器回收Gen 0对象的次数 # Gen 1 Collections 从系统开启之后到现在,垃圾回收器回收Gen 1对象的次数 # Gen 2 Collections 从系统开启之后到现在,垃圾回收器回收Gen 2对象的次数
介绍完上面的一些计数器之后,大家可以运行”perfmon”命令,打开性能监测工具。
下面开始介绍CLR Profiler(CLR 透析器)
CLR Profiler
CLR Profiler是微软开发的一个工具,这个工具可以用来检测CLR所占用的内存详情。
大家可以去下面的链接去下载这个工具:
下面的链接详细的讲述这个工具的用法:
http://msdn.microsoft.com/zh-cn/magazine/ee309515.aspx#MtViewDropDownText
在这里,只是简单的介绍一下如何使用,至于详细的操作,还请大家去查看上面给出的链接。使用的步骤如下:
1. 运行CLR Proflier
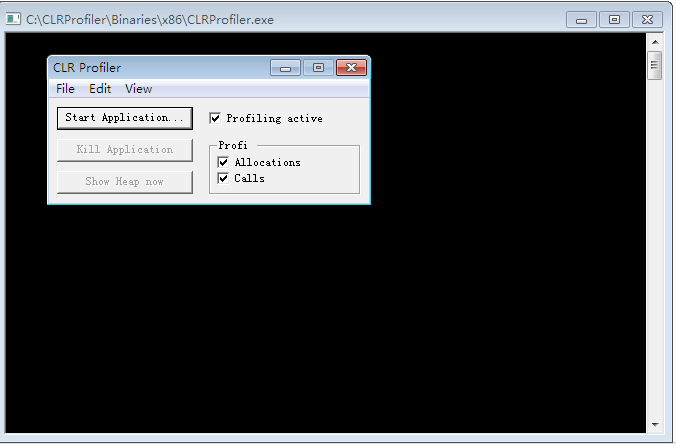
2. 确保”Profiling active, Allocations, Calls”都勾选上。如下:
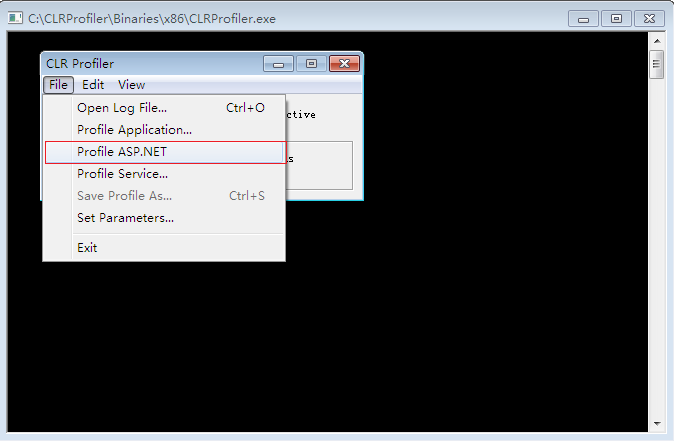
3. 选择”File->Profile ASP.NET”.这个操作的背后会停止IIS的运行,然后插入一些指令,然后重启IIS,所以这个工具在生产环境中慎用。
4. 然后我们可以在VS中F5运行我们的网站(确保在创建网站的时候是以IIS方式来建立站点的,而不是选择”文件系统”的方式建立)
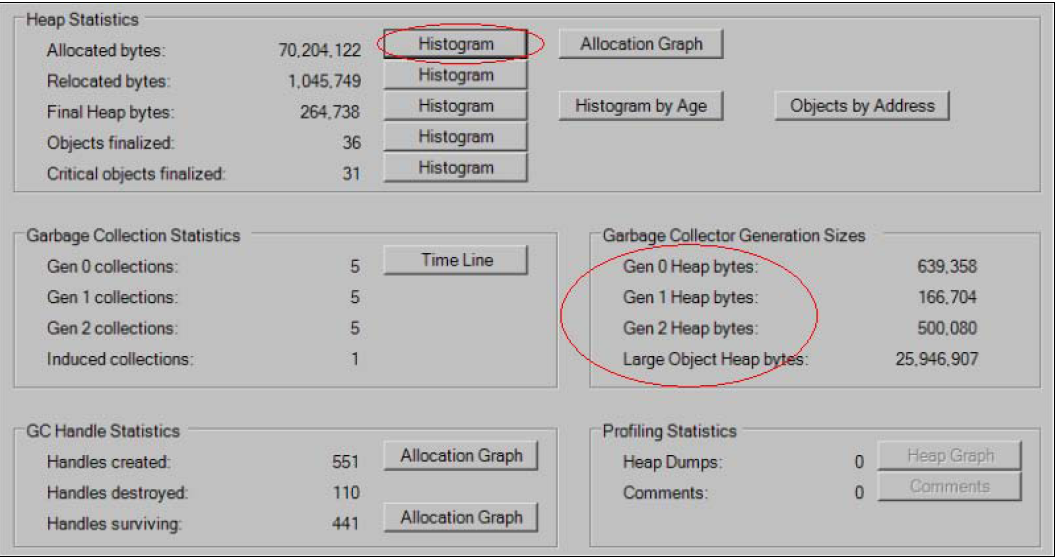
5. 在界面上面点击”Kill ASP.NET”.这个操作的背后会移除之前加入到IIS中的一些监视指令。点击按钮之后,会出现一些界面。这个界面上面显示了Gen0, Gen1 Gen2 ,LOH所占的大小,如下:
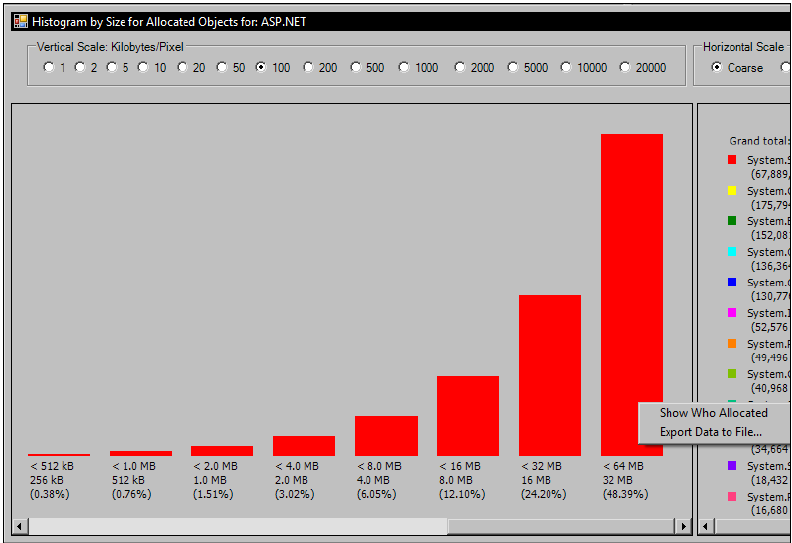
6. 我们还可以点击”Histogram”按钮。这个界面展示了不同大小以及不同类型的对象所占的比例。下面对看出,系统中有很多的string对象,也就说,系统中的string类型的对象占据了系统大部分的内存空间。
大家可以查看更多的信息,这里不再赘述了,下面我们来看看垃圾回收器的版本问题。
垃圾回收器版本
在CLR中,垃圾回收器是有两个版本的:
1. 服务端版本。CLR中的这个垃圾回收器版本进行了一系列的内存,处理器优化,用来进一步的提高性能。
2. 工作组版本,这是相对服务端版本而言的,主要是用在桌面开发中,例如在WPF,Winform中,就是采用的这个版本垃圾回收器。
在ASP.NET中就是采用的CLR服务端版本的垃圾回收器。
OK,今天就暂时写到这里,下一篇讲述一些针对上述问题的一些优化措施。


 (原图200*200,12.3k)
 (处理后80*80,17.7k)
 (原图256*192)
 (裁剪要求100*100)
 (裁剪要求90*120)
 (裁剪要求120*90)
 (原图146*256)
 (裁剪要求100*100)
 (裁剪要求90*120)
 (裁剪要求120*90)