[C#]Scalable COMET Combined with ASP.NET - Part 2

mikel阅读(1318)

Introduction

If you have read my previous article Scalable COMET Combined with ASP.NET, then you should understand what I was trying to achieve. I explained COMET and how to get the best scalable performance from ASP.NET; however, I think the previous article was a little too close to the wire. It demonstrated the technique well enough, but did not really contain any useful code. So, I thought I would write an API that wrapped up the functionality of the previous article into a neat set of classes that can be included in a typical web project, giving you the opportunity to leverage (and test) the idea.

I'm not going to go into much detail about the threading model, because it is pretty much covered in the previous article; I'm just going to cover the API and how to use it in your web applications.

I decided I would write a lightweight messaging API that is similar to the Bayeux protocol in the way it exchanges messages; however, it is not an implementation of this protocol as I believe it was overkill for what was required to get this API to work, and it is also only a draft.

My original article stated I would put together a Tic-Tac-Toe game; unfortunately, I figured the idea would be easier demonstrated with a simple chat application. The application uses a COMET channel to receive messages, and a WCF service to send messages.

The basic chat application

chat.PNG

Glossary of Terms

Below is a list of terms that I use in this document, and what they are meant to describe:

  • Channel – This is an end point that a COMET client can connect to. Any messages sent to the client must be delivered through a channel.
  • Timeout – This is when a client has been connected to a channel for a predefined amount of time and no messages have been received. A client can reconnect when they "timeout".
  • Idle Client – This is the time frame that a client has not been connected to the server, an idle client will be disconnected after a predefined time.
  • Message – A JSON message that is sent through a channel to a client.
  • Subscribed – A client that is subscribed to a channel. They are connected and ready to receive messages.

The Core Project

The core project contains all the classes required to enable COMET in your ASP.NET application. The code is very close in design to the code in the original article, but I have extended the functionality to enable the transmission of generic messages between the clients and the server.

The main class that controls the COMET mechanism is CometStateManager. This class manages a single channel within your application. This class aggregates an ICometStateProvider instance that manages the state in a particular way for your application. In the API, there is a built-in InProcCometStateProvider implementation that stores the state within the server's memory. Obviously, this is no good for load balanced environments, but one could implement a custom provider that uses a DB, or a custom state server.

To expose your channel to the outside world, it needs to be wrapped up in an IHttpAsyncHandler implementation. I actually attempted to use the asynchronous model within WCF, but found that it did not release the ASP.NET worker threads the same way as the asynchronous handler, which is a bit of a shame, and totally unexpected.

The code below demonstrates how you would setup an IHttpAsyncHandler to provide an end point for your COMET channel:

public class DefaultChannelHandler : IHttpAsyncHandler
{
//    this is our state manager that 
//    will manage our connected clients
private static CometStateManager stateManager;
static DefaultChannelHandler()
{
//    initialize the state manager
stateManager = new CometStateManager(
new InProcCometStateProvider());
}
#region IHttpAsyncHandler Members
public IAsyncResult BeginProcessRequest
(HttpContext context, AsyncCallback cb, object extraData)
{
return stateManager.BeginSubscribe(context, cb, extraData);
}
public void EndProcessRequest(IAsyncResult result)
{
stateManager.EndSubscribe(result);
}
#endregion
#region IHttpHandler Members
public bool IsReusable
{
get { return true; }
}
public void ProcessRequest(HttpContext context)
{
throw new NotImplementedException();
}
public static CometStateManager StateManager
{
get { return stateManager; }
}
#endregion
}

The above code is pretty simple. We have a static instance of our CometStateManager that is constructed with an implementation of ICometStateProvider. In this example, we use the built-in InProcCometStateProvider implementation.

The rest of the implementation of the class simply maps the BeginProcessRequest and EndProcessRequest methods to the BeginSubscribe and EndSubscribe methods of our CometStateManager instance.

We also need the entry in the web.config file that enables the handler.

<add verb="POST"
path="DefaultChannel.ashx"
type="Server.Channels.DefaultChannelHandler, Server" />

That's it, the channel is now ready to be subscribed to by a client.

The CometClient Class

The channel needs to keep track of clients, each client is represented in some sort of cache by an instance of the CometClient class. We don't want any old client connecting to the server or subscribing to channels without some sort of authentication, so we would implement an authentication mechanism, maybe a standard ASP.NET login form, or possibly a WCF call to a service that can validate some credentials and then initialize a client in our channel.

The code below shows the login action of the default.aspx file in the included chat application:

protected void Login_Click(object sender, EventArgs e)
{
try
{
DefaultChannelHandler.StateManager.InitializeClient(
this.username.Text, this.username.Text, this.username.Text, 5, 5);
Response.Redirect("chat.aspx?username="
+ this.username.Text);
}
catch (CometException ce)
{
if (ce.MessageId == CometException.CometClientAlreadyExists)
{
//  ok the comet client already exists, so we should really show
//  an error message to the user
this.errorMessage.Text =
"User is already logged into the chat application.";
}
}
}

We are not validating a password or anything, we are simply taking the username directly from the page and using that to identify our client. A COMET client has two tokens that are supplied by the consumer of the API:

  • PrivateToken – This is the token which is private to the client, the token that is used to subscribe to messages for that client.
  • PublicToken – This is the token which is used to identify the client to other clients. This is typically used when sending messages to a specific client.

The reason why we use a public and private token is because the private token can be used to subscribe to a channel and receive messages for that user. We don't want any other client to be able to do that apart from the original client (e.g., we don't want the messages spoofed!). Because of this reason, we use the public token if we wanted to send messages between clients.

I have also included a DisplayName property on the client that can be used to store a username; this has been added just for simplicities sake.

To setup a client in the channel, you need to call InitializeClient. This is shown above. This method takes the following parameters:

  • publicToken – The public token of the client
  • privateToken – The private token of the client
  • displayName – The display name of the client
  • connectionTimeoutSeconds – The amount of seconds a connected client will wait for a message until it responds with a timeout message
  • connectionIdleSeconds – The amount of seconds the server will wait for a client to reconnect before it kills the idle client

In the above example, InitializeClient is called, specifying the username from the form as the publicToken, privateToken, and displayName. Although this is not very secure, it is good enough for the example. To make this more secure, I could have generated a GUID for the privateToken, and kept the public token as the username.

The InitializeClient call will then call through to the ICometStateProvider.InitializeClient with a newly initialized CometClient class, and expect it to store it in a cache.

With the CometClient now available in the channel, clients may subscribe to the channel using their privateToken.

Client-Side JavaScript

To enable the client-side functionality, there is a WebResource located in the core project, Scripts/AspNetComet.js that contains all the JavaScript needed to subscribe to the channel (and a public domain JSON parser from here). To make things easier, I have included a static method on CometStateManager called RegisterAspNetCometScripts, which accepts a Page as a parameter and registers the script on that page.

protected void Page_Load(object sender, EventArgs e)
{
CometStateManager.RegisterAspNetCometScripts(this);
}

With this call in place, we are free to use the very basic client-side API that is available to us. The example below is taken from chat.aspx in the web project, and shows how you can subscribe to a particular channel once a client has been initialized.

var defaultChannel = null;
function Connect()
{
if(defaultChannel == null)
{
defaultChannel =
new AspNetComet("/DefaultChannel.ashx",
"<%=this.Request["username"] %>",
"defaultChannel");
defaultChannel.addTimeoutHandler(TimeoutHandler);
defaultChannel.addFailureHandler(FailureHandler);
defaultChannel.addSuccessHandler(SuccessHandler);
defaultChannel.subscribe();
}
}

All the functionality for the client-side API is wrapped up in a JavaScript class called AspNetComet. An instance of this class is used to track the state of a connected client. All that is required to subscribe is the URL of the COMET end point handler, the privateToken of the CometClient, and an alias that is used to identify the channel on the client. Once we have constructed an instance of AspNetComet, we setup a bunch of handlers that are called at specific times during the COMET life cycle.

  • addTimeoutHandler – Adds a handler that is called when a client has waited for a predefined amount of time and no messages have been received.
  • addFailureHandler – Adds a handler that is called when a COMET call fails; examples of failures would be the COMET client is not recognised.
  • addSuccessHandler – Adds a handler that is called for every message that is sent to the client.

The following code shows the signatures of each handler method:

    function SuccessHandler(privateToken, channelAlias, message)
{
// message.n - This is the message name
// message.c - This is the message contents
}
function FailureHandler(privateToken, channelAlias, errorMessage)
{
}
function TimeoutHandler(privateToken, channelAlias)
{
}

The message parameter of the SuccessHandler is an instance of the CometMessage class. The code below shows the class and its JSON contract:

[DataContract(Name="cm")]
public class CometMessage
{
[DataMember(Name="mid")]
private long messageId;
[DataMember(Name="n")]
private string name;
[DataMember(Name="c")]
private object contents;
/// <summary>
/// Gets or Sets the MessageId, used to track 
/// which message the Client last received
/// </summary>
public long MessageId
{
get { return this.messageId; }
set { this.messageId = value; }
}
/// <summary>
/// Gets or Sets the Content of the Message
/// </summary>
public object Contents
{
get { return this.contents; }
set { this.contents = value; }
}
/// <summary>
/// Gets or Sets the error message if this is a failure
/// </summary>
public string Name
{
get { return this.name; }
set { this.name = value; }
}
}

Sending a Message

In the chat web application, I have included an AJAX-enabled WCF web service that acts as the end point for the "Send Message" functionality of the chat application. The code below shows the client-side event handler for the click of the Send Message button:

function SendMessage()
{
var service = new ChatService();
service.SendMessage(
"<%=this.Request["username"] %>",
document.getElementById("message").value,
function()
{
document.getElementById("message").value = '';
},
function()
{
alert("Send failed");
});
}

The code constructs an instance of the ChatService client-side object that is created by the ASP.NET Web Service framework, then just calls the SendMessage method, passing over the privateToken of the client and their message.

The server code for SendMessage then takes the parameters, and writes a message to all the clients; the code below demonstrates this:

[OperationContract]
public void SendMessage(string clientPrivateToken, string message)
{
ChatMessage chatMessage = new ChatMessage();
//
//  get who the message is from
CometClient cometClient =
DefaultChannelHandler.StateManager.GetCometClient(clientPrivateToken);
//  get the display name
chatMessage.From = cometClient.DisplayName;
chatMessage.Message = message;
DefaultChannelHandler.StateManager.SendMessage(
"ChatMessage", chatMessage);
// Add your operation implementation here
return;
}

This method looks up the CometClient from the private token, and then creates a ChatMessage object that is used as the content of the message that is sent to each connected client using the SendMessage method on the CometStateManager instance. This will trigger any connected client to the callback on the SuccessHandler method contained in chat.aspx, which writes the message to the chat area on the page.

function SuccessHandler(privateToken, alias, message)
{
document.getElementById("messages").innerHTML +=
message.c.f + ": " + message.c.m + "<br/>";
}

Using the Code

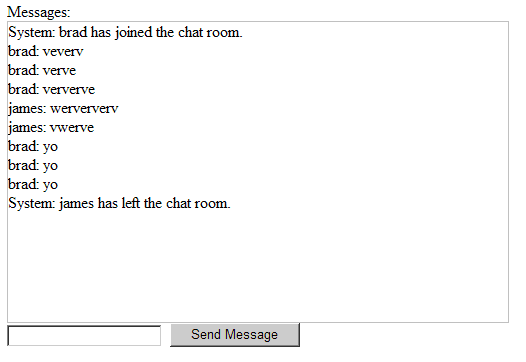
The website included in the solution will execute without any configuration changes, then just connect a few clients to the application login using a desired username, and chat. Messages should be received in real-time, and appear instantly to each user.

Using the API will enable you to use a COMET style approach in your AJAX enabled applications. Using WCF can be handy for sending messages to the server, this is all neatly wrapped up for you automatically, then just callback to the connected clients on a COMET channel.

History

  • 11th July 2008 – Created.

License

This article, along with any associated source code and files, is licensed under The Code Project Open License (CPOL)

About the Author

James Simpson

[C#]多线程TcpListener自定义事件

mikel阅读(1163)

目的:
1:Server:可以接受多个连接
创建一个等待连接线程,处理新的客户TCP连接请求。
为每一个TCP连接建立一个服务线程。
在接受到请求后,触发外部的一个方法。所以具有onRequest事件
发布一个serverPort的属性,供外部连接。
2:Client:可以连接多个Server
需要知道远程Server的remoteHostName和remotePort属性
具有ProcessRequest方法,供外部调用
————–server code———————
///

/// 为程序安装一个Server,侦听所有连接请求
///
public class Server
{
  public event RequestEventHandler OnRequest;
private IPEndPoint localEndPoint;
public Server(int serverPort)
{
string localName=Dns.GetHostName();
IPHostEntry ipEntry=Dns.GetHostByName(localName);
IPAddress ip=ipEntry.AddressList[0];
localEndPoint=new IPEndPoint (ip,serverPort);
}
public void Start()
{
//创建新的TCP连接需要一个线程,他一直在运行。
//这里只需要把这个线程启动起来
            Thread createServer=new Thread(new ThreadStart(CreateServer));
            createServer.Name="createServer";
createServer.Start();
}
private void CreateServer()
{
//为每一个新的客户端连接请求建立TCP连接
TcpListener listener;
    listener = new TcpListener(localEndPoint);
listener.Start();
//Log.Write("Start to Listen at :"+_localEndPoint.ToString());
while (true)
{
Socket connection;
connection = listener.AcceptSocket();//接受到请求
Connection conHandler=new Connection();
conHandler.connection=connection;
conHandler.OnRequest+=new RequestEventHandler(connectionHandler_OnRequest);//一个连接的每个请求都会执行一个Server的方法
    Thread clientThread =new Thread(new ThreadStart(conHandler.HandleConnection));
clientThread.Start();
}
}
public void Stop()
{
 
}
private string connectionHandler_OnRequest(string request)
{
//这个方法用于触发使用该server的一个事件。
string response;
if(this.OnRequest!=null)
response=OnRequest(request);
else
response="SERVER ERROR : NOT DISPATCH THE SERVER METHODE";
return response;
}
}
public delegate string RequestEventHandler(string request);
///

/// 处理一个连接的每个请求
/// 通过事件OnRequest向外发布事件
///
internal class Connection
{
private NetworkStream socketStream;
private BinaryWriter writer;
private BinaryReader reader;
public event RequestEventHandler OnRequest;
private Socket _connection;
public Socket connection
{
set{this._connection=value;}
}
public void HandleConnection()
{
//处理一个TCP连接的每个请求
while (true)
{
socketStream = new NetworkStream(_connection);
writer = new BinaryWriter(socketStream);
reader = new BinaryReader(socketStream);
string request = "";
do
{
try
{
request = reader.ReadString();
string response=OnRequest(request);//引发处理事件
writer.Write(response);
}
catch (Exception)
{
break;
}
} while (request != "CLIENT>>>EXIT" && _connection.Connected);
writer.Close();
reader.Close();
socketStream.Close();
_connection.Close();
}
}
}
——————–end server code—————————-
——————–client code——————————–
///

/// 客户端,可以发布请求
///
public class Client
{
  private NetworkStream output;
private BinaryWriter writer;
private BinaryReader reader;
        TcpClient client ;
public Client(string remoteHostName,int remoteHostPort)
{
IPHostEntry ipEntry=Dns.GetHostByName(remoteHostName);
IPAddress remoteIP=ipEntry.AddressList[0];
  client = new TcpClient();
client.Connect(remoteIP,remoteHostPort);
output = client.GetStream();
writer = new BinaryWriter(output);
reader = new BinaryReader(output);
            //writer.Write("this is the client to connect");
}
public string ProcessRequest(string request)
{
    writer.Write(request);
//这里是同步消息,需要加入一个异步处理
string response=reader.ReadString();
return response;
}
public void Close()
{
writer.Close();
reader.Close();
output.Close();
client.Close();
}
}
————————end client code——————————

[Java]基于长连接的服务器推技术

mikel阅读(696)

一般情况下,采用长连接,能持续的在客户端显示信息
比如

  1. <%@ page language="java" c pageEncoding="utf-8"%>  
  2. <%  
  3.   out.flush();  
  4.   int number = 0;  
  5.   while (true) {  
  6.     out.println(new java.util.Date()+"  
  7. ");  
  8.     out.flush();  
  9.     Thread.sleep(100);  
  10.     System.out.print(".");  
  11.     if (number++ > 100) {  
  12.       break;  
  13.     }  
  14.   }  
  15. %>  

这个代码会在客户端连续的显示时间。请注意,浏览器的正在下载是一直在运行中的。这个会让客户感到疑惑,难道还有东西在运行吗?

下面的这个方法,可以解决这个问题
我们先看服务器端代码。
使用了prototype.js

  1. <%@ page language="java" contentType="text/html; charset=utf-8" pageEncoding="utf-8"%>  
  2. <!DOCTYPE html PUBLIC "-//W3C//DTD XHTML 1.1//EN" "http://www.w3.org/TR/xhtml11/DTD/xhtml11.dtd">  
  3. <html xmlns="http://www.w3.org/1999/xhtml">  
  4. <head>  
  5. <title>Comet php backend</title>  
  6. <meta http-equiv="Content-Type" content="text/html; charset=utf-8" />  
  7. </head>  
  8. <body>  
  9. <script type="text/JavaScript">  
  10.   // KHTML browser don't share JavaScripts between iframes  
  11.   var is_khtml = navigator.appName.match("Konqueror") || navigator.appVersion.match("KHTML");  
  12.   if (is_khtml)  
  13.   {  
  14.     var prototypejs = document.createElement('script');  
  15.     prototypejs.setAttribute('type','text/JavaScript');  
  16.     prototypejs.setAttribute('src','../js/prototype.js');  
  17.     var head = document.getElementsByTagName('head');  
  18.     head[0].appendChild(prototypejs);  
  19.   }  
  20.   // load the comet object  
  21.   var comet = window.parent.comet;  
  22. </script>  
  23. <%  
  24.   out.flush();  
  25.   int number = 0;  
  26.   while (true) {  
  27.     // 这里生成了调用js的代码  
  28.     out.println("<script type='text/javascript'>comet.printServerTime('" + new java.util.Date() + "');</script>");  
  29.     out.flush();  
  30.     Thread.sleep(100);  
  31.     // 控制台显示,程序正在运行,正式运行可去掉  
  32.     System.out.print(".");  
  33.     // 防止程序一直运行,给调试带来麻烦,正式运行可去掉  
  34.     if (number++ > 100) {  
  35.       break;  
  36.     }  
  37.   }  
  38. %>  

关键在客户端代码

  1.    
  2. <%@ page language="java" contentType="text/html; charset=utf-8" pageEncoding="utf-8"%>  
  3. <!DOCTYPE html PUBLIC "-//W3C//DTD XHTML 1.1//EN" "http://www.w3.org/TR/xhtml11/DTD/xhtml11.dtd">  
  4. <html xmlns="http://www.w3.org/1999/xhtml">  
  5. <head>  
  6. <title>Comet demo</title>  
  7. <meta http-equiv="Content-Type" content="text/html; charset=utf-8" />  
  8. <script type="text/javascript" src="../js/prototype.js"></script>  
  9. </head>  
  10. <body>  
  11. <div id="content">The server time will be shown here</div>  
  12. <script type="text/javascript">  
  13. var url= 'testLinkData2.jsp';  
  14. var comet = {  
  15.   connection   : false,  
  16.   iframediv    : false,  
  17.     
  18.   initialize: function() {  
  19.     if (navigator.appVersion.indexOf("MSIE") != –1) {  
  20.       
  21.       // For IE browsers  
  22.       comet.connection = new ActiveXObject("htmlfile");  
  23.       comet.connection.open();  
  24.       comet.connection.write("<html>");  
  25.       comet.connection.write("<script>document.domain = '"+document.domain+"'");  
  26.       comet.connection.write("</html>");  
  27.       comet.connection.close();  
  28.       comet.iframediv = comet.connection.createElement("div");  
  29.       comet.connection.appendChild(comet.iframediv);  
  30.       comet.connection.parentWindow.comet = comet;  
  31.       comet.iframediv.innerHTML = "<iframe id='comet_iframe' src='./"+url+"'></iframe>";  
  32.     } else if (navigator.appVersion.indexOf("KHTML") != –1) {  
  33.       // for KHTML browsers  
  34.       comet.connection = document.createElement('iframe');  
  35.       comet.connection.setAttribute('id',     'comet_iframe');  
  36.       comet.connection.setAttribute('src',    './'+url);  
  37.       with (comet.connection.style) {  
  38.         position   = "absolute";  
  39.         left       = top   = "-100px";  
  40.         height     = width = "1px";  
  41.         visibility = "hidden";  
  42.       }  
  43.       document.body.appendChild(comet.connection);  
  44.     } else {  
  45.       
  46.       // For other browser (Firefox…)  
  47.       comet.connection = document.createElement('iframe');  
  48.       comet.connection.setAttribute('id',     'comet_iframe');  
  49.       with (comet.connection.style) {  
  50.         left       = top   = "-100px";  
  51.         height     = width = "1px";  
  52.         visibility = "hidden";  
  53.         display    = 'none';  
  54.       }  
  55.       comet.iframediv = document.createElement('iframe');  
  56.       comet.iframediv.setAttribute('src''./'+url);  
  57.       comet.connection.appendChild(comet.iframediv);  
  58.       document.body.appendChild(comet.connection);  
  59.     }  
  60.   },  
  61.   // this function will be called from backend.php    
  62.   printServerTime: function (time) {  
  63.     $('content').innerHTML = time;  
  64.   },  
  65.   onUnload: function() {  
  66.     if (comet.connection) {  
  67.       comet.connection = false// release the iframe to prevent problems with IE when reloading the page  
  68.     }  
  69.   }  
  70. }  
  71. Event.observe(window, "load",   comet.initialize);  
  72. Event.observe(window, "unload", comet.onUnload);  
  73. </script>  
  74. </body>  
  75. </html>  

请注意其中的
comet.connection = new ActiveXObject("htmlfile");
部分,就是这段代码生成了一个可以在IE浏览器下面,不再显示正在下载状态。据说这个是google的聪明人发现并应用于google的gtalk和gmail
最后,我们来看使用Ajax的查询方式,
服务器端在没有数据的情况下会阻塞,直到有数据。
服务器端

  1. <%@ page language="java" contentType="text/html; charset=utf-8" pageEncoding="utf-8"%>  
  2. <%  
  3.   out.flush();  
  4.   int number = 0;  
  5.   while (true) {  
  6.     // 这里可以插入检测的代码,我后面直接休眠100毫秒代替了  
  7.     out.println("{'timestamp':'"+System.currentTimeMillis()+"','msg':'"new java.util.Date() + "'}");  
  8.     out.flush();  
  9.       
  10.     Thread.sleep(100);  
  11.     System.out.print(".");  
  12.     if (number++ > 1) {  
  13.       break;  
  14.     }  
  15.     break;  
  16.   }  
  17. %>  

看关键的客户端

  1.    
  2. <%@ page language="java" contentType="text/html; charset=utf-8" pageEncoding="utf-8"%>  
  3. <!DOCTYPE html PUBLIC "-//W3C//DTD XHTML 1.1//EN" "http://www.w3.org/TR/xhtml11/DTD/xhtml11.dtd">  
  4. <html xmlns="http://www.w3.org/1999/xhtml">  
  5. <head>  
  6. <title>Comet demo</title>  
  7. <meta http-equiv="Content-Type" content="text/html; charset=utf-8" />  
  8. <script type="text/javascript" src="../js/prototype.js"></script>  
  9. </head>  
  10. <body>  
  11. <div id="content">内容</div>  
  12. <script type="text/javascript">  
  13. var Comet = Class.create();  
  14. Comet.prototype = {  
  15.   timestamp: 0,  
  16.   url: './testLinkData3.jsp',  
  17.   noerror: true,  
  18.   initialize: function() { },  
  19.   connect: function()  
  20.   {  
  21.     this.ajax = new Ajax.Request(this.url, {  
  22.       method: 'get',  
  23.       parameters: { 'timestamp' : this.timestamp },  
  24.       onSuccess: function(transport) {  
  25.         // handle the server response  
  26.         var response = transport.responseText.evalJSON();  
  27.         this.comet.timestamp = response['timestamp'];  
  28.         this.comet.handleResponse(response);  
  29.         this.comet.noerror = true;  
  30.       },  
  31.       onComplete: function(transport) {  
  32.         // send a new ajax request when this request is finished  
  33.         if (!this.comet.noerror)  
  34.           // if a connection problem occurs, try to reconnect each 5 seconds  
  35.           setTimeout(function(){ comet.connect() }, 5000);   
  36.         else  
  37.           this.comet.connect();  
  38.         this.comet.noerror = false;  
  39.       }  
  40.     });  
  41.     this.ajax.comet = this;  
  42.   },  
  43.   disconnect: function()  
  44.   {  
  45.   },  
  46.   handleResponse: function(response)  
  47.   {  
  48.     $('content').innerHTML += '<div>' + response['msg'] + '</div>';  
  49.   },  
  50.   doRequest: function(request)  
  51.   {  
  52.     new Ajax.Request(this.url, {  
  53.       method: 'get',  
  54.       parameters: { 'msg' : request }  
  55.     });  
  56.   }  
  57. }  
  58. var comet = new Comet();  
  59. comet.connect();  
  60. </script>  
  61. </body>  
  62. </html>  

几个相关的文献

[HTTP]Think in Pushlet

mikel阅读(854)

Think in Pushlet
作者:cleverpig
image

原文地址:http://www.matrix.org.cn/resource/article/2007-01-16/bcc2c490-a502-11db-8440-755941c7293d.html
介绍
        server端向浏览器client发送通知这种通讯模式在J2EE应用中很常见,通常使用采用RMICORBA或 者自定义TCP/IP信息的applet来实现。这些技术往往由于复杂而产生诸多不利之处:技术难以实现、存在防火墙限制(因为需要打开非HTTP的通讯 端口)、需要额外的server开发和维护。并且除了刷新整个页面或者完全采用applet展示内容之外,很难找到别的方法将client端applet 的状态和浏览器的页面内容集成在一起。
        Pushlet是一种comet实 现:在Servlet机制下,数据从server端的Java对象直接推送(push)到(动态)HTML页面,而无需任何Java applet或者插件的帮助。它使server端可以周期性地更新client的web页面,这与传统的request/response方式相悖。浏览 器client为兼容JavaScript1.4版本以上的浏览器(如Internet Explorer、FireFox),并使用JavaScript/Dynamic HTML特性。而低层实现使用一个servlet通过Http连接到JavaScript所在的浏览器,并将数据推送到后者。有关JavaScript版 本的知识请参看Mozilla开发中心提供的《JavaScript核心参考》Stephen Chapman编写的《What Version of Javascript》
         这种机制是轻量级的,它使用server端的servlet连接管理、线程工具、javax.servlet API,并通过标准Java特性中Object的wait()和notify()实现的生产者/消费者机制。原则上,Pushlet框架能够运行在任何支 持servlet的server上、防火墙的后面。当在client中使用JavaScript/DHTML时,Pushlet提供了通过脚本快速建立应 用、使用HTML/CSS特性集成和布局新内容的便利方法。
动机
        目前越来越多的servlet和JSP用来部署web,于是便出现了在页面已经装载完毕后由于server端某些对象的状态变化而产生对client浏览器进行通知和同步的需要。
        这些状态变化的原因很复杂:可能由于用户通过访问servlet或者修改数据库记录、更新EJB造成,或是在多用户应用(比如聊天室和共享白板)中的事件导致数据状态变化。这些类型的应用常常使用一种分布式的MVC模板:模式层位于server上(可能缓存在client中),控制层和视图层位于client中(这两个层可能合为一体)。
         当然,这里也存在需要订阅server端动态内容的应用:那些动态内容不停地从server端推送过来。例如股票实时情报、系统状态报告、天气情况或者其 它的监测应用。它遵循观察者(Observer)模板(也称为发布/订阅模板),这种模板中的远程client注册成为关注于server端对象变化的观 察者。关于设计模板的知识请看Matrix Wiki上的介绍
        那么在HTML页面已经被装载后如何通知浏览器客户端?或者如果有选择地更新页面中一些部分的话,那该怎么做?比如只更新在HTML Table中的那些价格发生变化的股票列?
多种通知解决方案
         让我们对应用进行这样的假设:拥有一个Java web server或者Java应用server,我们试图从server发送通知给client端浏览器。这里的解决方案可以分为:“轮询 (polling)”、“服务端回调(server-side callbacks)”和“消息(messaging)”三类。
轮询
         最简单的解决方案便是“定时刷新页面”。在HTML文档的头部使用HTML META标签,页面便可以每隔N秒自动reload一次。如果在此期间server端数据发生变化,那么我们可以获得新的内容,否则将得到相同的页面。虽 然方法很简单,但是如何设置刷新间隔是让人头疼的大问题。
服务端回调
        因为我们是“身经百战”的Java开发老手,所以经常会用到“服务端回调”。这种方式通过RMI或者CORBA将Server端的对象传输到Java applet客户端。
消息(MOM)
        这种解决方案采用一个作为client的applet,它使用TCP/IP或者无连接的UDP、甚至多播协议来建立与消息中间键server的通讯,然后由server推送消息给client。你可以从例如SoftWired的iBusIBM的MQSeriesBEA的WebLogic Event这些消息产品中直接挑选,或者自己使用基于socket的java.io.ObjectStream定制开发消息软件。
讨论(MOM)
        上面三种解决方案在复杂性、安全性、性能、可测量性、浏览器兼容性、防火墙限制上各有优势、劣势。最佳解决方案依赖于你的应用需求。例如,在共享白板应用中,用户需要直接与“状态”交互,那么server端回调或者消息很可能会大显身手。
         但在浏览器环境下,除非完全使用applet作为整个client应用,否则把来自于server的更新信息集成到页面中并非易事。如何在applet收 到回调或者消息时变更页面相关内容?一个很“痛快”而又“痛苦”的解决方案就是在回调方法中使用AppletContext.showDocument (URL)方法来刷新整个页面。
        由于HTML代码可以直接影响页面布局,直接使用来自server的数据更改HTML部 分内容不是更好吗?这是web应用的理想方案,在server上内容动态改变时,从用户到server所需的交互是最小化的。作为对上面的解决方案的补 充,我开发了Pushlet这种轻量级、瘦客户端的技术,它无需applet或者插件而直接与脚本/HTML集成在一起、使用标准HTTP连接、理论上可 以部署到任何支持Java servlet的server上。但这并不意味着它将替换对前面解决方案,而是在你的开发“工具箱”中添加另一种选择。作为Java构架者/开发者,你可 以自行权衡、选择、决定哪种适合应用的解决方案。
Pushlet原理
        Pushlet的基本使用形式是极为简单的。后面的一些示例会说明这一点。
HTTP流

image
极富生活韵味的“Urban Stream”把我们Connecting Together

        Pushlet 基于HTTP流,这种技术常常用在多媒体视频、通讯应用中,比如QuickTime。与装载HTTP页面之后马上关闭HTTP连接的做法相反, Pushlet采用HTTP流方式将新数据源源不断地推送到client,再此期间HTTP连接一直保持打开。有关如何在Java中实现这种Keep- alive的长连接请参看Sun提供的《HTTP Persistent Connection》W3C的《HTTP1.1规范》。
示例1
        我们利用HTTP流开发一个JSP页面(因为它易于部署,而且它在web server中也是作为servlet对待的),此页面在一个定时器循环中不断地发送新的HTML内容给client:

java 代码
 
  1. <%   
  2.   int i = 1;  
  3.       
  4.   try {  
  5.     while (true) {  
  6.        out.print("

    "+(i++)+"

    "
    );  
  7.        out.flush();  
  8.         
  9.        try {  
  10.             Thread.sleep(3000);  
  11.        } catch (InterruptedException e) {  
  12.        out.print("

    "+e+"

    "
    );  
  13.         }  
  14.      }  
  15.    } catch (Exception e) {  
  16.        out.print("

    "+e+"

    "
    );  
  17.    }  
  18. %>  

        在Pushlet源代码中提供了此页面(examples/basics/push-html-stream.jsp)。上面的页面并不是十分有用,因为在我们刷新页面时,新内容机械地、持续不断地被添加到页面中,而不是server端更新的内容。
示例2
        现在让我们步入Pushlet工作机理中一探究竟。通过运行Pushlet的示例源代码(examples/basics/ push-js-stream.html),我们会看到这个每3秒刷新一次的页面。那么它是如何实现的呢?
        此示例中包含了三个文件:push-js-stream.html、push-js-stream-pusher.jsp、push-js-stream-display.html。
        其中push-js-stream.html是主框架文件,它以HTML Frame的形式包含其它两个页面。
        push-js-stream-pusher.jsp是一个JSP,它执行在server端,此文件内容如下: 

java 代码
 
  1.  7: <%   
  2.  8:   /** Start a line of JavaScript with a function call to parent frame. */  
  3.  9:   String jsFunPre = ";  
  4. 10:     
  5. 11:   /** End the line of JavaScript */  
  6. 12:   String jsFunPost = "') ";  
  7. 13:     
  8. 14:   int i = 1;  
  9. 15:   try {  
  10. 16:     
  11. 17:     // Every three seconds a line of JavaScript is pushed to the client  
  12. 18:     while (true) {  
  13. 19:       
  14. 20:        // Push a line of JavaScript to the client   
  15. 21:        out.print(jsFunPre+"Page "+(i++)+jsFunPost);  
  16. 22:        out.flush();  
  17. 23:          
  18. 24:        // Sleep three secs  
  19. 25:        try {  
  20. 26:             Thread.sleep(3000);  
  21. 27:        } catch (InterruptedException e) {  
  22. 28:             // Let client display exception   
  23. 29:             out.print(jsFunPre+"InterruptedException: "+e+jsFunPost);  
  24. 30:        }  
  25. 31:      }  
  26. 32:    } catch (Exception e) {  
  27. 33:             // Let client display exception   
  28. 34:             out.print(jsFunPre+"Exception: "+e+jsFunPost);  
  29. 35:    }  
  30. 36: %>   

        注 意在示例1和示例2中使用JSP时都存在一个问题:一些servlet引擎在某个client离开时会“吃掉”IOException,以至于JSP页面 将永不抛出此异常。所以在这种情况下,页面循环将会永远执行下去。而这正是Pushlet实现采用servlet的原因之一:可以捕获到 IOException。
        在上面代码的第21行中可以看到在一个定时器循环(3秒/周期)中打印了一些HTML并将它们输出到client浏览器。请注意,这里推送的并非HTML而是Javascript!这样做的意义何在?
         它把类似“

” 的一行代码推送到浏览器;而具有JavaScript引擎的浏览器可以直接执行收到的每一行代码,并调用 parent.push()函数。而代码中的Parent便是浏览器页面中所在Frame的Parent,也就是push-js- stream.html。让我们看看都发生了什么?

js 代码
 
  1. "JavaScript">  
  2. var pageStart=";  
  3. var pageEnd="";  
  4.   // Callback function with message from server.  
  5.   // This function is called from within the hidden JSP pushlet frame  
  6.   function push(content) {  
  7.    
  8.     // Refresh the display frame with the content received  
  9.     window.frames['displayFrame'].document.writeln(pageStart+content+pageEnd);  
  10.     window.frames['displayFrame'].document.close();  
  11.   }  
  12.   
  13.   
  14.   
  15.   
  16.   
  17.        
  18.        
  19.        
  20.        
  21.        
  22.   

         可以看到push-js-stream.html中的push()函数被名为pushletFrame的JSP Frame调用:把传入的参数值写入到displayFrame(此Frame为push-js-stream-display.html)。这是动态 HTML的一个小技巧:使用document对象的writeln方法刷新某个Frame或者Window的内容。
        于是displayFrame成为了用于显示内容的、真正的视图。displayFrame初始化为黑色背景并显示“wait…”直到来自server的内容被推送过来:

WAIT...

         这便是Pushlet的基本做法:我们从servlet(或者从示例中的JSP)把JavaScript代码作为HTTP流推送到浏览器。这些代码被浏览 器的JavaScript引擎解释并完成一些有趣的工作。于是便轻松地完成了从server端的Java到浏览器中的JavaScript的回调。
         上面的示例展示了Pushlet原理,但这里存在一些等待解决的问题和需要增添的特性。于是我建立了一个小型的server端Pushlet框架(其类结 构图表将会展示在下面),添加了一些用在client中的JavaScript库。由于client需要依赖更多的DHTML特性(比如Layers), 我们将首先粗略地温习一些DHTML知识。示例代码见examples/dhtml。
框架的设计
        注意:本章节仅反映了Pushlet server端框架的1.0版本(随着版本升级可能还会重新构造)。
        Pushlet 框架允许client订阅在server端的主题(subject),而server则接收订阅,然后在server端的订阅主题所对应的数据变化时推送 数据到client。此框架的基本设计模板是发布/订阅(Publish/Subscrib),也被称为观察者(Observer)。它具有server 和client两部分组建而成:
        Server端:
        由围绕着Pushlet类的Java类集合构成(见下面的UML类设计图表)。
        Client端:
        脚本与页面:可重用的JavaScript库(pushlet.js)和用来在DHTML client(这里指浏览器)中接收事件的HTML(pushlet.html)组成。
        Client端Java类:
        JavaPushletClient.java和JavaPushletClientListener.java,负责在Java client中接收事件。
        跨越浏览器的DHTML工具库:
        layer.js, layer-grid.js, layer-region.js,用来在DHTML层中显示数据内容。
        最后,还有用于测试事件的生成工具类EventGenerators.java以及一些示例应用。
server端类设计
        下面是server端Java类的UML图表:


image
Pushlet框架Java类UML图

        关键的类:Pushlet、Publisher类、Subscriber接口和Event类。通过HTTP请求调用Pushlet这个servlet,client订阅事件并接收事件。
        Client发送订阅请求时需要表明的内容如下:
        1.订阅事件的主题
        2.接收事件所采用的格式:默认为JavaScript调用,还有XML或者Java序列化对象者三种。目前Pushlet 2.0.2版已经支持AJAX。
        3.使用哪种接收协议(将来实现):TCP/IP、UDP、Multicast。
        示例:用于接收AEX股票价格的请求,默认使用JavaScript调用作为格式。

js 代码
 
  1. http://www.fluidiom.com:8080/servlet/pushlet?subject="/stocks/aex"  

         主题(subject)表示为具有层次的“主题树”(topic-tree)形式。例如:“/stocks”表示与股票价格相关的所有事件,而 “/stocks/aex”表示Amsterdam Exchange公司的股票价格。“/”表示所有事件。这并不时硬性规定,而是由开发者根据应用自行定义。
        当前只有接收方协议是发送到client的HTTP回应流(response stream)。在将来的扩展版本中,接收方协议能够提供多种选择,比如TCP、UDP、RMI、HTTP POST甚至只SMTP。
        Event(事件)类:仅仅是name/value的字符串对(使用java.util.Properties实现)的集合。
        产生Event的方式:Publisher 类为生成的Event提供了发布接口,它内部保存了订阅者(那些实现Subscriber接口的类)列表,并把每个Event发送给那些主题与Event 匹配的订阅者。Event在server端也可以通过能够侦听外部Event的EventGenerators类来生成。另外client可以通过基于 HTTP通讯的Postlet类来发布Event。
        在上面的图表中,为了适配不同请求源(浏览器、Java client程序),PushletSubscriber以及它所包含的那些类提供了多种订阅者的实现。
场景1: 事件订阅


image
浏览器client订阅程序图

        上面的UML程序图中,浏览器client通过Publisher订阅Event。
        Pushlet 作为servlet,通过doGet/doPost方法被调用。由于多个client可以同时调用同一个Pushlet,所以Pushlet本身不能作为 订阅者。取而代之的是,它派发所有的订阅:在每一次调用doGet()/doPost()时,新建PushletSubscriber对象、并使之运行直 至事件循环(eventLoop)结束。PushletSubscriber作为一个实现Subscriber接口的对象,通过join()方法向 Publisher类进行注册的方式将自身添加到Publisher的内部列表。
        面对不同的client类型和协议, PushletSubscriber建立一个相对的ClientAdapter对象,在这个场景中是BrowserPushletAdapter对象。而 对于支持Multipart MIME的浏览器,将建立MultipartBrowserClientAdapter对象。
        最后的deQueue()调用是一个“等待Event的循环”,deQueue的意思为入队。注意此方法将挂起当前线程直到PushletSubscriber的GuardedQueue队列中存入有效的Event。
场景2: 发送和派发事件

image
事件发布程序图

         上图显示了发送一个事件所要经历的程序。它展现了Event如何被生成、被派发给浏览器client。在这个场景中,EventGenerator建立了 一个Event对象,并调用Publisher.publish()将其派发到client。Publisher遍历它内部的订阅者列表,询问这个 Event是否匹配订阅标准(目前只是主题匹配)。如果发现与之匹配的订阅者,则调用该订阅者的send()方法。
        每个 PushletSubscriber对象都有一个GuardedQueue对象,在其中以队列的形式保存着调用send()方法时传入的Event。那么 它为什么不直接将Event推送给BrowserPushletAdapter呢?最重要的原因是我们期望挂起 BrowserPushletAdapter线程,直到GuardedQueue中存在有效的Event,这样就避免了“忙于等待”或者“轮询”方式所带 来的负面影响。第二原因是Publisher可以通知多个client,如果在执行同步的send()调用时,某个慢速的client可能会堵塞所有其它 正在等待通知的client。这正是我在RMI或者CORBA提供的一组client进行同步回调的示例中所看到的设计缺陷。
        GuardedQueue 是个工具类,它使用了读/写模板(readers-writers pattern),此模板采取java.lang.Object.wait()/notifyAll()方法实现可被监控的挂起。通过使用读/写模板,使 GuardedQueue类具有进行对象入队/出队(enqueue/dequeue)操作的能力。当队列为空时,GuardedQueue调用 deQueue()方法时,此时调用线程将被挂起,直到有对象入队为止。相反,当队列已满时调用enQueue(),线程也将挂起。在 BrowserPushletSubscriber获得出队的Event对象后,它将调用BrowserPushletAdapter的push()方 法,后者将格式化Event为JavaScript代码或者XML以及其它格式),并将它发送到浏览器。比如Philips股票价格为123.45的 JavaScript代码格式如下:

js 代码

Client端框架
        由于这是对于所有浏览器client的通用任务,所以Pushlet Client端框架提供了两个可重用的文件:
pushlet.html和pushlet.js。
        Pushlet.html本身是被附着在一个隐藏的HTML Frame中。这个Frame的parent调用并实现push()方法。
        pushlet.html :被包含在client端的HTML文档中的Frame中。它可以传入主题标识和背景颜色两个参数。而它所做的最重要的工作是下面的push方法:

js 代码
 
  1. function push() {  
  2.         // 根据传入的参数建立PushletEvent object  
  3.         // push.arguments是来自server的Event数据  
  4.         pushletEvent = new PushletEvent(push.arguments)  
  5.   
  6.         // 更新状态Frame:显示闪光表示接收数据  
  7.         updateStatusFrame();  
  8.           
  9.         // parent frame是否准备好接收Event?  
  10.         if (!parent.onPush) {  
  11.                 return;  
  12.         }  
  13.           
  14.         // 把Event转发给parent frame指定的处理方法  
  15.         parent.onPush(pushletEvent);  
  16. }  

        Push ()函数首先根据传入的参数建立了一个JavaScript对象——pushletEvent。接着使用updateStatusFrame()显示闪 光,表示我们正在接收Event数据,如果parent frame存在onPush()函数,则将前面建立的PushletEvent对象作为参数调用parent frame指定的处理方法。
        在pushlet.js 中的PushletEvent类代码如下:

js 代码
 
  1. /* Object to represent nl.justobjects.pushlet.Event in JavaScript.  
  2.    Arguments are an array where args[i] is name and args[i+1] is value  
  3. */  
  4. function PushletEvent(args) {  
  5.    // Map存放Name/Value pairs  
  6.    this.map = new Map();  
  7.      
  8.    // 设置成员方法  
  9.    this.getSubject = PushletEventGetSubject  
  10.    this.put = PushletEventPut  
  11.    this.get = PushletEventGet  
  12.    this.toString = PushletEventToString  
  13.    this.toTable = PushletEventToTable  
  14.   
  15.    // 将传入的参数值放入到map中  
  16.    for (var i=0; i < args.length; i++) {  
  17.      this.put(args[i], args[++i] );  
  18.    }  
  19. }  
  20.   
  21. // 获取事件主题  
  22. function PushletEventGetSubject() {  
  23.   return this.map.get('subject')  
  24. }  
  25.   
  26. // 获取事件属性  
  27. function PushletEventGet(name) {  
  28.   return this.map.get(name)  
  29. }  
  30.   
  31. // 存放事件属性  
  32. function PushletEventPut(name, value) {  
  33.   return this.map.put(name, value)  
  34. }  
  35.   
  36. function PushletEventToString() {  
  37.   return this.map.toString();  
  38. }  
  39.   
  40. // 将map内容转化为HTML Table  
  41. function PushletEventToTable() {  
  42.   return this.map.toTable();  
  43. }  

        PushletEvent使用了一个我增加的Map JavaScript对象,它类似于java.util.Hashtable。
Pushlet协议
        详见http://www.pushlets.com/doc/protocol.html
应用
        Pushlet可以开发多种类型的web应用。由于此框架允许client主动更新事件(通过Postlet),所以应用就并不只是被动地推送数据了。每个Pushlet应用都可以根据下面进行分类:
        事件由server发起、还是client发起或者两者都有可能;状态是否保持在server、还是在client或者两者都有可能。
        由于事件不但被做成了对JavaScript有效,而且也是其它脚本化的插件能够接收实时的事件更新。例如你可以脚本化Macromedia Flash或者VRML应用。
        为了说明Pushlet应用的范围,下面提供了一些简单的demo。
监控
        例如股票、天气、投票、机场到达系统,这些应用都可以采用Pushlet对实时数据进行监控。
        这是一个实时FX股票/新闻应用:www.rabotreasuryweb.com (IE only). 另一个部署Pushlet的实时股票/新闻应用:www.marketnews.com.
游戏
        从象棋到描述危机和垄断者的游戏。
分布式MVC
         这涉及到了在用户接口框架(例如Java Swing和微软MFC)中常见的设计模板。在分布式MVC的各种变体中,模式层位于server,而client控制着是视图层和控制层。Client 通过控制进而修改模式,然后模式将通知所有依附的视图,而视图将进行自我刷新。
        一些应用具有web前端(front end),其数据存放在server上可被多个用户更新。比如预订系统和登记系统。如果一个client完成一次更新,而其它client却不能马上见到 变化直至刷新页面。在某些情况下,这是很简单、可行的解决方案,但同时也存在着用户需要同步变化的情况。这种情况下,应用可以使用Pushlet简单地将 URL作为单一事件推送到client,client接收到这个URL后将刷新页面。
        另外一点值得注意的示例是争议颇多 的EJB。尽管Java client能够直接和EJB对话(通过RMI或者CORBA),但多数情况下则是由servlet和作为client前端的JSP来完成。在这种情况 下,“通知”工作变得很艰难。使用Pushlet,EJB可以在其状态发生改变时通知依附于它的web client。
Web表示层
        在放弃使用PowerPonit作Java课程讲解工具后,我开发了一个基于XML的内容管理框架。由于在某些情形下,教室没有“卷轴工”,但是所有的学生人手一台网络计算机,所以我开发了这个简单的应用,它使我能够同步改变学生和我的页面内容。
用户辅助
        这种类型的应用可用于call center、银行、帮助桌面、电子商务web应用。当你由于问题而拨打call center电话时,代理程序可以使你通过上网的方式浏览解决方案、供货等信息。
        使用EJB作为后台和JSP作为前台,client可以买/卖外币。一个“AutoTrader”对象自动提供处理,如果自动处理失败或者client请求人工处理时,一个“处理干预”将发生,处理者将被通知并提供相应的服务。
社区工具
        这是一种多用户参加实时会话的应用。我正在计划扩充Pushlet框架,使其支持多用户session的特性。目前可以实现简单的web聊天,我称之为WCQ,大家可以在Pushlet源代码的example中见到它。
比较
        本章节对Pushlet与基于CORBA/RMI的Java applet解决方案进行一下比较。
优势
        直接与浏览器中的DHTML集成。
        标准的HTTP端口和协议:消息和RMI/CORBA使用非标准端口(相对HTTP标准端口而言),遇到“防火墙”、“禁止回调”、“禁止接收UDP数据”的浏览器安全限制时可能无法工作。
        client负载:基于CORBA/RMI的Java applet使client在启动时更加沉重,并消耗更多的资源。
        无需额外的server:消息和RMI/CORBA需要单独的server产品。Pushlet理论上可以在任何server引擎上运行,并具备连接管理和多线程能力。
缺点
        跨越浏览器的DHTML:Pushlet需要使用能工作在任何平台、所有浏览器版本的DHTML库。
        可测量性:当100个以上的client通过Pushlet连接到server时,server上的线程和socket资源都将出现紧张。而解决这一问题的方式就是使用单独的Pushlet服务器。
        Web server问题:一般的web server往往不是为长连接而设计的。针对这一问题的解决方案与上面的可测量性相同。
        代理缓存:一些代理服务器可能缓存HTTP数据。
参考资源:
        什么是Comet?
        Pushlet官网
        Pushlet白皮书
        JavaWorld《An in-depth look at RMI callbacks》
        JavaWorld《POSTing via Java/ Learn how to POST data to Web servers in Java》
        avaWorld《POSTing via Java revisited. Learn how to display the HTML document returned by the Web server》J
        JavaWorld《Connect to a Java server via HTTP》
        Doug Lea编写的《Concurrent Programming in Java – 2nd edition》
        Dynamic Duo[Cross-Browser Dynamic HTML]
        Danny Goodman编写的 《Dynamic HTML: The Definitive Reference》
进阶资源:
        Pushlet安装手册
        Pushlet协议解释
        Pushlet Cookbook
        Pushlet API文档
感谢阅读此文

[Flex]通用聊天引擎开发一

mikel阅读(976)

我们非常希望有一款这样的聊天引擎,能与QQ,MSN,Gtalk等常用聊天工具进行简单的文本沟通,并且在客户端无需安装任何插件,最好能在网页 中通过打开一个Div就能与在线的某个网友进行简单的沟通,目前网站客服系统相当普及,那么是否可以实现呢?本文就通过使用Jivesoftware公司 出品的Openfire服务器,客户端使用XIFF来简单实现这一目的,XIFF是用AS2.0语法编写的与XMPP服务器通信的开源包,所以我们客户端 只需要安装有Flash Player 6.0插件以上就能实现与Openfire的通信(支持XMPP协议的开源服务器),通用聊天引擎的接口如下:

核心接口

sendMessage ——发送消息

入参

类型

描述

Msg

字符串

消息内容

To

字符串

接收者 JID

相关回调函数:

ExeonMessage(msg,from ,msgtype )

ExeonLeaveMessage(msg,from,msgtype)

功能描述:

发送消息给指定人

sendXMessage ——发送特殊消息

入参

类型

描述

Msg

字符串

消息内容

To

字符串

接收者 JID

MsgProp

XML

消息自定义属性

相关回调函数:

ExeonXMessage(msg,from,msgprop)

功能描述:


postRequest ——发送交友邀请

入参

类型

描述

jid

字符串

请求接受人 JID

nickname

字符串

显示名称

group

字符串

所加入的组

相关回调函数:

onRequest (jid)

功能描述:

发送好友邀请给指定人

setStatus ——设置状态

入参

类型

描述

vshow

字符串

显示状态:

normal,online,away,xa,dnd

vStatus

字符串

自定义状态名称

相关回调函数:

ExeonStatusChange (jid,vshow,statu)

ExeOnNoRosterStatusChange(jid,vshow,statu)

ExeonUpdateUserList(style,list)

List 是一数组元素,包含以下索引属性:

List.jid :唯一 ID

List.displayName :联系人显示名称

List.group :所在组

List.show :状态, dnd

List.status :自定义状态

功能描述:

设置我的状态,支持自定义状态


updateContact ——更新联系人信息

入参

类型

描述

jid

字符串

被设置人的 JID

newNick

字符串

设置新的备注名称

newGroup

字符串

移动到组

相关回调函数:

功能描述:

更新我的联系人备注名称或所在的组


removeContact ——删除联系人

入参

类型

描述

jid

字符串

删除联系人的 JID

相关回调函数:

功能描述:

删除指定的联系人

login ——登录

入参

类型

描述


相关回调函数:

ExeonConnect()

ExeonDisconnet()

ExeonError(errorMessage)

ExeonLogin()

ExeonAnonyLogin(jid)

功能描述:

如未传入用户名,则视为匿名登录

exit ——登出

入参

类型

描述


相关回调函数:


功能描述:

手动退出应用聊天引擎,一般可不调用

grantRequest ——授权查看在线状态

入参

类型

描述

jid

字符串


flag

布尔型

是否允许查看我的在线状态

相关回调函数:


功能描述:

处理邀请,让我的联系人看到我的在线状态信息


bindMSN ——绑定 MSN 等其他通讯工具

入参

类型

描述

Username

字符串

MSN 等帐号

Password

字符串

密码

Svr

字符串

服务

相关回调函数:


功能描述:

在登录即时通的同时登录其他通讯工具

Svr 服务包括: msn,yahoo,gtalk,irc,icq,aol

unbindMSN ——取消与其他通讯工具的绑定

入参

类型

描述

Svr

字符串

服务

相关回调函数:


功能描述:

取消与其他通讯工具的绑定

Svr 服务包括: msn,yahoo,gtalk,irc,icq,aol

[C#]一个较完整的关键字过滤解决方案(上)

mikel阅读(883)

  如果您希望看到关键字过滤算法的话那么可能就要失望了。博客园中已经有不少关于此类算法的文章(例如这里这里),虽然可能无法直接满足特定需求,但是已经足够作为参考使用。而本文的目的,是给出一个较为完整的关键字过滤功能,也就是将用户输入中的敏感字符进行替换——这两者有什么区别?那么就请继续看下去吧。:)

有趣的需求

   关键字过滤功能自然无比重要,但是如果要在代码中对每个输入进行检查和替换则会是一件非常费神费事的事情。尤其是如果网站已经有了一定规模,用户输入功 能已经遍及各处,而急需对所有输入进行关键字过滤时,上述做法更可谓“远水解不了近渴”。这时候,如果有一个通用的办法,呼得一下为整站的输入加上了一道 屏障,那该是一件多么惬意的事情。这就是本文希望解决的问题。是不是很简单?我一开始也这么认为,不过事实上并非那么一帆风顺,而且在某些特定条件下似乎 更是没有太好的解决方法……

  您慢坐,且听我慢慢道来……

实现似乎很简单

  数据结构中的单向链 表可谓无比经典。有人说:单向链表的题目好难啊,没法逆序查找,很多东西都不容易做。有人却说:单向链表既然只能向一个方向遍历,那么变化就会很有限,所 以题目不会过于复杂。老赵觉得后者的说法不无道理。例如在现在的问题上,我们如果要在一个ASP.NET应用程序中做一个统一的“整站方案 ”,HttpModule似乎是唯一的选择。

  思路如下:我们在Request Pipeline中最早的阶段(BeginRequest)将请求的QueryString和Form集合中的值做过滤,则接下来的ASP.NET处理过 程中一切都为“规范”的文字了。说干就干,不就是替换两个NameValueCollection对象中的值吗?这再简单不过了:

public class FilterForbiddenWordModule : IHttpModule
{
void IHttpModule.Dispose() { }
void IHttpModule.Init(HttpApplication context)
{
context.BeginRequest += new EventHandler(OnBeginRequest);
}
private static void OnBeginRequest(object sender, EventArgs e)
{
var request = (sender as HttpApplication).Request;
ProcessCollection(request.QueryString);
ProcessCollection(request.Form);
}
private static void ProcessCollection(NameValueCollection collection)
{
var copy = new NameValueCollection();
foreach (string key in collection.AllKeys)
{
Array.ForEach(
collection.GetValues(key),
v => copy.Add(key, ForbiddenWord.Filter(v)));
}
collection.Clear();
collection.Add(copy);
}
}

  在BeginRequest阶段,我们将调用ProcessCollection将QueryString和Form两个 NameValueCollection中的值使用ForbiddenWord.Filter方法进行处理。ForbiddenWord是一个静态类,其 中的Filter方法会将原始字符串中的敏感字符使用“**”进行替换。替换方法不在本文的讨论范围内,因此我们就以如下方式进行简单替换:

public static class ForbiddenWord
{
public static string Filter(string original)
{
return original.Replace("FORBIDDEN_WORD", "**");
}
}

  看似没有问题,OK,随便打开一张页面看看……

Collection is read-only.

Description: An unhandled exception occurred during the execution of the current web request... Exception Details: System.NotSupportedException: Collection is read-only.

  呀,只读……这是怎么回事?不就是一个NameValueCollection吗?在不得不请出.NET Reflector之后,老赵果然发现其中有猫腻……

public class HttpRequest
{
...
public NameValueCollection Form
{
get
{
if (this._form == null)
{
this._form = new HttpValueCollection();
if (this._wr != null)
{
this.FillInFormCollection();
}
this._form.MakeReadOnly();
}
if (this._flags[2])
{
this._flags.Clear(2);
ValidateNameValueCollection(this._form, "Request.Form");
}
return this._form;
}
}
...
}

  虽然HttpRequest.Form属性为NameValueCollection类型,但是其中的_form变量事实上是一个 HttpValueCollection对象。而HttpValueCollection自然是NameValueCollection的子类,而造成其 “只读”的最大原因便是:

[Serializable]
internal class HttpValueCollection : NameValueCollection
{
...
internal void MakeReadOnly()
{
base.IsReadOnly = true;
}
...
}

  IsReadOnly是定义在NameValueCollection基类NameObjectCollectionBase上的 protected属性,这意味着如果我们只有编写一个如同NameValueCollection或HttpValueCollection般的子类才 能直接访问它,而现在……反射吧,兄弟们。

public class FilterForbiddenWordModule : IHttpModule
{
private static PropertyInfo s_isReadOnlyPropertyInfo;
static FilterForbiddenWordModule()
{
Type type = typeof(NameObjectCollectionBase);
s_isReadOnlyPropertyInfo = type.GetProperty(
"IsReadOnly",
BindingFlags.Instance | BindingFlags.NonPublic);
}
...
private static void ProcessCollection(NameValueCollection collection)
{
var copy = new NameValueCollection();
foreach (string key in collection.AllKeys)
{
Array.ForEach(
collection.GetValues(key),
v => copy.Add(key, ForbiddenWord.Filter(v)));
}
// set readonly to false.
s_isReadOnlyPropertyInfo.SetValue(collection, false, null);
collection.Clear();
collection.Add(copy);
// set readonly to true.
s_isReadOnlyPropertyInfo.SetValue(collection, true, null);
}
}

  现在再打开个页面看看,似乎没事。那么就来体验一下这个HttpModule的功效吧。我们先准备一个空的aspx页面,加上以下代码:

<form id="form1" runat="server">
<asp:TextBox runat="server" TextMode="MultiLine" />
<asp:Button runat="server" Text="Click" />
</form>

  打开页面,在文本框内填写一些敏感字符并点击按钮:

  嗨,效果似乎还不错!

问题来了

  太简单了,是不?

  可惜问题才刚开始:如果业务中有些字段不应该被替换怎么办?例如“密码”。如果我们只做到现在这点,那么密码“let-us-say- shit”和“let-us-say-fuck”则会被认为相同——服务器端逻辑接收到的都是“let-us-say-**”。也就是说,我们必须提供一 个机制,让上面的HttpModule可以“忽略”掉某些内容。

  如果是其他一些解决方案,我们可以在客户端进行一些特殊标记。例如在客户端增加一个“-noffw-password”字段来表示忽略对 “password”字段的过滤。不过根据著名的“Don't trust the client”原则,这种做法应该是第一个被否决掉的。试想,如果某些哥们发现了这一点(别说“不可能”),那么想要绕开这种过滤方式实在是一件非常容易 的事情。不过我们应该可以把这种“约定”直接运用在字段名上。例如原本我们如果取名为“password”的字段,现在直接使用“-noffw- password”,而HttpModule发现了这种前缀就会放它一马。由于字段的命名完全是由服务器端决定,因此采取这种方式之后客户端的恶人们就无 法绕开我们的过滤了。

  还有一种情况就是我们要对某些特定的字段采取一些特殊的过滤方式。例如,之前相当长的一段时间内我认为在服务器端反序列化一段JSON字符串是 非常不合理的,不过由于AJAX几乎成了事实标准,亦或是现在的Web应用程序经常需要传递一些结构复杂的对象,JSON格式已经越来越多地被服务器端所 接受。假如一个字段是表示一个JSON字符串,那么首先我们只应该对它的“值”进行过滤,而忽略其中的“键”。对于这种字段,我们依旧可以使用如上的命名 约定来进行忽略。例如,我们可以使用-json-data的方法来告诉服务器端这个字段应该被当作JSON格式进行处理。

  如何?

  其实问题远没有解决——尽情期待《一个较完整的关键字过滤解决方案(下)》。

[SQL]SQL Server 2005新特性之使用with关键字解决递归父子关系

mikel阅读(899)

1. 引言

现实项目中经常遇到需要处理递归父子关系的问题,如果把层次关系分开,放在多个表里通过主外键关系联接,最明显的问题就是扩展起来不方便,对于这种情况,一般我们会创建一个使用自连接的表来存放数据。例如存放会员地区数据表结构可能是这样:

列名

描述

location_id

地区编号

location_name

地区名称

parentlocation_id

上级地区编号

或者某个部分的职员表结构可能如下所示:

列名

描述

employee_id

职员编号

employee_name

职员名称

manager_id

职员的直接上级管理者,和employee_id进行自联接

通过类似表结构,我们就可以通过一个表理论上管理无限级数的父/子关系,但是当我们需要将这些数据读取出来,不论是填充到一个树中,或是使用级联显示出来,需要花费一定的精力。传统的做法,是做一个递归调用,首先连接数据库将顶层数据(也就是parent_xxxnull的记录)读取出来,再对每一条数据进行递归访问填充集合,这种做法需要连接数据库多次,显然不是较好的解决方法,那么我们能不能通过一次数据库访问,将数据全部读取出来,并且为了按照父子关系形成集合,使返回的数据满足某种格式。

2. 分析

理想情况下,如果父/子关系数据时严格按照关系结构添加到数据库中,亦即首先添加某条父记录,接着添加该父记录的子记录,如果子记录还包含子记录的话继续添加,最终数据表中父/子关系按规则排列数据,我们就可以使用某种算法填充集合,但是正如我们所说,这是理想情况,实际情况下数据经常会发生改变,导致数据没有规律可言,如下图所示,这样的话读取数据填充集合就不太容易的。

所以我们要做的就是通过查询使数据库返回的数据满足这种格式,那么我们的思路是首先查找顶层(0层)记录,再查询第1层记录,接下来是第2层、第3层直到第n层。因为层数是不确定的,所以仍然需要使用递归访问。

SQL Server 2005中提供了新的with关键字,用于指定临时命名的结果集,这些结果集称为公用表表达式(CTE)。该表达式源自简单查询,并且在SelectInsertUpdateDelete 语句的执行范围内定义。该子句也可用在 Create VIEW 语句中,作为该语句的 Select 定义语句的一部分。公用表表达式可以包括对自身的引用。这种表达式称为递归公用表表达式。

其语法为:

[ WITH <common_table_expression> [ ,…n ] ]

<common_table_expression>::=

        expression_name [ ( column_name [ ,…n ] ) ]

    AS

        ( CTE_query_definition )

使用with关键子的一个简单示例,以下代码将tb_loc表中数据源样输出:

WITH locs(id,name,parent)

AS

(

    Select * FROM tb_loc

)

Select * FROM locs

为了创建良好层次记录结构集,使用with关键字首先读取顶层记录,并且针对每一条顶层记录读取其子记录,直到读取到最底层级记录,最后将所有的记录组合起来,这里用到了UNION ALL关键字,用于将多个查询结果组合到一个结果集中。

接下来就可以使用该关键字创建存储过程返回结果集,并附加每条记录所位于的“层”数,如下图所示:

最后需要在前台界面将其显示出来,由于记录已经按层次返回,需要做的就是按层次首其输出,首先将第0层数据输出,接下来将遍历第0层 数据,将第一层数据添加到合适的父对象中,重复此过程直到填充结果。那么这里的难题就在于如何查找父对象,我们当然可以遍历集合,但是这么做的话如果数据 量很大将导致效率低下。既然可以得到当前对象所位于的层的信息,就也是这树倒置的树是一层一层向下填充的,我们可以定义一个临时集合变量,存储当前层上一 层的所有父对象,在插入当前层对象时遍历集合变量以插入到合适的位置,同时我们还必须保证在逐层读取数据时临时集合变量中持有的始终时当前层上一层所有的 对象,程序流程图如下所示:

根据以上分析,我们就可以编写实现代码了(为了方便,将本文中用到的数据表和创建记录等SQL语句一并给出)。

3. 实现

3.1 打开SQL Server 2005 Management Studio,选择某个数据库输入以下语句创建表结构:

Create TABLE [tb_loc](

    [id] [int],

    [name] [varchar](16),

    [parent] [int]

)


GO

3.2 创建测试数据:

Insert tb_loc(id,name,parent) VALUES( 1,'河北省',NULL)

Insert tb_loc(id,name,parent) VALUES( 2,'石家庄',1)

Insert tb_loc(id,name,parent) VALUES( 3,'保定',1)

Insert tb_loc(id,name,parent) VALUES( 4,'山西省',NULL)

Insert tb_loc(id,name,parent) VALUES( 5,'太原',4)

Insert tb_loc(id,name,parent) VALUES( 6,'新华区',2)

Insert tb_loc(id,name,parent) VALUES( 7,'北焦村',6)

Insert tb_loc(id,name,parent) VALUES( 8,'大郭村',6)

Insert tb_loc(id,name,parent) VALUES( 9,'河南省',NULL)

Insert tb_loc(id,name,parent) VALUES( 10,'大郭村南',8)

Insert tb_loc(id,name,parent) VALUES( 11,'大郭村北',8)

Insert tb_loc(id,name,parent) VALUES( 12,'北焦村东',7)

Insert tb_loc(id,name,parent) VALUES( 13,'北焦村西',7)

Insert tb_loc(id,name,parent) VALUES( 14,'桥东区',3)

Insert tb_loc(id,name,parent) VALUES( 15,'桥西区',3)


GO

3.3 创建pr_GetLocations存储过程:

Create PROCEDURE pr_GetLocations

AS

BEGIN

    WITH locs(id,name,parent,loclevel)

    AS

    (

        Select id,name,parent,0 AS loclevel FROM tb_loc

        Where parent IS NULL

        UNION ALL

        Select l.id,l.name,l.parent,loclevel+1 FROM tb_loc l

            INNER JOIN locs p ON l.parent=p.id

    )


    Select * FROM locs

END

3.4 Visual Studio 2008里创建解决方案并新建一个网站

3.5 网站中添加APP_Code目录,并创建Location实体类,该类标识了所在地编号和名称,并且保存了父级所在地编号和它所包含的所有子所在地的集合:

public class Location

{

    public int Id

    {

        get;

        set;

    }


    public string Name

    {

        get;

        set;

    }


    public LocationCollection SubLocations

    {

        get;

        set;

    }


    public int ParentId

    {

        get;

        set;

    }


    public Location()

    {

        Id = 0;

        Name = string.Empty;

        SubLocations = new LocationCollection();


        ParentId=0;

    }

}

3.5 以上代码使用了LocationCollection集合类,使用泛型集合创建该类(同样位于APP_Code目录下):

using System.Collections.Generic;


public class LocationCollection:List<Location>

{


}

3.6 APP_Code目录下创建DAO类用于访问数据库,添加必要的命名空间引用:

using System;

using System.Data;

using System.Data.SqlClient;


public class DAO

{

}

3.7编写GetLocations方法,返回所在地集合对象(请根据实际情况修改数据库连接字符串):

public LocationCollection GetLocations()

{

    LocationCollection locs = new LocationCollection();


    using (SqlConnection conn = new

        SqlConnection("server=.;uid=sa;pwd=00000000;database=temp;"))

    {

        conn.Open();


        SqlCommand cmd = new SqlCommand();

        cmd.CommandText = "pr_GetLocations";

        cmd.CommandType = CommandType.StoredProcedure;

        cmd.Connection = conn;


        SqlDataReader reader = cmd.ExecuteReader();


        int level = 0;

        int oldlevel = 1;


        LocationCollection container=new LocationCollection();

        LocationCollection current = new LocationCollection();


        while (reader.Read())

        {

            Location loc = GetLocationFromReader(reader, out level);


            if (level == 0)

            {

                locs.Add(loc);

                container.Add(loc);                

            }

            else

            {

                if (oldlevel != level)

                {

                    container.Clear();


                    foreach (Location l in current)

                        container.Add(l);


                    current.Clear();

                    oldlevel = level;

                }


                current.Add(loc);


                CreateLocation(container, loc);

            }              

        }

    }


    return locs;

}

在该方法按照以下步骤执行:

1. 使用命令对象对象执行pr_GetLocations存储过程返回结果集

2. 如果数据阅读器读取了数据(reader.Read方法返回true)执行:

       2.1. 从数据阅读器当前记录中读取Location对象,并返回层数信息(out level

       2.2. 如果是第一层(level等于0)填充locs集合,并加入到container对象

       2.3. 如果不是第一层根据层标志(oldlevel)判断当前层是否是新的一层

2.4 如果当前层是新的一层清空container集合并将current集合中实体复制到container集合中,清空current集合并置层标志(oldlevel

2.5 将当前对象添加到current集合中

2.6 调用CreateLocation方法从container上层集合中匹配当前实体父级对象并加入父对象的子集合中

3. 重复第2步直到读取完全部数据

可以看到container集合始终保存了当前层的上层所有的实体对象,并且为了在更换层数后能够正确的更新container集合,使用current集合保存当前层的实体对象。

3.8 编写GetLocationFromReader方法,用于从数据阅读器中返回Location实体对象,并将层数信息使用out参数返回:

private Location GetLocationFromReader(SqlDataReader reader, out int level)

{

    Location loc = new Location();

    loc.Id = Convert.ToInt32(reader["id"]);

    loc.Name = Convert.ToString(reader["name"]);


    object o = reader["parent"];

    if (o != DBNull.Value)

        loc.ParentId = Convert.ToInt32(o);


    level = Convert.ToInt32(reader["loclevel"]);


    return loc;

}

3.9 编写CreateLocation方法,该方法遍历实体集合找到与当前实体对象的父级编号匹配的实体,并将当前实体加入到父级实体的子集合中:

private void CreateLocation(LocationCollection container, Location loc)

{

    foreach (Location location in container)

    {

        if (location.Id == loc.ParentId)

        {

            location.SubLocations.Add(loc);

            break;

        }

    }

}

3.10 Default.aspx页面上添加TreeView控件:

<asp:TreeView ID="trvLocation" runat="server" Font-Size="12px"

    ShowLines="True">

</asp:TreeView>

3.11 Default.aspx页面后置代码中编写BindData数据绑定方法:

private void BindData()

{

    DAO dao = new DAO();


    LocationCollection locs = dao.GetLocations();


    TreeNodeCollection nodes = CreateTreeNodes(locs);


    foreach (TreeNode node in nodes)

    {

        trvLocation.Nodes.Add(node);

    }

}

3.12 BindData方法调用了CreateTreeNode方法返回节点集合,该方法中递归调用自身以得到全部所在地节点:

private TreeNodeCollection CreateTreeNodes(LocationCollection locs)

{

    TreeNodeCollection nodeColl = new TreeNodeCollection();


    foreach (Location loc in locs)

    {

        TreeNode node = new TreeNode(loc.Name, loc.Id.ToString());


        if (loc.SubLocations.Count > 0)

        {

            TreeNodeCollection subColl = CreateTreeNodes(loc.SubLocations);


            foreach (TreeNode subNode in subColl)

                node.ChildNodes.Add(subNode);

        }


        nodeColl.Add(node);

    }


    return nodeColl;

}

3.13 最后在页面加载事件里执行数据绑定:

protected void Page_Load(object sender, EventArgs e)

{

    if (!IsPostBack)

    {

        this.BindData();

    }

}

3.14 在浏览器中预览结果:


4. 总结

原来在处理类似父子关系时总是找不到好的解决办法,现在通过SQL Server 2005里的新特性可以较为合理的解决该类问题,在这里主要用到了with关键字实现递归访问,并且在输出数据时同样使用了递归的方法。如果各位有更好的实现方式,请不不吝赐教。

本文示例代码下载:示例代码

[C#]自己动手写个ORM实现(4) 关于反射DataRow数据记录到实体性能的优化

mikel阅读(736)

总所周知,反射对于运行时确定对象类型十分方便,但是它最大的不足就是效率低下,比直接调用的效率慢了一百倍有余。

在3.5以前有codeDom或借助Emit直接编写IL来优化其效率,但是使用不便,借助3.5新增的Expression,让我们有了一种既简洁,在速度上又较反射有很大的提高。 示例如下


 1 public static T GetEntityByDataRowSlow<T>(this DataRow data) where T : new()
 2         {
 3             T t = new T();
 4             PropertyInfo[] properties = typeof(T).GetProperties();
 5 
 6             foreach (PropertyInfo p in properties)
 7             {
 8                 object value = data[p.Name] == DBNull.Value ? null : data[p.Name];
 9                 p.SetValue(t, value, null); 
10             }
11             return t;
12         }


如上,整段代码慢就慢在p.SetValue(t,value,null)这段上。 也有可能有人会说 typeof(T).GetProperties()获取所有属性应该缓存,但实际测试结果看下来影响并不大,效率相差无几。

接下来,主角登场了


 1 static Func<T, MethodInfo, objectobject> GetSetDelegate<T>(MethodInfo m,Type type)
 2         {
 3            
 4             var param_obj = Expression.Parameter(typeof(T), "obj");
 5             var param_val = Expression.Parameter(typeof(object), "val");
 6             var param_m = Expression.Parameter(typeof(MethodInfo), "m");
 7             var body_val = Expression.Convert(param_val, type);
 8             var body = Expression.Call(param_obj, m, body_val);
 9             Action<T, MethodInfo, object> set = Expression.Lambda<Action<T, MethodInfo, object>>(body, param_obj, param_m, param_val).Compile();
10             return (instance, method, v) =>
11             {
12                 set(instance, method, v);
13                 return null;
14             };
15         }


1 static void FastSetValue<T>(this PropertyInfo property,T t, object value)
2         {
3             MethodInfo m = property.GetSetMethod();
4             GetSetDelegate<T>(m,property.PropertyType)(t, m, value);
5         }


关于Expression和lambda的介绍可参看园里大牛赵哥的文章  方法的直接调用,反射调用与……Lambda表达式调用

经过改良的调用方法


public static T FastGetEntityByDataRow<T>(this DataRow data) where T : new()
        {
            T t 
= new T();
            PropertyInfo[] properties 
= GetProperties(typeof(T));
            
            
foreach (PropertyInfo p in properties)
            {                    
                
object value = data[p.Name] == DBNull.Value ? null : data[p.Name];
                p.FastSetValue
<T>(t, value);
            }
            
return t; 
        }


经过测试下来  如果直接是Entity.Property = "somevalue"设置属性的速度比值是1的话,反射的速度比值是100多,而经过改良的上述方法比值在2-3之间。

尽管这样,常见Web应用的主要瓶颈还是在结构的设计,数据库的读取,上面的方法对于整个程序框架的影响也只是积跬步,单用这个地方用了也几乎白用,不用白不用。谨记录一下。

[C#]在C#中实现Socket端口复用

mikel阅读(793)

一、什么是端口复用:

  因为在winsock的实现中,对于服务器的绑定是可以多重绑定的,在确定多重绑定使用谁的时候,根据一条原则是谁的指定最明确则将包递交给谁,而且没有权限之分。这种多重绑定便称之为端口复用。

二、我们如何实现Socket端口复用:

  其实我们要实现端口复用很简单,我们只要使用SetSocketOption函数设置Socket选项就可以了。MSDN是这样解释的:
Socket 选项确定当前 Socket 的行为。对于具有 Boolean 数据类型的选项,指定非零值可启用该选项,指定零值可禁用该选项。对于具有整数数据类型的选项,指定适当的值。Socket 选项按照协议支持程度来分组。

我们来看看这个函数是怎么用的:

public void SetSocketOption (
    SocketOptionLevel optionLevel,
    SocketOptionName optionName,
    
int optionValue
)


参数
optionLevel
SocketOptionLevel 值之一。
optionName
SocketOptionName 值之一。
optionValue
该选项的值。

以上参数大家可以去看看MSDN。我这里就不多讲了。

在这里我们optionLevel 参数传SocketOptionLevel.Socket;optionName参数传 SocketOptionName.ReuseAddress;optionValue参传一个非零值,我传的是True,如果要禁用的话,就传 False。

如:

socket2.SetSocketOption(SocketOptionLevel.Socket, SocketOptionName.ReuseAddress, true);

具体我们看看下面的代码:

我们首先建立第一个Socket:

        Socket socket1;
        IPEndPoint localEP 
= new IPEndPoint(IPAddress.Any, 20000);
        socket1 
= new Socket(AddressFamily.InterNetwork, SocketType.Stream, ProtocolType.Tcp);
        socket1.Bind(localEP);

再建立第二个Socket:

        Socket socket2
        IPEndPoint localEP 
= new IPEndPoint(IPAddress.Any, 20000);
        socket2
= new Socket(AddressFamily.InterNetwork, SocketType.Stream, ProtocolType.Tcp);
        socket2.SetSocketOption(SocketOptionLevel.Socket, SocketOptionName.ReuseAddress, 
true);
       
//请注意这一句。ReuseAddress选项设置为True将允许将套接字绑定到已在使用中的地址。 
        socket2.Bind(localEP);

这样Socket1和Socket2便绑定在同一个端口上了。

例程源代码我上传到我的资源里面大家可以到http://files.cnblogs.com/wzd24/28135640620.rar去下载。