[转载]Basic Tutorial | WebKit .NET
- C#
- 2012-05-28
- 220热度
- 0评论
[转载]Basic Tutorial | WebKit .NET.
Introduction
This tutorial gives a very basic overview of how to get started with WebKit .NET. It is assumed that you have either Visual C# 2008 Express or Visual Studio 2008 installed and that you have some experience with C#, or at the very least another .NET language such as VB .NET. More experienced coders will probably benefit more from the API reference which goes into greater detail. If you have any trouble with the tutorial, please get in touch.
Getting Started
In this tutorial we will create a very basic web browser in C#. There is very little code involved so hopefully the ideas should be clear to anyone with knowledge of a modern programming language.
Lets begin by downloading the latest binary release of WebKit .NET from the project download page. Extract the contents of the included 'bin' folder to somewhere on your local machine, for example D:\webkitdotnet\bin.
Next, fire up Visual C# and create a new Windows Forms Application:
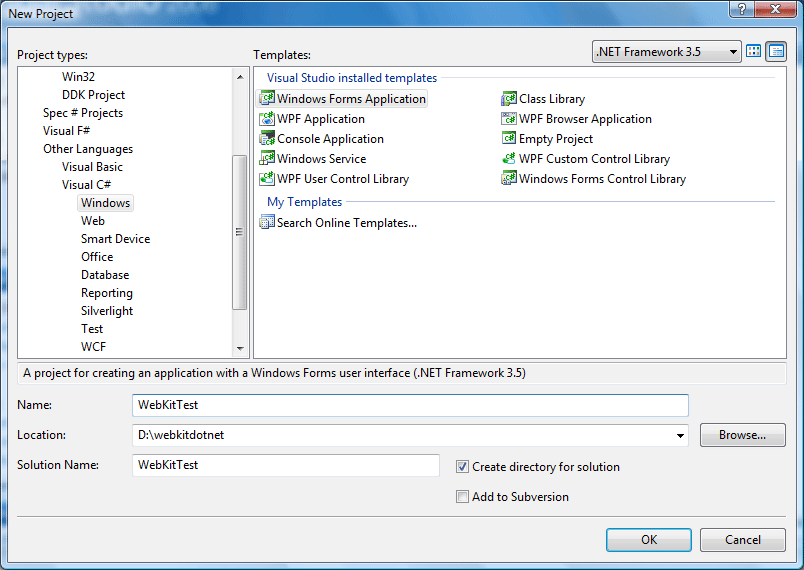
Choose a suitable name and location and click OK to create the project.
Adding the Controls
With the project created, you should be presented with a blank 'Form1' in the Windows Forms designer. To use the control in the designer, right click the toolbox and select Choose Items -> .NET Framework Components. Click 'Browse...', navigate to the WebKit .NET directory and select WebKitBrowser.dll. The WebKitBrowser control should appear in the list as below:
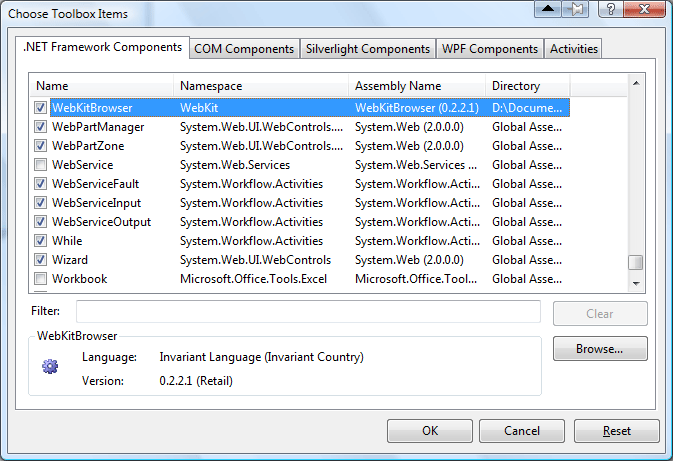
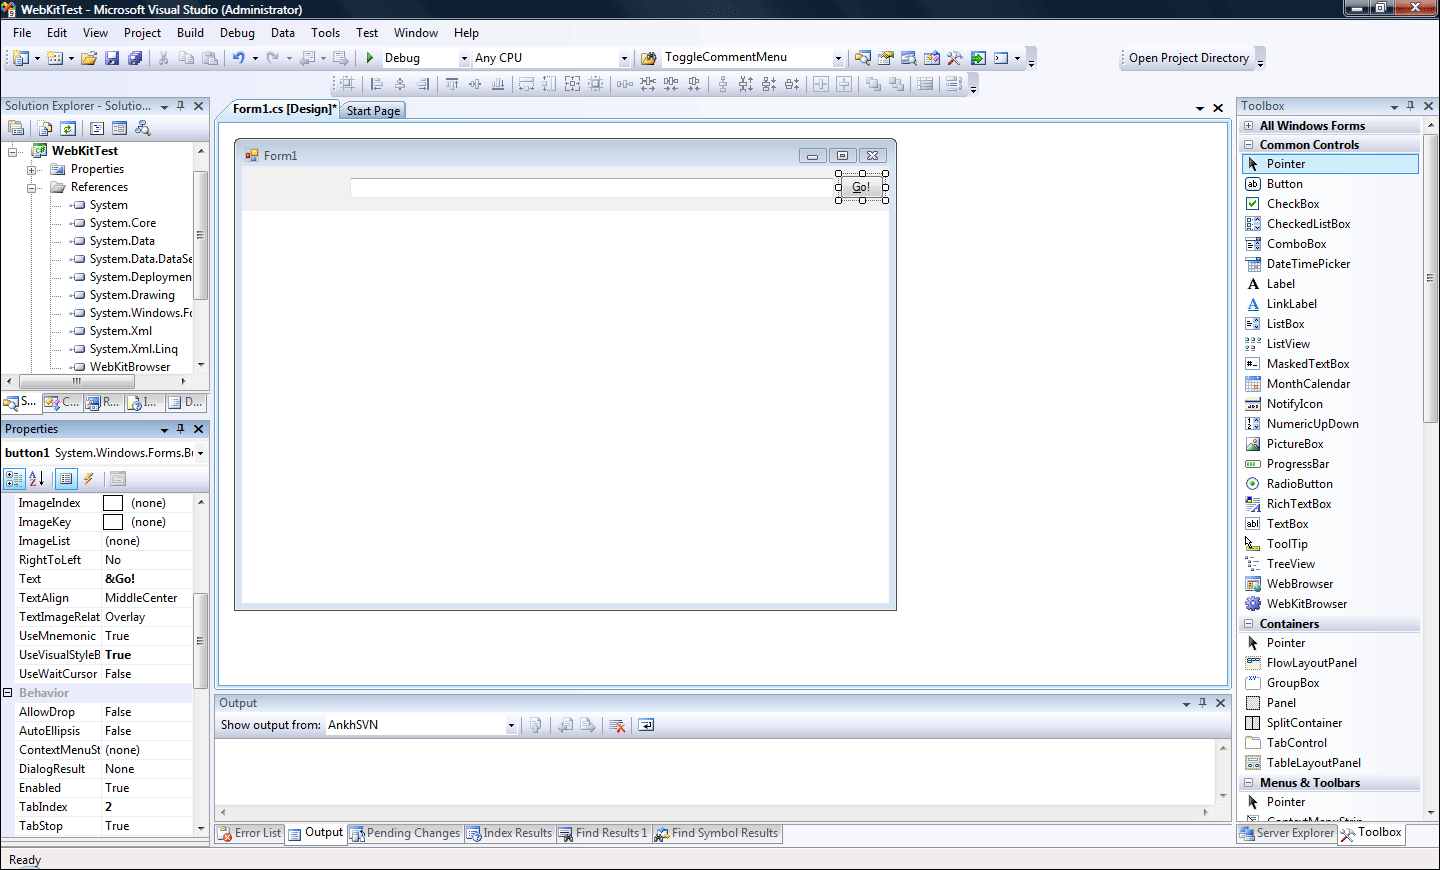
Make sure the checkbox is ticked and click OK. Select the WebKitBrowser in the toolbox and drag it onto the empty form. In the properties window, change the 'Dock' property to 'Bottom' and resize the control leaving enough room at the top of the form for a navigation bar.
Select a TextBox from the toolbox and drag it onto the top of the form, moving and resizing to suit. Do the same with a Button control. Change the 'Text' property of the button to '&Go!'
Adding the Code
Double-click the Go! button to create a Click event handler and open the code view. Add the following code which causes the WebKitBrowser to navigate to the Url in our textbox when the button is clicked:
[csharp]
private void button1_Click(object sender, EventArgs e) { webKitBrowser1.Navigate(textBox1.Text); }
[/csharp]
In the constructor for Form1, add the following code to create handlers for the form load and browser navigation events:
[csharp]
public Form1() { InitializeComponent(); this.Load += new EventHandler(Form1_Load); this.webKitBrowser1.Navigated += new WebBrowserNavigatedEventHandler(webKitBrowser1_Navigated); }
[/csharp]
Add the following event handlers. When the form is loaded, we set the browser to display an obligitory 'Hello World' message. When the browser navigates to a new page, we update the contents of the textbox to reflect the new location:
[csharp]
void Form1_Load(object sender, EventArgs e) { webKitBrowser1.DocumentText = "<h1><a href=\"http://google.com\">Hello, World!</a></h1>"; } void webKitBrowser1_Navigated(object sender, WebBrowserNavigatedEventArgs e) { textBox1.Text = webKitBrowser1.Url.ToString(); }
[/csharp]
Running the Application
Before we can run the program, there are a few important things still to do.
Changing the Application Platform
As there is no x64 build of WebKit yet, WebKit .NET is configured to run only as a 32-bit process so that it functions correctly on 64-bit versions of Windows. As a consequence of this, ALL .NET applications which use WebKit .NET must also be configured in this way. By default, C# applications will run as a 64-bit process on Win64, and we will get an error if we try to use a 32-bit library with them. To change the platform, right click the project in the Solution Explorer and select 'Properties'. Select the 'Build' tab and choose 'x86' as the platform (by default it will be set to 'Any CPU').
We can now build the application (Build -> Build Solution) but it will not run yet without the WebKit library.
WebKit and Dependencies
Before we can run the application, WebKit.dll and it's dependencies must be present in the output directory. In Windows Explorer (or otherwise), copy all of the files from the WebKit .NET 'bin' directory to your project's output directory. For example, here is the listing of my output directory after copying:
D:\webkitdotnet\WebKitTest\WebKitTest\bin\Debug>ls CFLite.dll icudt40.dll JavaScriptCore.dll icuin40.dll JavaScriptCore.resources icuuc40.dll SQLite3.dll libcurl.dll WebKit.Interop.dll libcurl.dll.manifest WebKit.dll libeay32.dll WebKit.resources libeay32.dll.manifest WebKitBrowser.dll libpng13.dll WebKitBrowser.dll.manifest libxml2.dll WebKitBrowser.pdb libxslt.dll WebKitTest.exe pthreadVC2.dll WebKitTest.pdb ssleay32.dll WebKitTest.vshost.exe ssleay32.dll.manifest WebKitTest.vshost.exe.manifest zlib1.dll curl.exe.manifest Alternatively, you could create a post-build event that automatically copies the WebKit files to the output directory after each successful build.
We can now finally run the test application - select 'Start Without Debugging' from the Debug menu within Visual C#. Our web browser should appear:

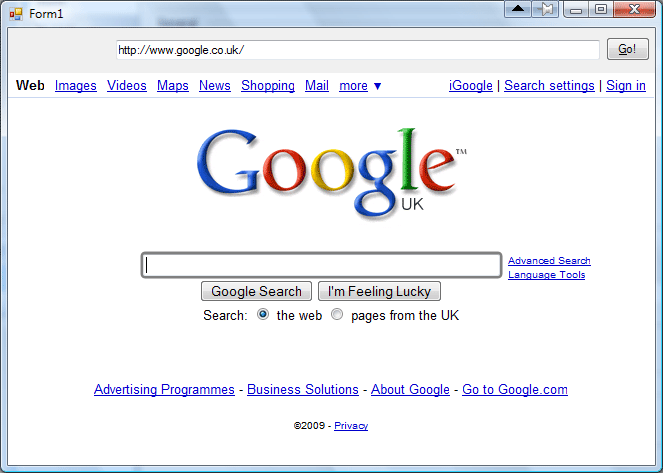
This concludes the tutorial. It is left as an exercise to implement back, forward and home navigation buttons, or browser tabs if you're feeling ambitious! You may want to have a look at the test browser application included in the WebKit .NET source.