[MVC]Improving Performance with Output Caching

mikel阅读(423)

转载:http://www.ASP.NET/learn/mvc/tutorial-15-cs.aspx

Improving Performance with Output Caching (C#)

The goal of this tutorial is to explain how you can dramatically improve the performance of an ASP.NET MVC application by taking advantage of the output cache. The output cache enables you to cache the content returned by a controller action. That way, the same content does not need to be generated each and every time the same controller action is invoked.

Imagine, for example, that your ASP.NET MVC application displays a list of database records in a view named Index. Normally, each and every time that a user invokes the controller action that returns the Index view, the set of database records must be retrieved from the database by executing a database query.

If, on the other hand, you take advantage of the output cache then you can avoid executing a database query every time any user invokes the same controller action. The view can be retrieved from the cache instead of being regenerated from the controller action. Caching enables you to avoid performing redundant work on the server.

Enabling Output Caching

You enable output caching by adding an [OutputCache] attribute to either an individual controller action or an entire controller class. For example, the controller in Listing 1 exposes an action named Index(). The output of the Index() action is cached for 10 seconds.

Listing 1 – Controllers\HomeController.cs

using System.Web.Mvc;
namespace MvcApplication1.Controllers
{
[HandleError]
public class HomeController : Controller
{
[OutputCache(Duration=10, VaryByParam="none")]
public ActionResult Index()
{
return View();
}
}
}
In the Beta versions of ASP.NET MVC, output caching does not work for a URL like http://www.MySite.com/. Instead, you must enter a URL like http://www.MySite.com/Home/Index.

In Listing 1, the output of the Index() action is cached for 10 seconds. If you prefer, you can specify a much longer cache duration. For example, if you want to cache the output of a controller action for one day then you can specify a cache duration of 86400 seconds (60 seconds * 60 minutes * 24 hours).

There is no guarantee that content will be cached for the amount of time that you specify. When memory resources become low, the cache starts evicting content automatically.

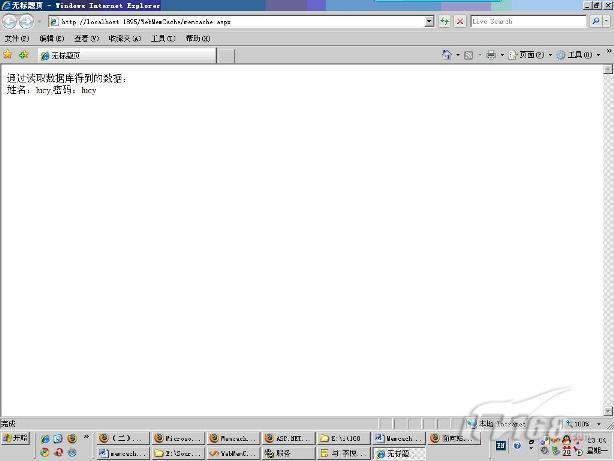
The Home controller in Listing 1 returns the Index view in Listing 2. There is nothing special about this view. The Index view simply displays the current time (see Figure 1).

Listing 2 – Views\Home\Index.aspx

<%@ Page Language="C#" AutoEventWireup="true" CodeBehind="Index.aspx.cs" Inherits="MvcApplication1.Views.Home.Index" %>
<!DOCTYPE html PUBLIC "-//W3C//DTD XHTML 1.0 Transitional//EN" "http://www.w3.org/TR/xhtml1/DTD/xhtml1-transitional.dtd">
<html xmlns="http://www.w3.org/1999/xhtml" >
<head runat="server">
<title>Index</title>
</head>
<body>
<div>
The current time is: <%= DateTime.Now.ToString("T") %>
</div>
</body>
</html>

Figure 1 – Cached Index view

clip_image002

If you invoke the Index() action multiple times by entering the URL /Home/Index in the address bar of your browser and hitting the Refresh/Reload button in your browser repeatedly, then the time displayed by the Index view won’t change for 10 seconds. The same time is displayed because the view is cached.

It is important to understand that the same view is cached for everyone who visits your application. Anyone who invokes the Index() action will get the same cached version of the Index view. This means that the amount of work that the web server must perform to serve the Index view is dramatically reduced.

The view in Listing 2 happens to be doing something really simple. The view just displays the current time. However, you could just as easily cache a view that displays a set of database records. In that case, the set of database records would not need to be retrieved from the database each and every time the controller action that returns the view is invoked. Caching can reduce the amount of work that both your web server and database server must perform.

Don’t use the page <%@ OutputCache %> directive in an MVC view. This directive is bleeding over from the Web Forms world and should not be used in an ASP.NET MVC application.

Where Content is Cached

By default, when you use the [OutputCache] attribute, content is cached in three locations: the web server, any proxy servers, and the web browser. You can control exactly where content is cached by modifying the Location property of the [OutputCache] attribute.

You can set the Location property to any one of the following values:

· Any

· Client

· Downstream

· Server

· None

· ServerAndClient

By default, the Location property has the value Any. However, there are situations in which you might want to cache only on the browser or only on the server. For example, if you are caching information that is personalized for each user then you should not cache the information on the server. If you are displaying different information to different users then you should cache the information only on the client.

For example, the controller in Listing 3 exposes an action named GetName() that returns the current user name. If Jack logs into the website and invokes the GetName() action then the action returns the string “Hi Jack”. If, subsequently, Jill logs into the website and invokes the GetName() action then she also will get the string “Hi Jack”. The string is cached on the web server for all users after Jack initially invokes the controller action.

Listing 3 – Controllers\BadUserController.cs

using System.Web.Mvc;
using System.Web.UI;
namespace MvcApplication1.Controllers
{
public class BadUserController : Controller
{
[OutputCache(Duration = 3600, VaryByParam = "none")]
public string GetName()
{
return "Hi " + User.Identity.Name;
}
}
}

Most likely, the controller in Listing 3 does not work the way that you want. You don’t want to display the message “Hi Jack” to Jill.

You should never cache personalized content in the server cache. However, you might want to cache the personalized content in the browser cache to improve performance. If you cache content in the browser, and a user invokes the same controller action multiple times, then the content can be retrieved from the browser cache instead of the server.

The modified controller in Listing 4 caches the output of the GetName() action. However, the content is cached only on the browser and not on the server. That way, when multiple users invoke the GetName() method, each person gets their own user name and not another person’s user name.

Listing 4 – Controllers\UserController.cs

using System.Web.Mvc;
using System.Web.UI;
namespace MvcApplication1.Controllers
{
public class UserController : Controller
{
[OutputCache(Duration=3600, VaryByParam="none", Location=OutputCacheLocation.Client, NoStore=true)]
public string GetName()
{
return "Hi " + User.Identity.Name;
}
}
}

Notice that the [OutputCache] attribute in Listing 4 includes a Location property set to the value OutputCacheLocation.Client. The [OutputCache] attribute also includes a NoStore property. The NoStore property is used to inform proxy servers and browser that they should not store a permanent copy of the cached content.

Varying the Output Cache

In some situations, you might want different cached versions of the very same content. Imagine, for example, that you are creating a master/detail page. The master page displays a list of movie titles. When you click a title, you get details for the selected movie.

If you cache the details page, then the details for the same movie will be displayed no matter which movie you click. The first movie selected by the first user will be displayed to all future users.

You can fix this problem by taking advantage of the VaryByParam property of the [OutputCache] attribute. This property enables you to create different cached versions of the very same content when a form parameter or query string parameter varies.

For example, the controller in Listing 5 exposes two actions named Master() and Details(). The Master() action returns a list of movie titles and the Details() action returns the details for the selected movie.

Listing 5 – Controllers\MoviesController.cs

using System.Linq;
using System.Web.Mvc;
using MvcApplication1.Models;
namespace MvcApplication1.Controllers
{
public class MoviesController : Controller
{
private MovieDataContext _dataContext;
public MoviesController()
{
_dataContext = new MovieDataContext();
}
[OutputCache(Duration=int.MaxValue, VaryByParam="none")]
public ActionResult Master()
{
ViewData.Model = (from m in _dataContext.Movies
select m).ToList();
return View();
}
[OutputCache(Duration = int.MaxValue, VaryByParam = "id")]
public ActionResult Details(int id)
{
ViewData.Model = _dataContext.Movies.SingleOrDefault(m => m.Id == id);
return View();
}
}
}

The Master() action includes a VaryByParam property with the value “none”. When the Master() action is invoked, the same cached version of the Master view is returned. Any form parameters or query string parameters are ignored (see Figure 2).

Figure 2 – The /Movies/Master view

clip_image004

Figure 3 – The /Movies/Details view

clip_image006

The Details() action includes a VaryByParam property with the value “Id”. When different values of the Id parameter are passed to the controller action, different cached versions of the Details view are generated.

It is important to understand that using the VaryByParam property results in more caching and not less. A different cached version of the Details view is created for each different version of the Id parameter.

You can set the VaryByParam property to the following values:

* = Create a different cached version whenever a form or query string parameter varies.

none = Never create different cached versions

Semicolon list of parameters = Create different cached versions whenever any of the form or query string parameters in the list varies

Creating a Cache Profile

As an alternative to configuring output cache properties by modifying properties of the [OutputCache] attribute, you can create a cache profile in the web configuration (web.config) file. Creating a cache profile in the web configuration file offers a couple of important advantages.

First, by configuring output caching in the web configuration file, you can control how controller actions cache content in one central location. You can create one cache profile and apply the profile to several controllers or controller actions.

Second, you can modify the web configuration file without recompiling your application. If you need to disable caching for an application that has already been deployed to production, then you can simply modify the cache profiles defined in the web configuration file. Any changes to the web configuration file will be detected automatically and applied.

For example, the <caching> web configuration section in Listing 6 defines a cache profile named Cache1Hour. The <caching> section must appear within the <system.web> section of a web configuration file.

Listing 6 – Caching section for web.config

<caching>
<outputCacheSettings>
<outputCacheProfiles>
<add name="Cache1Hour" duration="3600" varyByParam="none"/>
</outputCacheProfiles>
</outputCacheSettings>
</caching>

The controller in Listing 7 illustrates how you can apply the Cache1Hour profile to a controller action with the [OutputCache] attribute.

Listing 7 – Controllers\ProfileController.cs

using System;
using System.Web.Mvc;
namespace MvcApplication1.Controllers
{
public class ProfileController : Controller
{
[OutputCache(CacheProfile="Cache1Hour")]
public string Index()
{
return DateTime.Now.ToString("T");
}
}
}

If you invoke the Index() action exposed by the controller in Listing 7 then the same time will be returned for 1 hour.

Summary

Output caching provides you with a very easy method of dramatically improving the performance of your ASP.NET MVC applications. In this tutorial, you learned how to use the [OutputCache] attribute to cache the output of controller actions. You also learned how to modify properties of the [OutputCache] attribute such as the Duration and VaryByParam properties to modify how content gets cached. Finally, you learned how to define cache profiles in the web configuration file.

[MVC]Using ASP.NET MVC with IIS

mikel阅读(585)

转载:http://www.ASP.NET/learn/mvc/tutorial-08-cs.aspx

Using ASP.NET MVC with Different Versions of IIS (C#)

The ASP.NET MVC framework depends on ASP.NET Routing to route browser requests to controller actions. In order to take advantage of ASP.NET Routing, you might have to perform additional configuration steps on your web server. It all depends on the version of Internet Information Services (IIS) and the request processing mode for your application.

Here’s a summary of the different versions of IIS:

  • IIS 7.0 (integrated mode) – No special configuration necessary to use ASP.NET Routing.
  • IIS 7.0 (classic mode) – You need to perform special configuration to use ASP.NET Routing.
  • IIS 6.0 or below – You need to perform special configuration to use ASP.NET Routing.

The latest version of IIS is version 7.0. This version of IIS is included with Windows Server 2008. You also can install IIS 7.0 on any version of the Vista operating system except Home Basic (see http://technet.microsoft.com/en-us/library/cc732624.aspx).

IIS 7.0 supports two modes for processing requests. You can use integrated mode or classic mode. You don’t need to perform any special configuration steps when using IIS 7.0 in integrated mode. However, you do need to perform additional configuration when using IIS 7.0 in classic mode.

Microsoft Windows Server 2003 includes IIS 6.0. You cannot upgrade IIS 6.0 to IIS 7.0 when using the Windows Server 2003 operating system. You must perform additional configuration steps when using IIS 6.0.

Microsoft Windows XP Professional includes IIS 5.1. You must perform additional configuration steps when using IIS 5.1.

Finally, Microsoft Windows 2000 and Microsoft Windows 2000 Professional includes IIS 5.0. You must perform additional configuration steps when using IIS 5.0.

Integrated versus Classic Mode

IIS 7.0 can process requests using two different request processing modes: integrated and classic. Integrated mode provides better performance and more features. Classic mode is included for backwards compatibility with earlier versions of IIS.

The request processing mode is determined by the application pool. You can determine which processing mode is being used by a particular web application by determining the application pool associated with the application. Follow these steps:

  1. Launch the Internet Information Services Manager
  2. In the Connections window, select an application
  3. In the Actions window, click the Basic Settings link to open the Edit Application dialog box (see Figure 1)
  4. Take note of the Application pool selected.

By default, IIS is configured to support two application pools: DefaultAppPool and Classic .NET AppPool. If DefaultAppPool is selected, then your application is running in integrated request processing mode. If Classic .NET AppPool is selected, your application is running in classic request processing mode.

Figure 1: Detecting the request processing mode(Click to view full-size image)

Notice that you can modify the request processing mode within the Edit Application dialog box. Click the Select button and change the application pool associated with the application. Realize that there are compatibility issues when changing an ASP.NET application from classic to integrated mode. For more information, see the following articles:

If an ASP.NET application is using the DefaultAppPool, then you don’t need to perform any additional steps to get ASP.NET Routing (and therefore ASP.NET MVC) to work. However, if the ASP.NET application is configured to use the Classic .NET AppPool then keep reading, you have more work to do.

Using ASP.NET MVC with Older Versions of IIS

If you need to use ASP.NET MVC with an older version of IIS than IIS 7.0, or you need to use IIS 7.0 in classic mode, then you have two options. First, you can modify the route table to use file extensions. For example, instead of requesting a URL like /Store/Details, you would request a URL like /Store.aspx/Details.

The second option is to create something called a wildcard script map. A wildcard script map enables you to map every request into the ASP.NET framework.

If you don’t have access to your web server (for example, your ASP.NET MVC application is being hosted by an Internet Service Provider) then you’ll need to use the first option. If you don’t want to modify the appearance of your URLs, and you have access to your web server, then you can use the second option.

We explore each option in detail in the following sections.

Adding Extensions to the Route Table

The easiest way to get ASP.NET Routing to work with older versions of IIS is to modify your route table in the Global.asax file. The default and unmodified Global.asax file in Listing 1 configures one route named the Default route.

Listing 1 – Global.asax (unmodified)

using System;
using System.Collections.Generic;
using System.Linq;
using System.Web;
using System.Web.Mvc;
using System.Web.Routing;
namespace MvcApplication1
{
public class GlobalApplication : System.Web.HttpApplication
{
public static void RegisterRoutes(RouteCollection routes)
{
routes.IgnoreRoute("{resource}.axd/{*pathInfo}");
routes.MapRoute(
"Default",                                              // Route name
"{controller}/{action}/{id}",                           // URL with parameters
new { controller = "Home", action = "Index", id = "" }  // Parameter defaults
);
}
protected void Application_Start()
{
RegisterRoutes(RouteTable.Routes);
}
}
}

The Default route configured in Listing 1 enables you to route URLs that look like this:

/Home/Index

/Product/Details/3

/Product

Unfortunately, older versions of IIS won’t pass these requests to the ASP.NET framework. Therefore, these requests won’t get routed to a controller. For example, if you make a browser request for the URL /Home/Index then you’ll get the error page in Figure 2.

Figure 2: Receiving a 404 Not Found error(Click to view full-size image)

Older versions of IIS only map certain requests to the ASP.NET framework. The request must be for a URL with the right file extension. For example, a request for /SomePage.aspx gets mapped to the ASP.NET framework. However, a request for /SomePage.htm does not.

Therefore, to get ASP.NET Routing to work, we must modify the Default route so that it includes a file extension that is mapped to the ASP.NET framework.

When you install the ASP.NET MVC framework, a script named registermvc.wsf is added to the following folder:

C:\Program Files\Microsoft ASP.NET\ASP.NET MVC\Scripts

Executing this script registers a new .mvc extension with IIS. After you register the .mvc extension, you can modify your routes in the Global.asax file so that the routes use the .mvc extension.

The modified Global.asax file in Listing 2 works with older versions of IIS.

Listing 2 – Global.asax (modified with extensions)

using System;
using System.Collections.Generic;
using System.Linq;
using System.Web;
using System.Web.Mvc;
using System.Web.Routing;
namespace MvcApplication1
{
public class MvcApplication : System.Web.HttpApplication
{
public static void RegisterRoutes(RouteCollection routes)
{
routes.IgnoreRoute("{resource}.axd/{*pathInfo}");
routes.MapRoute(
"Default",
"{controller}.mvc/{action}/{id}",
new { action = "Index", id = "" }
);
routes.MapRoute(
"Root",
"",
new { controller = "Home", action = "Index", id = "" }
);
}
protected void Application_Start()
{
RegisterRoutes(RouteTable.Routes);
}
}
}

Important: remember to build your ASP.NET MVC Application again after changing the Global.asax file.

There are two important changes to the Global.asax file in Listing 2. There are now two routes defined in the Global.asax. The URL pattern for the Default route, the first route, now looks like:

{controller}.mvc/{action}/{id}

The addition of the .mvc extension changes the type of files that the ASP.NET Routing module intercepts. With this change, the ASP.NET MVC application now routes requests like the following:

/Home.mvc/Index/

/Product.mvc/Details/3

/Product.mvc/

The second route, the Root route, is new. This URL pattern for the Root route is an empty string. This route is necessary for matching requests made against the root of your application. For example, the Root route will match a request that looks like this:

http://www.YourApplication.com/

After making these modifications to your route table, you’ll need to make sure that all of the links in your application are compatible with these new URL patterns. In other words, make sure that all of your links include the .mvc extension. If you use the Html.ActionLink() helper method to generate your links, then you should not need to make any changes.

Instead of using the registermvc.wcf script, you can add a new extension to IIS that is mapped to the ASP.NET framework by hand. When adding a new extension yourself, make sure that the checkbox labeled Verify that file exists is not checked.

Hosted Server

You don’t always have access to your web server. For example, if you are hosting your ASP.NET MVC application using an Internet Hosting Provider, then you won’t necessarily have access to IIS.

In that case, you should use one of the existing file extensions that are mapped to the ASP.NET framework. Examples of file extensions mapped to ASP.NET include the .aspx, .axd, and .ashx extensions.

For example, the modified Global.asax file in Listing 3 uses the .aspx extension instead of the .mvc extension.

Listing 3 – Global.asax (modified with .aspx extensions)

using System;
using System.Collections.Generic;
using System.Linq;
using System.Web;
using System.Web.Mvc;
using System.Web.Routing;
namespace MvcApplication1
{
public class MvcApplication : System.Web.HttpApplication
{
public static void RegisterRoutes(RouteCollection routes)
{
routes.IgnoreRoute("{resource}.axd/{*pathInfo}");
routes.MapRoute(
"Default",
"{controller}.aspx/{action}/{id}",
new { action = "Index", id = "" }
);
routes.MapRoute(
"Root",
"",
new { controller = "Home", action = "Index", id = "" }
);
}
protected void Application_Start()
{
RegisterRoutes(RouteTable.Routes);
}
}
}

The Global.asax file in Listing 3 is exactly the same as the previous Global.asax file except for the fact that it uses the .aspx extension instead of the .mvc extension. You don’t have to perform any setup on your remote web server to use the .aspx extension.

Creating a Wildcard Script Map

If you don’t want to modify the URLs for your ASP.NET MVC application, and you have access to your web server, then you have an additional option. You can create a wildcard script map that maps all requests to the web server to the ASP.NET framework. That way, you can use the default ASP.NET MVC route table with IIS 7.0 (in classic mode) or IIS 6.0.

Be aware that this option causes IIS to intercept every request made against the web server. This includes requests for images, classic ASP pages, and HTML pages. Therefore, enabling a wildcard script map to ASP.NET does have performance implications.

Here’s how you enable a wildcard script map for IIS 7.0:

  1. Select your application in the Connections window
  2. Make sure that the Features view is selected
  3. Double-click the Handler Mappings button
  4. Click the Add Wildcard Script Map link (see Figure 3)
  5. Enter the path to the aspnet_isapi.dll file (You can copy this path from the PageHandlerFactory script map)
  6. Enter the name MVC
  7. Click the OK button

Figure 3: Creating a wildcard script map with IIS 7.0(Click to view full-size image)

Follow these steps to create a wildcard script map with IIS 6.0:

  1. Right-click a website and select Properties
  2. Select the Home Directory tab
  3. Click the Configuration button
  4. Select the Mappings tab
  5. Click the Insert button (see Figure 4)
  6. Paste the path to the aspnet_isapi.dll into the Executable field (you can copy this path from the script map for .aspx files)
  7. Uncheck the checkbox labeled Verify that file exists
  8. Click the OK button

Figure 4: Creating a wildcard script map with IIS 6.0(Click to view full-size image)

After you enable wildcard script maps, you need to modify the route table in the Global.asax file so that it includes a Root route. Otherwise, you’ll get the error page in Figure 5 when you make a request for the root page of your application. You can use the modified Global.asax file in Listing 4.

Figure 5: Missing Root route error(Click to view full-size image)

Listing 4 – Global.asax (modified with Root route)

using System;
using System.Collections.Generic;
using System.Linq;
using System.Web;
using System.Web.Mvc;
using System.Web.Routing;
namespace MvcApplication1
{
public class MvcApplication : System.Web.HttpApplication
{
public static void RegisterRoutes(RouteCollection routes)
{
routes.IgnoreRoute("{resource}.axd/{*pathInfo}");
routes.MapRoute(
"Default",
"{controller}/{action}/{id}",
new { action = "Index", id = "" }
);
routes.MapRoute(
"Root",
"",
new { controller = "Home", action = "Index", id = "" }
);
}
protected void Application_Start()
{
RegisterRoutes(RouteTable.Routes);
}
}
}

After you enable a wildcard script map for either IIS 7.0 or IIS 6.0, you can make requests that work with the default route table that look like this:

/

/Home/Index

/Product/Details/3

/Product

Summary

The goal of this tutorial was to explain how you can use ASP.NET MVC when using an older version of IIS (or IIS 7.0 in classic mode). We discussed two methods of getting ASP.NET Routing to work with older versions of IIS: Modify the default route table or create a wildcard script map.

The first option requires you to modify the URLs used in your ASP.NET MVC application. One very significant advantage of this first option is that you do not need access to a web server in order to modify the route table. That means that you can use this first option even when hosting your ASP.NET MVC application with an Internet hosting company.

The second option is to create a wildcard script map. The advantage of this second option is that you do not need to modify your URLs. The disadvantage of this second option is that it can impact the performance of your ASP.NET MVC application.

[MVC]学习ASP.NET MVC(二) 识别URL的Routing组件

mikel阅读(472)

转载:http://tech.ddvip.com/2009-03/1235968159110093.html 

 本文示例源代码或素材下载

  一.摘要

 本篇文章从基础到深入的介绍ASP.NET MVC中的Routing组件. Routing翻译过来是"路由选择", 负责ASP.NET MVC的第一个工作: 识别URL, 将一个Url请求"路由"给Controller. 由于今天下午参加了博客园北京俱乐部的聚会, 所以本篇文章的完工时间晚了点, 还好也是在今天发表, 总算兑现了"每日一篇"的承诺. 不久丁学就会发布北京博客园聚会活动的资料了, 我在这里先预告了!

  二.承上启下

   第一篇文章中我们已经学会了如何使用ASP.NET MVC, 虽然其中还有很多的细节没有深入了解, 但是对基本的处理流程已经有了认识:来了一个Url请求, 从中找到Controller和Action的值, 将请求传递给Controller处理. Controller获取Model数据对象, 并且将Model传递给View, 最后View负责呈现页面.

  而Routing的作用就是负责分析Url, 从Url中识别参数, 如图:

学习ASP.NET MVC(二) 识别URL的Routing组件

 这一讲就让我们细致的了解System.Web.Routing及其相关的扩展知识.

  三.Routing的作用

  第一讲中实例的首页地址是: localhost/home/index

 我们发现访问上面的地址, 最后会传递给 HomeController中名为index的action(即HomeController类中的index方法).

  当然服务器端不会自己去实现这个功能,  关键点就是在Global.asax.cs文件中的下列代码:

    public static void RegisterRoutes(RouteCollection routes)
    {
      routes.IgnoreRoute("{resource}.axd/{*pathInfo}");
      routes.MapRoute(
        "Default",                       // Route name
        "{controller}/{action}/{id}",              // URL with parameters
        new { controller = "Home", action = "Index", id = "" } // Parameter defaults
      );
    }
    protected void Application_Start()
    {
      RegisterRoutes(RouteTable.Routes);
    }

  回来看我们的Url: localhost/home/index

  localhost是域名, 所以首先要去掉域名部分: home/index

  对应了上面代码中的这种URL结构: {controller}/{action}/{id}

  因为我们建立了这种Url结构的识别规则, 所以能够识别出 Controller是home, action是index, id没有则为默认值"".

  这就是Routing的第一个作用:

  1.从Url中识别出数据.比如controller,action和各种参数.

  如果跟踪程序, 接下来我们会跳转到HomeController中的Index()方法.  这是Routing内部为实现的第二个作用:

  2.根据识别出来的数据, 将请求传递给Controller和Action.

  但从实例中我们并不知道Routing如何做的这部份工作.第五部分我做了深入讲解.

  四.Routing的使用

  在分析Routing的实现原理前, 先学习如何使用Routing为ASP.NET MVC程序添加路由规则.

  1. 使用MapRoute()方法.

  这是最简单的为ASP.NET MVC添加识别规则的方法.此方法有如下重载:

MapRoute( string name, string url);
MapRoute( string name, string url, object defaults);
MapRoute( string name, string url, string[] namespaces);
MapRoute( string name, string url, object defaults, object constraints);
MapRoute( string name, string url, object defaults, string[] namespaces);
MapRoute( string name, string url, object defaults, object constraints, string[] namespaces);
 

  name参数:

  规则名称, 可以随意起名.当时不可以重名,否则会发生错误:

  路由集合中已经存在名为“Default”的路由。路由名必须是唯一的。

  url参数:

  url获取数据的规则, 这里不是正则表达式,  将要识别的参数括起来即可, 比如: {controller}/{action}

  最少只需要传递name和url参数就可以建立一条Routing(路由)规则.比如实例中的规则完全可以改为:

      routes.MapRoute(
          "Default",
          "{controller}/{action}");

  defaults参数:

  url参数的默认值.如果一个url只有controller: localhost/home/

  而且我们只建立了一条url获取数据规则: {controller}/{action}

  那么这时就会为action参数设置defaults参数中规定的默认值. defaults参数是Object类型,所以可以传递一个匿名类型来初始化默认值:

new { controller = "Home", action = "Index" }

  实例中使用的是三个参数的MapRoute方法:

      routes.MapRoute(
        "Default",                       // Route name
        "{controller}/{action}/{id}",              // URL with parameters
        new { controller = "Home", action = "Index", id = "" } // Parameter defaults
      );

  constraints参数:

  用来限定每个参数的规则或Http请求的类型.constraints属性是一个RouteValueDictionary对象,也就是一个字典表, 但是这个字典表的值可以有两种:

  用于定义正则表达式的字符串。正则表达式不区分大小写。

  一个用于实现 IRouteConstraint 接口且包含 Match 方法的对象。

  通过使用正则表达式可以规定参数格式,比如controller参数只能为4位数字:

new { controller = @"\d{4}"}
 

   通过第IRouteConstraint 接口目前可以限制请求的类型.因为System.Web.Routing中提供了HttpMethodConstraint类, 这个类实现了IRouteConstraint 接口. 我们可以通过为RouteValueDictionary字典对象添加键为"httpMethod", 值为一个HttpMethodConstraint对象来为路由规则添加HTTP 谓词的限制, 比如限制一条路由规则只能处理GET请求:

httpMethod = new HttpMethodConstraint( "GET", "POST" )

  完整的代码如下:

      routes.MapRoute(
        "Default",                       // Route name
        "{controller}/{action}/{id}",              // URL with parameters
        new { controller = "Home", action = "Index", id = "" }, // Parameter defaults
        new { controller = @"\d{4}" , httpMethod = new HttpMethodConstraint( "GET", "POST" ) }
      );

 当然我们也可以在外部先创建一个RouteValueDictionary对象在作为MapRoute的参数传入, 这只是语法问题.

  namespaces参数:

  此参数对应Route.DataTokens属性. 官方的解释是:

  获取或设置传递到路由处理程序但未用于确定该路由是否匹配 URL 模式的自定义值。

  我目前不知道如何使用. 请高手指点

  2.MapRoute方法实例

  下面通过实例来应用MapRoute方法. 对于一个网站,为了SEO友好,一个网址的URL层次不要超过三层:

  localhost/{频道}/{具体网页}

  其中域名第一层, 频道第二层, 那么最后的网页就只剩下最后一层了. 如果使用默认实例中的"{controller}/{action}/{其他参数}"的形式会影响网站SEO.

  假设我们的网站结构如下:

学习ASP.NET MVC(二) 识别URL的Routing组件

 下面以酒店频道为例, 是我创建的Routing规则:

    public static void RegisterRoutes(RouteCollection routes)
    {
      routes.IgnoreRoute("{resource}.axd/{*pathInfo}");
      #region 酒店频道部分
      // hotels/list-beijing-100,200-3
      routes.MapRoute(
        "酒店列表页",
        "hotels/{action}-{city}-{price}-{star}",
        new { controller = "Hotel", action = "list", city = "beijing", price="-1,-1", star="-1" },
        new { city=@"[a-zA-Z]*",price=@"(\d)+\,(\d)+", star="[-1-5]"}
        );
      //hotels/所有匹配
      routes.MapRoute(
        "酒店首页",
        "hotels/{*values}",
        new { controller = "Hotel", action = "default", hotelid = "" }
        );
      #endregion
      //网站首页.
      routes.MapRoute(
         "网站首页",
         "{*values}",
         new { controller = "Home", action = "index"}
         ); 
    }


  实现的功能:

  (1)访问 localhost/hotels/list-beijing-100,200-3 会访问酒店频道的列表页,并传入查询参数

  (2)访问 localhost/hotels 下面的任何其他页面地址, 都会跳转到酒店首页.

  (3)访问 localhost 下面的任何地址, 如果未匹配上面2条, 则跳转到首页.

  简单总结:

  (1)Routing规则有顺序(按照添加是的顺序), 如果一个url匹配了多个Routing规则, 则按照第一个匹配的Routing规则执行.

  (2)由于上面的规则, 要将具体频道的具体页面放在最上方, 将频道首页 和 网站首页 放在最下方.

  (3) {*values} 表示后面可以使任意的格式.

  3.使用Route类

  MapRoute方法虽然简单, 但是他是本质也是通过创建Route类的实例, 为RouteCollection集合添加成员.

  下载最新版本的MSDN-Visual Studio 20008 SP1, 已经可以找到Route类的说明.

  创建一个Route类实例,最关键的是为以下几个属性赋值:

属性名称 说明 举例
Constraints 获取或设置为 URL 参数指定有效值的表达式的词典。 {controller}/{action}/{id}
DataTokens 获取或设置传递到路由处理程序但未用于确定该路由是否匹配 URL 模式的自定义值。 new RouteValueDictionary { { "format", "short" } }
Defaults 获取或设置要在 URL 不包含所有参数时使用的值。 new { controller = "Home", action = "Index", id = "" }
RouteHandler 获取或设置处理路由请求的对象。 new MvcRouteHandler()
Url 获取或设置路由的 URL 模式。 new { controller = @"[^\.]*" }

  这些属性除了RouteHandler以外, 其他的都对应MapRoute方法的参数.RouteHandler是实现了IRouteHandler接口的对象.关于此接口的作用在第五部分Routing深入解析中做讲解.

  五.Routing深入解析

  对于一个一般开发人员来说, 上面的知识已经完全足够你使用ASP.NET MVC时使用Routing了.

  接下来的部分我将深入Routing的机制讲解Routing的高级应用.但是因为是"高级应用", 加上这篇文章已经太长了, 再加上马上今天就过去了, "每日一篇"的承诺一定要兑现的, 所以不会对所有细节进行讲解. 或者也可以略过此部分.

   Routing如何将请求传递给Controller?上面讲解Routing作用的时候, 我们就分析出Routing会将请求传递给Controller, 但是Routing如何做的这部份工作我们却看不到.关键在于MapRoute()这个方法封装了具体的细节.

  虽然MapRoute方 法是RouteCollection对象的方法,但是却被放置在System.Web.Mvc程序集中, 如果你的程序只引用了System.Web.Routing, 那么RouteCollection对象是不会有MapRoute方法的. 但是如果你同又引用了System.Web.Mvc, 则在mvc的dll中为RouteCollection对象添加了扩展方法:

    public static void IgnoreRoute(this RouteCollection routes, string url);
    public static void IgnoreRoute(this RouteCollection routes, string url, object constraints);
    public static Route MapRoute(this RouteCollection routes, string name, string url);
    public static Route MapRoute(this RouteCollection routes, string name, string url, object defaults);
    public static Route MapRoute(this RouteCollection routes, string name, string url, string[] namespaces);
    public static Route MapRoute(this RouteCollection routes, string name, string url, object defaults, object constraints);
    public static Route MapRoute(this RouteCollection routes, string name, string url, object defaults, string[] namespaces);
    public static Route MapRoute(this RouteCollection routes, string  name, string url, object defaults, object constraints, string[]  namespaces);

  RouteCollection是一个集合,他的每一项应该是一个Route对象. 但是我们使用MapRoute时并没有创建这个对象, 这是因为当我们将MapRoute方法需要的参数传入时, 在方法内部会根据参数创建一个Route对象:

     public static Route MapRoute(this RouteCollection routes, string  name, string url, object defaults, object constraints, string[]  namespaces) {
      if (routes == null) {
        throw new ArgumentNullException("routes");
      }
      if (url == null) {
        throw new ArgumentNullException("url");
      }
      Route route = new Route(url, new MvcRouteHandler()) {
        Defaults = new RouteValueDictionary(defaults),
        Constraints = new RouteValueDictionary(constraints)
      };
      if ((namespaces != null) && (namespaces.Length > 0)) {
        route.DataTokens = new RouteValueDictionary();
        route.DataTokens["Namespaces"] = namespaces;
      }
      routes.Add(name, route);
      return route;
    }

  上面就是MapRoute方法的实现, 至于在创建Route对象时第二个参数是一个MvcRouteHandler, 它是一个实现了IRouteHandler接口的类. IRouteHandler十分简单只有一个方法:

IHttpHandler GetHttpHandler(RequestContext requestContext);

  参数是一个RequestContext 类实例, 这个类的结构也很简单:

  public class RequestContext
  {
    public RequestContext(HttpContextBase httpContext, RouteData routeData);
    public HttpContextBase HttpContext { get; }
    public RouteData RouteData { get; }
  }

其中的一个属性RouteData就包含了Routing根据Url识别出来各种参数的值, 其中就有Controller和Action的值.

   归根结底, ASP.NET MVC最后还是使用HttpHandler处理请求. ASP.NET MVC定义了自己的实现了IHttpHandler接口的Handler:MvcHandler,  因为MvcRouteHandler的GetHttpHandler方法最后返回的就是MvcHandler. 

  MvcHandler的构造函数需要传入RequestContext 对象, 也就是传入了所有的所有需要的数据, 所以最后可以找到对应的Controller和Action, 已经各种参数.

  六.测试Routing

  因为一个Url会匹配多个routing规则, 最后常常会遇到规则写错或者顺序不对的问题.于是我们希望能够看到Url匹配Routing的结果.

  其中最简单的办法就是使用RouteDebug辅助类. 这个类需要单独下载dll组件, 我将此组件的下载放在了博客园上:

  http://files.cnblogs.com/zhangziqiu/RouteDebug-Binary.zip

  解压缩后是一个DLL文件, 将这个DLL文件添加到项目中并且添加引用.

  使用方法很简单, 只需要在Application_Start方法中添加一句话:

RouteDebug.RouteDebugger.RewriteRoutesForTesting(RouteTable.Routes);

  比如下面是我的示例中的代码:

    protected void Application_Start()
    {
      RegisterRoutes(RouteTable.Routes);
      RouteDebug.RouteDebugger.RewriteRoutesForTesting(RouteTable.Routes);
    }

  现在你访问任何URL, 都会出现RouteDebug页面, 如下:

学习ASP.NET MVC(二) 识别URL的Routing组件

  其中不仅有你的所有Routing规则, 还显示了是否匹配.并且按照顺序列出. 还有识别的参数列表.

  当你不想测试Routing规则的时候则注释掉这一段, 即可回复跳转到View对象上.

  七.总结

   本文讲解了ASP.NET MVC中一个关键的组件:Routing的使用. System.Web.Routing在Framework3.5 SP1中已经集成, 也就是说虽然我们还没有ASP.NET MVC的正式版, 但是Routing组件却已经提早发布了. 因为Routing是一个相对独立的组件, 不仅能和ASP.NET MVC配额使用, 也可以用于任何需要URL路由的项目. 另外Routing的作用和Url重写(Url Rewrite)是有区别的, 你会发现Routing和Url Rewrite相比其实很麻烦, 无论是添加规则还是传递参数.对UrlRewite感兴趣的可以去寻找UrlRewrite.dll这个组件, 很简单很强大, 有关两者的异同以及如何使用UrlRewrite这里不在多说了.

 另外今天博客园北京俱乐部聚会, 听了2位大师的讲座, 见到了至今没记住名字和样子的同行们, 很是激动和兴奋. 期待俱乐部领导将活动照片和资料放出!

  系列文章:

学习ASP.NET MVC(一) 开天辟地入门篇

[MVC] 浅谈URL生成方式的演变

mikel阅读(628)

转载:http://www.cnblogs.com/JeffreyZhao/archive/2009/10/29/several-ways-of-generating-url.html

开发Web应用程序的时候,在页面上总会放置大量的链接,而链接的生成方式看似简单,也有许多不同的变化,且各有利弊。现在我们就来看看,在一个ASP.NET MVC应用程序的视图中如果要生成一个链接地址又有哪些做法,它们之间又是如何演变的。

目标

作为示例,我们总要有个目标URL。我们这里的目标为面向如下Action的URL,也就是一篇文章的详细页:

public class ArticleController : Controller
{
public ActionResult Detail(Article article)
{
...
}
}
public class Article
{
public int ArticleID { get; set; }
public string Title { get; set; }
}

而我们的目标URL则是文章的ID与标题的联合,其中标题里的空格替换为很短横线——把文章的标题放入URL自然是为了SEO。于是乎我们使用这样的Route规则:

routes.MapRoute(
"Article.Detail",                                  // Route name
"article/{article}",                               // URL with parameters
new { controller = "Article", action = "Detail" }  // Parameter defaults
);

在URL Routing捕获到article之后,它的形式可能是这样的:

10-this-is-the-title

我们只考虑这个ID,后面的字符串虽然在URL中,但是完全被忽略。在实际项目中,我们可以编写一个Model Binder从这样一个字符串中提取ID,再获取对应的Article对象。不过我们的现在不关注这个。

我们的目标只有一个:如何生成URL。

方法一:直接拼接字符串

这是个最直接,最容易想到的做法:

<% foreach (var article in Models.Articles) { %>
    <a href="/article/<%= article.ArticleID %>-<%= Url.Encode(article.Title.Replace(' ', '-')) %>">
<%= Html.Encode(article.Title) %>
    </a>
<% } %>

这个做法随着ASP.NET的诞生陪伴我们一路走来,已经有7、8个年头了,相信大部分朋友对它都不会陌生。它的优点自然是最为简单,最为直接,几乎没有任何门槛,也不需要任何准备就可以直接使用,而且理论上性能也是最佳的。但是它的缺点也 很明显,那就是需要在每个页面,每个地方都重复这样一个字符串。试想,如果我们URL的生成规则忽然有所变化,又会怎么样?我们必须找出所有的生成链接的 地方,一个一个改过来。这往往是一个浩大的工程,而且非常容易出错——因为我们根本没有静态检查可以依托。因此,在实际情况下,除非是快速开发的超小型 的,随做随抛的实验性项目,一般不建议使用这样的做法。

方法二:使用辅助方法

为了避免方法一的缺点,我们可以使用一个辅助方法来生成URL:

public static class ArticleUrlExtensions
{
public static string ToArticle(this UrlHelper helper, Article article)
{
return "/article/" + article.ArticleID + "-" + helper.Encode(article.Title.Replace(' ', '-'));
}
}

我们把负责生成URL的辅助方法写作UrlHelper的扩展方法,于是我们就可以在页面上这样生成URL了(省略多余标记):

<a href="<%= Url.ToArticle(article) %>">...</a>

这个做法的优点在于把生成URL的逻辑汇集到了一处,这样如果需要变化的时候只需要修改这一个地方就行了,而且它几乎没有任何副作用,使用起来也非常简单。而它的缺点还是在于有些重复:如果这个URL修改涉及到Route配置的变化(例如从http://www.domain.com/article/5变成了http://articles.domain.com/5),则ToArticle方法也必须随之修改。也就是说,这个方法对DRY(Don’t Repeat Yourself)原则贯彻地还不够彻底。不过,对于一般项目来说,这个做法也不会有太大问题——这也是构造URL方式的底线。

方法三:从Route配置中生成URL

对于URL Routing的双向职责我已经提过无数次了,我们配置了Route规则,那么便可以使用它来生成URL:

public static string ToDetail(this UrlHelper helper, Article article)
{
var values = new
{
article = article.ArticleID + "-" + helper.Encode(article.Title.Replace(' ', '-'))
};
var path = helper.RouteCollection.GetVirtualPath(
helper.RequestContext, "Article.Detail", new RouteValueDictionary(values));
return path.VirtualPath;
}

由于Route配置知道如何根据Route Value集合里的值生成一个URL,因此我们只要把这个职责交给它即可。一般来说,我们会指定Route规则的名称,这样节省了遍历尝试每个规则的开销,也不会被冲突问题所困扰。此时,即便是URL需要变化,只要调整Route规则即可——只要保持规则对“值”的需求不变就行了。例如之前提到的URL的变化,我们只要把Route配置调整为:

routes.MapDomain(
"Article",
"http://articles.{*domain}",
innerRoutes =>
{
innerRoutes.MapRoute(
"Detail",
"",
new { controller = "Article", action = "Detail" });
};

这个做法的优点在于“自动”与Route配置同步,几乎不需要额外的逻辑。而它的缺点——可能在从性能角度上考虑会有“细微”的差距(在实际应用中是否重要另当别论)……

方法四:使用Lambda表达式生成URL

我也经常强调使用Lambda表达式生成URL的好处:

<a href="<%= Url.Action<ArticleController>(c => c.Detail(article)) %>">...</a>

由于在ASP.NET MVC中,一个URL的最终目标归根到底是一个Action,因此如果我们可以更直观地在代码中表现出这一点,则可以进一步提高代码的可读性。这一点在 ASP.NET MVC 1.0自带的MvcFutures项目中已经有所体现,只可惜它作的远远不够,几乎没有任何实用价值。不过现在您也可以使用MvcPatch项目进行开发,它提供了完整的使用Lambda表达式生成URL的能力,它相对于MvcFutures里的辅助方法作了各种补充:

  1. 支持ActionNameAttribute
  2. 提高性能
  3. 允许忽略部分参数
  4. 可指定Route规则的名称
  5. 支持Action复杂参数的双向转化

使用这种方式,我们需要对Action方法做些简单的修改:

public class ArticleBinder : IModelBinder, IRouteBinder
{
public object BindModel(ControllerContext controllerContext, ModelBindingContext bindingContext)
{
...
}
public RouteValueDictionary BindRoute(RequestContext requestContext, RouteBindingContext bindingContext)
{
var article = (Article)bindingContext.Model;
var text = article.ArticleID + "-" + HttpUtility.UrlEncode(article.Title.Replace(' ', '-'));
return new RouteValueDictionary(new { article = text });
}
}
public class ArticleController : Controller
{
[RouteName("Article.Detail")]
public ActionResult Detail([ModelBinder(typeof(ArticleBinder))]Article article)
{
...
}
}

请注意我们对Action方法标记了RouteNameAttribute,以此指定Route规则的名称(第4点);同时,ArticleBinder也实现一个新的接口IRouteBinder负责从Article对象转化为Route Value。

这个做法的优点在于基本上回避了“生成URL”这个工作,而将关注点放在Action 方法这个根本的目标上。此外,各种逻辑也很内聚,它们都环绕在Action方法周围,遇到问题也不用四散查询,而将Article对象转化为Route Value的职责也和它的对应操作放在了一起,更容易进行独立的单元测试。此外,使用Lambda表达式生成URL还能获得编译器的静态检查,这确保了可以在编译期间解决尽可能多的问题。

而它的缺点主要是比较复杂,如果您不使用MvcPatch项目的话,可能就需要自行补充许多辅助方法,它们并不那么简单。此外,在视图上的代码页稍显多了一些。还有便是基于表达式树解析的做法多少会有些性能损失,我们下次再来关注这个问题。

方法五:简化Lambda表达式的使用

第五个方法其实是前者的补充。例如,我们可以再准备这样一个辅助方法:

public static class ArticleUrlExtensions
{
public static string ToArticle(this UrlHelper urlHelper, Expression<Action<ArticleController>> action)
{
return urlHelper.Action<ArticleController>(action);
}
}

这样在页面上使用时无须指定ArticleController类了——这类名的确有些长:

<a href="<%= Url.ToArticle(c => c.Detail(article)) %>">...</a>

或者,我们可以结合方法二或三,提供一个额外的辅助方法:

public static class ArticleUrlExtensions
{
public static string ToArticle(this UrlHelper urlHelper, Article article)
{
return urlHelper.Action<ArticleController>(c => c.Detail(article));
}
}

至于最终使用哪个辅助方法,我想问题都不是很大。前者的“准备工作”更为简单,只需为每个Controller准备一个辅助方法就够了,而后者则需要为每个Action提供一个辅助方法,不过它使用起来却更为方便一些。

这个做法的优点在于继承了Lambda表达式构造URL的优势之外,还简化了它的使用。至于缺点,可能也和Lambda表达式类似吧,例如准备工作较多,性能理论上略差一些。

第五个方法,也是我在ASP.NET MVC项目中使用的“标准做法”。

总结

这次我们把“URL生成”这个简单的目标使用各种方法“演变”了一番,您可以选择地使用。这个演变的过程,其实也是一步步发现缺点,再进行针对性改 进的过程。我们虽然使用在ASP.NET MVC的视图作为演示载体,但是它的方式和思路并不仅限于此,它也可以用在ASP.NET MVC的其它方面(如在Controller中生成URL),或是其它模型(如WebForms),甚至与Web开发并无关联的应用程序开发上面。

[MVC]在ASP.NET MVC中使用DropDownList

mikel阅读(557)

转载:http://www.cnblogs.com/kirinboy/archive/2009/10/28/use-dropdownlist-in-asp-net-mvc.html

ASP.NET MVC中,尽管我们可以直接在页面中编写HTML控件,并绑定控件的属性,但更方便的办法还是使用HtmlHelper中的辅助方法。在View中,包含一个类型为HtmlHelper的属性Html,它为我们呈现控件提供了捷径。

我们今天主要来讨论Html.DropDownList的用法,首先从Html.TextBox开始。

Html.TextBox有一个重载方法形式如下:

public static string TextBox(this HtmlHelper htmlHelper, string name, object value);

其中name参数为文本框name属性(以及 id属性)的值,value参数为文本框的默认值(即value属性的值)。如果value参数为null或者使用没有value参数的重载方法,那么此 时name参数同时还是一个键值,负责获取文本框的默认值。获取的顺序为,先从ViewData中查找是否存在键值为name值的项,如果 ViewData中没有则从ViewData.Model中查找是否存在名称为name值的属性,如果仍然不存在,则返回null。(具体参见 HtmlHelper的InputHelper辅助方法)

也就是说

public ActionResult Test()
{
ViewData["Name"] = "Jade";
return View();
}
<%= Html.TextBox("Name")%>

这样的代码将会输出这样的HTML:

<input id="Name" name="Name" type="text" value="Jade" />

由于TextBox的id和name属性的值与ViewData中的某一项同名(均为Name),因此TextBox的value属性的值将自动绑 定为ViewData中Name项的值。不仅是ViewData,如果view model的类型包含Name属性,也将输出同样的结果:

var user = new User { Name = "Jade" };
ViewData.Model = user;
return View();

如果ViewData和ViewData.Model中同时存在Name,则优先使用ViewData中的项。

CheckBox、Hidden、Password、RedioButton等控件也是如此,它们与TextBox一样都使用input标记,属性绑定的规则大致相同。

DropDownList则与TextBox等控件不同,它使用的是select标记。它需要两个值:在下拉框中显示的列表,和默认选项。而自动绑定一次只能绑定一个属性,因此你需要根据需要选择是绑定列表,还是默认选项。

DropDownList扩展方法的各个重载版本“基本上”都会传递到这个方法上:

public static string DropDownList(this HtmlHelper htmlHelper,
string name,
IEnumerable<SelectListItem> selectList,
string optionLabel,
IDictionary<string, object> htmlAttributes) {
…
}

如果没有指定selectList,该方法将自动绑定列表,即从ViewData中查找name所对应的值。如果提供了selectList,将自 动绑定默认选项,即从selectList中找到Selected属性为true的SelectedListItem。(具体参见HtmlHelper方 法的SelectInternal辅助方法)

例1:如果在Action方法中有如下代码:

List<SelectListItem> items = new List<SelectListItem>();
items.Add(new SelectListItem { Text = "Kirin", Value = "29" });
items.Add(new SelectListItem { Text = "Jade", Value = "28", Selected = true});
items.Add(new SelectListItem { Text = "Yao", Value = "24"});
this.ViewData["list"] = items;

在View中这样使用:

<%=Html.DropDownList("list")%>

那么辅助方法将率先从ViewData中获取key为list的项,如果该项为 IEnumerable<SelectedListItem>类型则绑定到下拉框中,否则将抛出 InvalidOperationException。由于第二个SelectListItem的Selected为true,则默认选中第二个。

例2:如果Action中代码如下:

List<SelectListItem> items = new List<SelectListItem>();
items.Add(new SelectListItem { Text = "Kirin", Value = "29" });
items.Add(new SelectListItem { Text = "Jade", Value = "28"});
items.Add(new SelectListItem { Text = "Yao", Value = "24"});
this.ViewData["list"] = items;
this.ViewData["selected"] = 24;

View中的代码如下:

<%=Html.DropDownList("selected", ViewData["list"] as IEnumerable<SelectListItem>)%>

那么辅助方法将ViewData["list"]绑定为下拉框,然后从ViewData中获取key为selected的项,并将下list中Value值与该项的值相等的SelecteListItem设为默认选中项。

以上两种方法尽管可以实现DropDownList的正确显示,但并非最佳实践。在实际项目中,我们更希望在代码中使用强类型。例如上面两例 中,SelectListItem的Text和Value本来是User对象的Name和Age属性,然而上面的代码却丝毫体现不出这种对应关系。如果 User列表是从数据库或其他外部资源中获得的,我们难道要用这样的方式来绑定吗?

var users = GetUsers();
foreach (var user in users)
{
items.Add(new SelectListItem { Text = user.Name, Value = user.Age.ToString() });
}

这显然是我们所无法容忍的。那么什么是最佳实践呢?

ASP.NET MVC为DropDownList和ListBox(都在html中使用select标记)准备了一个辅助类型:SelectList。 SelectList继承自MultiSelectList,而后者实现了IEnumerable<SelectListItem>。也就是 说,SelectList可以直接作为Html.DropDownList方法的第二个参数。

MultiSelectList包含四个属性,分别为:

  • Items:用于在select标记中出现的列表,通常使用option标记表示。IEnumerable类型。
  • DataTextField:作为option的text项,string类型。
  • DataValueField:作为option的value项,string类型。
  • SelectedValues:选中项的value值,IEnumerable类型。

显然,作为DropDownList来说,选中项不可能为IEnumerable,因此SelectList提供了一个新的属性:

  • SelectedValue:选中项的value值,object类型。

同时,SelectList的构造函数如下所示:

public SelectList(IEnumerable items, string dataValueField, string dataTextField, object selectedValue)
: base(items, dataValueField, dataTextField, ToEnumerable(selectedValue)) {
SelectedValue = selectedValue;
}

于是我们的代码变为:

var users = GetUsers();
var selectList = new SelectList(users, "Age", "Name", "24");
this.ViewData["list"] = selectList;
<%=Html.DropDownList("list")%>

当然,你也可以使用不带selectedValue参数的构造函数重载,而在view中显式指定 IEnumerable<SelectListItem>,并在ViewData或view model中指定其他与DropDownList同名的项作为默认选项。

最后让我们来回顾一下DropDownList的三种用法:

  1. 建立IEnumerable<SelectListItem>并在其中指定默认选中项。
  2. 建立IEnumerable<SelectListItem>,在单独的ViewData项或view model的属性中指定默认选中项。
  3. 使用SelectList。

好了,关于DropDownList的用法我们今天就讨论到这里,您会用了吗?

[MVC]ASP.NET MVC Tip #39 – Use the Velocity Distri

mikel阅读(695)

转载:http://stephenwalther.com/blog/archive/2008/08/28/asp-net-mvc-tip-39-use-the-Velocity-distributed-cache.aspx

Improve the performance of ASP.NET MVC applications by taking advantage of the Velocity distributed cache. In this tip, I also explain how you can use Velocity as a distributed session state provider.

The best way to improve the performance of an ASP.NET MVC application is by caching. The slowest operation that you can perform in an ASP.NET MVC application is database access. The best way to improve the performance of your data access code is to avoid accessing the database at all. Caching enables you to avoid accessing the database by keeping frequently accessed data in memory.

Because ASP.NET MVC is part of the ASP.NET framework, you can access the standard ASP.NET System.Web.Caching.Cache object from your ASP.NET MVC applications. The standard ASP.NET Cache object is a powerful class. You can use the Cache object to cache data in memory for a particular period of time, create dependencies between items in the cache and the file system or a database table, and create complicated chains of dependencies between different items in the cache. In other words, you can do a bunch of fancy things with the standard ASP.NET Cache object.

The one limitation of the standard ASP.NET Cache object is that it runs in the same process as your web application. It is not a distributed cache. The same ASP.NET Cache cannot be shared among multiple machines. If you want to share the same ASP.NET Cache among multiple machines, you must duplicate the cache for each machine.

The standard ASP.NET Cache works great for web applications running on a single server. But what do you do when you need to maintain a cluster of web servers? For example, you want to scale your web application to handle billions of users. or, you don’t want to reload the data in the cache when a server fails. In situations in which you want to share the same cache among multiple web servers, you need to use a distributed cache.

In this tip, I explain how you can use the Microsoft distributed cache (code-named Velocity) with an ASP.NET MVC application. Setting up and using Velocity is surprisingly easy. Switching from the standard ASP.NET Cache to the Velocity distributed cache is surprisingly painless.

I’m also going to explain how you can use Velocity as a session state provider. Velocity enables you to use ASP.NET session state even when you are hosting an MVC application on a cluster of web servers. You can use Velocity to store session state in the distributed cache.

Installing and Configuring Velocity

As I write this, Velocity is not a released product. It is still in the Community Technology Preview state of its lifecycle. However, you can download Velocity and start experimenting with it now.

The main website for all information on Velocity is located at the following address:

http://msdn.microsoft.com/en-us/data/cc655792.aspx

You can download Velocity by following a link from this web page.

Installing Velocity is a straightforward process. You need to install Velocity on each server where you want to host the cache (each cache server). The cache is distributed across these servers.

Before you install Velocity on any of the cache servers, you need to create one file share in your network that is accessible to all of the cache servers. This file share will contain the cache configuration file (ClusterConfig.xml). The cache configuration file is an XML file that is used to configure the distributed cache.

During this Beta period, you must give the Everyone account Read and Write permissions to the file share that contains the configuration file. Right-click the folder, select the Properties menu option and select the Security tab. Click the Edit button, click the Add button, and enter the Everyone account and click the OK button. Make sure that the Everyone account has Read and Write permissions.

When you run the installation program for Velocity (see Figure 1), you will be asked to enter the following information:

· Cluster Configuration Share – This is the path to the folder share that we just created.

· Cluster Name – The name of the cluster. Enter any name that you want here (for example, MyCacheCluster).

· Cluster Size – The number of cache servers that you expect to use in this cluster.

· Service Port Number – The port that your application uses to communicate with the cache server (needs to be unblocked from your firewall).

· Cluster Port Number — The port that the cache servers use to communicate with each other. Velocity uses this port number and an additional port located plus one port higher (both of these ports need to be unblocked from your firewall).

· Max Server Memory – The maximum amount of memory used by Velocity on this server.

Figure 1 – Installing Velocity

image

After you install Velocity on each of the servers, you must configure firewall exceptions for Velocity on each server. If you don’t, then communication with Velocity will be blocked. You can create a firewall exception for the DistributedCache.exe program name or you can create the firewall exceptions for each port number (port 22233, port 22234, and port 22235).

Using the Velocity Administration Tool

You manage Velocity through a command line administration tool which you can open by selecting Start, All Programs, Microsoft Distributed Cache, Administration Tool (see Figure 2).

Figure 2 – The Velocity Administration Tool

image

The Administration Tool supports the following important commands (these commands are case sensitive):

· start cluster – Starts Velocity for each cache server in the cluster

· stop cluster – Stops Velocity for each cache server in the cluster

· create cache – Creates a new named cache

· delete cache – Deletes an existing cache

· list host – Lists all of the cache servers in the cluster

· list cache – Lists all of the caches configured in the cache cluster

· show hoststats <cache server>:<cache port>– Lists statistics for a particular cache server

The first thing that you will want to do after installing Velocity is to start up the cache cluster. Enter the following command:

start cluster

Using Velocity with an ASP.NET MVC Application

After you have Velocity up and running, you can build an ASP.NET MVC application that uses the Velocity cache. In order to use Velocity in a project, you will need to add references to the following assemblies:

· CacheBaseLibrary.dll

· ClientLibrary.dll

You can find these assemblies in the Program Files\Microsoft Distributed Cache folder on any machine where you installed Velocity. You can copy these assemblies from the cache server to your development server.

You also need to modify your ASP.NET MVC application’s web configuration (web.config) file. Add the following section handler to the <configSections> section:

  1. <section name="dcacheClient"  
  2.     type="System.Configuration.IgnoreSectionHandler"  
  3.     allowLocation="true" allowDefinition="Everywhere"/>  

Next, add the following section anywhere within your configuration file (outside of another section):

  1. <dcacheClient deployment="simple" localCache="false">  
  2. <hosts>  
  3.    <!–List of hosts –>  
  4.    <host name="localhost"  
  5.       cachePort="22233"  
  6.       cacheHostName="DistributedCacheService" />  
  7.    </hosts>  
  8. </dcacheClient>  

You might need to change one value here. This section lists one cache host with the name localhost. In other words, the MVC application will contact the cache server on the local computer. If the cache server is located somewhere else on your network, you’ll need to change name to point at the right server.

Adding and Retrieving Items from the Cache

Using the Velocity distributed cache is very similar to using the normal ASP.NET cache. You can use the following methods to add, retrieve, and remove items from the distributed cache:

· Add() – Adds a new item to the distributed cache. If an item with the same key already exists then an exception is thrown.

· Get() – Gets an item with a certain key from the distributed cache.

· Put () – Adds a new item to the distributed cache. If an item with the same key already exists then the item is replaced.

· Remove() – Removes an existing item from the distributed cache.

Let’s look at a concrete sample. The MVC controller in Listing 1 uses the distributed cache to cache a set of Movie database records.

Listing 1 – HomeController.cs

  1. using System;  
  2. using System.Collections.Generic;  
  3. using System.Linq;  
  4. using System.Web;  
  5. using System.Web.Mvc;  
  6. using System.Data.Caching;  
  7. using Tip39.Models;  
  8. using System.Diagnostics;  
  9. using System.Web.Configuration;  
  10. using System.Web.Hosting;  
  11. using System.Data.Linq.Mapping;  
  12. using System.Data.Linq;  
  13.   
  14. namespace Tip39.Controllers  
  15. {  
  16.     [HandleError]  
  17.     public class HomeController : Controller  
  18.     {  
  19.         private DataContext _dataContext;  
  20.         private Table<Movie> _table;  
  21.   
  22.         public HomeController()  
  23.         {  
  24.             // Get connection string  
  25.             var conString = WebConfigurationManager.ConnectionStrings["Movies"].ConnectionString;  
  26.   
  27.             // Get XML mapping source  
  28.             var url = HostingEnvironment.MapPath("~/Models/Movie.xml");  
  29.             var xmlMap = XmlMappingSource.FromUrl(url);  
  30.   
  31.             // Create data context  
  32.             _dataContext = new DataContext(conString, xmlMap);  
  33.             _table = _dataContext.GetTable<Movie>();  
  34.         }  
  35.   
  36.   
  37.         public ActionResult Index()  
  38.         {  
  39.             // Try to get movies from cache  
  40.             var factory = new CacheFactory();  
  41.             var cache = factory.GetCache("default");  
  42.             var movies = (List<Movie>)cache.Get("movies");  
  43.              
  44.             // If fail, get movies from db  
  45.             if (movies != null)  
  46.             {  
  47.                 Debug.WriteLine("Got movies from cache");  
  48.             }  
  49.             else  
  50.             {  
  51.                 movies = (from m in _table select m).ToList();  
  52.                 cache.Put("movies", movies);  
  53.                 Debug.WriteLine("Got movies from db");  
  54.             }  
  55.   
  56.             // Display movies in view  
  57.             return View("Index", movies);  
  58.         }  
  59.   
  60.     }  
  61. }  

The Index() method returns all of the rows from the movies database table. First, the method attempts to retrieve the records from the cache. If that fails, the records are retrieved from the database and added to the cache.

The Index() method calls Debug.WriteLine() to write messages to the Visual Studio Console window. When the records are retrieved from the distributed cache, this fact is reported. When the records are retrieved from the database, this fact is also reported (see Figure 2).

Figure 2 – Using the Visual Studio Console to track cache activities

image

You also can use the Velocity Administration Tool to monitor the distributed cache. Executing the following command displays statistics on the distributed cache:

show hoststats server name:22233

Replace server name with the name of your cache server (unfortunately, localhost does not work). When you run this command, you get super valuable statistics on the number of items in the cache, the size of the cache, the number of times a request has been made against the cache, and so on (see Figure 3).

Figure 3 – Cache Statistics

image

The Index() method in Listing 1 first creates an instance of the CacheFactory class. The CacheFactory class is used to retrieve a particular cache from the distributed cache.

Velocity can host multiple named caches. You can group different data into different caches. Think of each named cache like a separate database. When you first install Velocity, you get one named cache named “default”. In Listing 1, the CacheFactory is used to retrieve the “default” cache.

Next, the Cache.Get() method is used to retrieve the movie database records from the cache. The first time the Index() method is invoked, the Get() method won’t return anything because there won’t be any data in the distributed cache.

If the Get() method fails to return any database records from the cache then the records are retrieved from the actual database. The records are added to the distributed cache with the help of the Put() method.

Notice that the Cache stores and retrieves items as untyped objects. You must cast items retrieved from the cache to a particular type before using the items in your code. Most likely, when using the distributed cache in a production application, you’ll create a strongly typed wrapper class around the distributed cache.

Also, be aware that the distributed cache survives across Visual Studio project rebuilds. If you want to clear the distributed class while developing an application that interacts with the cache, execute this sequence of commands from the Velocity Administration Tool:

stop cluster

start cluster

What can be Cached?

You can add any serializable class to the distributed cache. That means that you can add any class that is marked with the [Serializable] attribute (all of the dependent classes of a serializable class must also be serializable).

The Home controller in Listing 1 uses LINQ to SQL to grab database records from the database. You must be careful when using LINQ to SQL with the distributed cache since, depending on how you create your LINQ to SQL classes, the classes won’t be serializable.

If you use the Object Relational Designer to generate your LINQ to SQL classes then your LINQ to SQL classes will not be serializable. To work around this problem, I built my LINQ to SQL classes by hand. The Movie.cs class is contained in Listing 2.

Listing 2 – Models\Movie.cs

  1. using System;  
  2.   
  3. namespace Tip39.Models  
  4. {  
  5.     [Serializable]  
  6.     public class Movie  
  7.     {  
  8.         public int Id { getset; }  
  9.         public string Title { getset; }  
  10.         public string Director { getset; }  
  11.         public DateTime DateReleased { getset; }  
  12.     }  
  13. }  

Notice that the Movie class includes a [Serializable] attribute.

The XML mapping file in Listing 3 is used in the HomeController constructor to initialize the LINQ to SQL DataContext. This XML mapping file maps the Movie class and its properties to the Movies table and its columns.

Listing 3 – Models\Movie.xml

  1. <?xml version="1.0" encoding="utf-8" ?>  
  2. <Database Name="MoviesDB" xmlns="http://schemas.microsoft.com/linqtosql/mapping/2007">  
  3. <Table Name="Movies" Member="Tip39.Models.Movie">  
  4.     <Type Name="Tip39.Models.Movie">  
  5.         <Column Name="Id" Member="Id" IsPrimaryKey="true" IsDbGenerated="true"/>  
  6.         <Column Name="Title" Member="Title" />  
  7.         <Column Name="Director" Member="Director" />  
  8.         <Column Name="DateReleased" Member="DateReleased" />  
  9.     </Type>  
  10. </Table>  
  11. </Database>  

One other warning about using LINQ to SQL with the distributed cache. Realize that a LINQ to SQL query is not actually executed against the database until you start iterating through the query results. Make sure that you add the results of a LINQ to SQL query, instead of the query itself, to the cache.

In the Index() method in Listing 1, the movie records are added to the cache with the following two lines of code:

  1. movies = (from m in _table select m).ToList();  
  2. cache.Put("movies", movies);  

Notice that the ToList() method is called on the LINQ to SQL query. Calling the ToList() method forces the query to be executed against the database so that the actual results are assigned to the movies variable instead of the LINQ to SQL query expression.

Using Velocity as a Session State Provider

By default, the ASP.NET framework stores session state in the same process as your ASP.NET MVC application. Storing session state in-process provides you with the best performance. However, this option has one huge drawback. You can’t host your ASP.NET MC application on multiple web servers when using in-process session state.

The ASP.NET framework provides you with two alternatives to in-process session state. You can store your session state information with a state server (a Windows service) hosted on a machine in your network. or, you can store your session state information in a SQL Server database. Both of these options enable you to create a central session state server so that you can scale your ASP.NET MVC application up to use multiple web servers.

There are disadvantages associated with using either the state server or the SQL Server approach to storing session state. The first option, the state server approach, is not very fault tolerant. The second option, the SQL Server option, is not very fast (each request made against your MVC application causes a database query to be executed to retrieve session state for the current user).

Velocity provides you with a better option for storing out-of-process session state. You can store your state information in the Velocity distributed cache. Unlike the state server approach, the distributed cache is fault tolerant. Unlike the SQL Server approach, the Velocity cache is entirely in-memory so it is comparatively fast.

Imagine that you want to keep count of the number of times that a particular user has visited a web page (see Figure 4). You can store a count of visits in session state. The Counter controller in Listing 4 maintains a count of visits with an item in session state named count.

Figure 4 — Keeping count of page views

image

Listing 4 – CounterController.cs

  1. using System.Web.Mvc;  
  2.   
  3. namespace Tip39.Controllers  
  4. {  
  5.     public class CounterController : Controller  
  6.     {  
  7.         public ActionResult Index()  
  8.         {  
  9.             var count = (int?)Session["count"] ?? 0;  
  10.             count++;  
  11.             Session["count"] = count;  
  12.             return View("Index", count);  
  13.         }  
  14.     }  
  15. }  

By default, the Counter controller will use in-process session state. If we want to use the Velocity session state store then we need to modify our web configuration (web.config) file. You need to add the <sessionState> information in Listing 5 within the <system.web> section.

Listing 5 – Session Configuration for Velocity

  1. <sessionState mode="Custom" customProvider="dcache">  
  2. <providers>  
  3.   <add   
  4.      name="dcache"   
  5.      type="System.Data.Caching.SessionStoreProvider"/>  
  6. </providers>  
  7. </sessionState>  

After you make this change to the web configuration file, session state information is stored in the distributed cache instead of in-process. You can verify that the Counter controller is using the distributed cache by using the Velocity Administration Tool. Executing the following command will display how many times the distributed cache has been accessed:

show hoststats server name:22233

Each time the Counter controller Index() action method is invoked, the Total Requests statistic is incremented by two: once for reading from session state and once for writing to session state. See Figure 5.

Figure 5 – Seeing Total Requests

image

Notice that you can start using the Velocity session state store without changing a single line of code in your existing application. You can switch session state providers entirely within the web configuration file. This means that you can initially build your application to use in-process session state and switch to the Velocity session state provider in the future without experiencing a single tingle of pain.

Summary

In this tip, I’ve provided you with a brief introduction to the Velocity distributed cache. I demonstrated how you can use the distributed cache in the context of an ASP.NET MVC application to store database records across multiple requests. I also showed you how to take advantage of the Velocity session state provider to store session state in the distributed cache.

In this tip, I’ve only provided the most basic introduction to Velocity. There are many features of Velocity that I have not discussed. For example, Velocity supports a locking mechanism. You can use either optimistic or pessimistic locking when working with Velocity to prevent concurrency violations. You also can use Velocity to tag and search items that you add to the cache.

Even though this was a brief introduction, I hope that I have provided enough detail to prompt you to experiment with Velocity in your ASP.NET MVC applications.

[原创]SQL Server2005新增SQL学习笔记

mikel阅读(643)

  1. 1.CROSS APPLY :
    可以理解成INNER JOIN
    适用:
        *  表A 存储的是客户信息,每个客户ID一条记录;表B存储的是发布记录,每个客户ID对应多条记录,
    需要取出每个客户最新的一条的发布信息记录
        * 表A存储多客户发布的多条信息,想取得每个客户最新发布的单条信息
        *
    代码:
    select
    distinct info.UserID,id.DisplayDate
    from view_InformationSimple as info
    CROSS apply(select top(1)DisplayDate,UserId from view_Information as i where i.UserId=info.UserId order by DisplayDate DESC)as idCROSS APPLY :可以理解成INNER JOIN 例如:select distinct info.UserID,id.DisplayDate from view_InformationSimple as info
    CROSS apply(select top(1)DisplayDate,UserId from view_Information as i where i.UserId=info.UserId order by DisplayDate DESC)as id 取得唯一用户的最新发布的信息
  2.  

[Delphi]Win2003下提示Can't load package:dclite70.bpl

mikel阅读(681)

转载:http://hi.baidu.com/delphi%B1%E0%B3%CC/blog/item/93da634c204c2cfad72afc0e.html

win2003server SP1 + delphi7 ,在启动DELPHI时会提示Can't load package:dclite70.bpl,进入后打开Options时出现异常。
解决方法:
右击“我的电脑”。单击“属性”。
在“系统属性”中单击“高级”。
在“性能”中单击“设置”。
在“性能选项”中单击“数据执行保护”。
单击“添加”。选择Delphi7安装目录,然后到Bin目录下选择Delphi32.exe。
应用重启DELPHI即可。

全是Window2003的Data Execution Prevention(DEF数据执行保护)造成的。

引用
数据执行保护 (DEP) 是 Microsoft Windows XP Service Pack 2 (SP2) /Windows2003支持的一种处理器功能,它禁止在标记为数据存储的内存区域中执行代码。此功能也称作“不执行”和“执行保护”。当尝试运行标记的 数据页中的代码时,就会立即发生异常并禁止执行代码。这可以防止攻击者使用代码致使数据缓冲区溢出,然后执行该代码。数据执行保护 (DEP) 有助于防止病毒和其他安全威胁造成破坏,它们的攻击方法是从只有 Windows 和其他程序可以使用的内存位置执行恶意代码。

也就是说,这个DEF数据执行保护是MS为了防范其系统中不知哪处的漏洞而被攻击者利用来制造数据缓冲区溢出而达到攻击入侵的目的的。而默认是执行保护的,所以给Delphi7造成这个错误。

[Memcached]Discuz!NT中集成Memcached分布式缓存

mikel阅读(539)

      大约在两年前我写过一篇关于Discuz!NT缓存架构的文章,在那篇文章的结尾介绍了在IIS中如果开启多个
应用程序池会造成多个缓存实例之间数据同步的问题。虽然给出了一个解决方案,但无形中却把压力转移到了
磁盘I/O上(多个进程并发访问cache.config文件)。其实从那时起我就开始关注有什么更好的方案,当然今
天本文中所说的Memcached,以及Velocity等这类的分布式缓存方案之前都考虑过,但一直未能决定该使用那
个。起码Velocity要在.net 4.0之后才会提供,虽然是原生态,但有些远水解不了近火。
      我想真正等到Velocity能堪当重任还要等上一段时间。于是我就开始将注意力转移到了Memcached,必定
有Facebook这只“超级小白鼠”使用它并且反响还不错。所以就开始尝试动手在产品中集成Memcached。
      其实在之前的那篇关于Discuz!NT缓存架构的文章中已提到过,使用了设计模式中的“策略模式”来构造。
所以为了与以往使用缓存的代码格式相兼容,所以这里采用新添加MemCachedStrategy(MemCached策略)
来构造一个缓存策略类以便于当管理后台开启“MemCached”时以“MemCached策略模式”来做为当前系统默认
的策略模式。
    其代码段如下(Discuz.Cache/MemCached.cs):
    

/// <summary>
/// MemCache缓存策略类
/// </summary>
public class MemCachedStrategy : Discuz.Cache.ICacheStrategy
{
    
/// <summary>
    
/// 添加指定ID的对象
    
/// </summary>
    
/// <param name="objId"></param>
    
/// <param name="o"></param>
    public void AddObject(string objId, object o)
    {
        RemoveObject(objId);
        
if (TimeOut > 0)
        {
            MemCachedManager.CacheClient.Set(objId, o, System.DateTime.Now.AddMinutes(TimeOut));
        }
        
else
        {
            MemCachedManager.CacheClient.Set(objId, o);
        }
    }
    
/// <summary>
    
/// 添加指定ID的对象(关联指定文件组)
    
/// </summary>
    
/// <param name="objId"></param>
    
/// <param name="o"></param>
    
/// <param name="files"></param>
    public void AddObjectWithFileChange(string objId, object o, string[] files)
    {
        ;
    }
    
/// <summary>
    
/// 添加指定ID的对象(关联指定键值组)
    
/// </summary>
    
/// <param name="objId"></param>
    
/// <param name="o"></param>
    
/// <param name="dependKey"></param>
    public void AddObjectWithDepend(string objId, object o, string[] dependKey)
    {
        ;
    }
    
/// <summary>
    
/// 移除指定ID的对象
    
/// </summary>
    
/// <param name="objId"></param>
    public void RemoveObject(string objId)
    {
        
if (MemCachedManager.CacheClient.KeyExists(objId))
            MemCachedManager.CacheClient.Delete(objId);
    }
    
/// <summary>
    
/// 返回指定ID的对象
    
/// </summary>
    
/// <param name="objId"></param>
    
/// <returns></returns>
    public object RetrieveObject(string objId)
    {
        
return MemCachedManager.CacheClient.Get(objId);
    }
    
/// <summary>
    
/// 到期时间
    
/// </summary>
    public int TimeOut { setget; }
}

    
    上面类实现的接口Discuz.Cache.ICacheStrategy定义如下:


/// <summary>
 
/// 公共缓存策略接口
 
/// </summary>
 public interface ICacheStrategy
 {
     
/// <summary>
     
/// 添加指定ID的对象
     
/// </summary>
     
/// <param name="objId"></param>
     
/// <param name="o"></param>
     void AddObject(string objId, object o);
     
/// <summary>
     
/// 添加指定ID的对象(关联指定文件组)
     
/// </summary>
     
/// <param name="objId"></param>
     
/// <param name="o"></param>
     
/// <param name="files"></param>
     void AddObjectWithFileChange(string objId, object o, string[] files);
     
/// <summary>
     
/// 添加指定ID的对象(关联指定键值组)
     
/// </summary>
     
/// <param name="objId"></param>
     
/// <param name="o"></param>
     
/// <param name="dependKey"></param>
     void AddObjectWithDepend(string objId, object o, string[] dependKey);
     
/// <summary>
     
/// 移除指定ID的对象
     
/// </summary>
     
/// <param name="objId"></param>
     void RemoveObject(string objId);
     
/// <summary>
     
/// 返回指定ID的对象
     
/// </summary>
     
/// <param name="objId"></param>
     
/// <returns></returns>
     object RetrieveObject(string objId);
     
/// <summary>
     
/// 到期时间
     
/// </summary>
     int TimeOut { set;get;}
}

     当然在MemCachedStrategy类中还有一个对象要加以说明,就是MemCachedManager,该类主要是对
Memcached一些常操作和相关初始化实例调用的“封装”,下面是是其变量定义和初始化构造方法的代码:

/// <summary>
/// MemCache管理操作类
/// </summary>
public sealed class MemCachedManager
{
    
#region 静态方法和属性
    
private static MemcachedClient mc = null;
    
private static SockIOPool pool = null;
    
private static MemCachedConfigInfo memCachedConfigInfo = MemCachedConfigs.GetConfig();
    
private static string [] serverList = null;
    
static MemCachedManager()
    {
        CreateManager();
    }
    
private static void CreateManager()
    {
        serverList 
= Utils.SplitString(memCachedConfigInfo.ServerList, ""r"n");
        pool 
= SockIOPool.GetInstance(memCachedConfigInfo.PoolName);
        pool.SetServers(serverList);
        pool.InitConnections 
= memCachedConfigInfo.IntConnections;//初始化链接数
        pool.MinConnections = memCachedConfigInfo.MinConnections;//最少链接数
        pool.MaxConnections = memCachedConfigInfo.MaxConnections;//最大连接数
        pool.SocketConnectTimeout = memCachedConfigInfo.SocketConnectTimeout;//Socket链接超时时间
        pool.SocketTimeout = memCachedConfigInfo.SocketTimeout;// Socket超时时间
        pool.MaintenanceSleep = memCachedConfigInfo.MaintenanceSleep;//维护线程休息时间
        pool.Failover = memCachedConfigInfo.FailOver; //失效转移(一种备份操作模式)
        pool.Nagle = memCachedConfigInfo.Nagle;//是否用nagle算法启动socket
        pool.HashingAlgorithm = HashingAlgorithm.NewCompatibleHash;
        pool.Initialize();
        
        mc 
= new MemcachedClient();
        mc.PoolName 
= memCachedConfigInfo.PoolName;
        mc.EnableCompression 
= false;
    }
    
/// <summary>
    
/// 缓存服务器地址列表
    
/// </summary>
    public static string[] ServerList
    {
        
set
        {
            
if (value != null)
                serverList 
= value;
        }
        
get { return serverList; }
    }
    
/// <summary>
    
/// 客户端缓存操作对象
    
/// </summary>
    public static MemcachedClient CacheClient
    {
        
get
        {
            
if (mc == null)
                CreateManager();
            
return mc;
        }
    }
    
public static void Dispose()
    {
        
if (pool != null)
            pool.Shutdown();
    }


    上面代码中构造方法会初始化一个池来管理执行Socket链接,并提供静态属性CacheClient以便MemCachedStrategy
来调用。
    当然我还在这个管理操作类中添加了几个方法分别用于检测当前有效的分布式缓存服务器的列表,向指定(或全部)
缓存服务器发送特定stats命令来获取当前缓存服务器上的数据信息和内存分配信息等,相应的方法如下(详情见注释):

/// <summary>
/// 获取当前缓存键值所存储在的服务器
/// </summary>
/// <param name="key">当前缓存键</param>
/// <returns>当前缓存键值所存储在的服务器</returns>
public static string GetSocketHost(string key)
{
    
string hostName = "";
    SockIO sock 
= null;
    
try
    {
        sock 
= SockIOPool.GetInstance(memCachedConfigInfo.PoolName).GetSock(key);
        
if (sock != null)
        {
            hostName 
= sock.Host;
        }
    }
    
finally
    {
        
if (sock != null)
            sock.Close();
    }
    
return hostName;
}
/// <summary>
/// 获取有效的服务器地址
/// </summary>
/// <returns>有效的服务器地</returns>
public static string[] GetConnectedSocketHost()
{
    SockIO sock 
= null;
    
string connectedHost = null;
    
foreach (string hostName in serverList)
    {
        
if (!Discuz.Common.Utils.StrIsNullOrEmpty(hostName))
        {
            
try
            {
                sock 
= SockIOPool.GetInstance(memCachedConfigInfo.PoolName).GetConnection(hostName);
                
if (sock != null)
                {
                    connectedHost 
= Discuz.Common.Utils.MergeString(hostName, connectedHost);
                }
            }
            
finally
            {
                
if (sock != null)
                    sock.Close();
            }
        }
    }
    
return Discuz.Common.Utils.SplitString(connectedHost, ",");
}
/// <summary>
/// 获取服务器端缓存的数据信息
/// </summary>
/// <returns>返回信息</returns>
public static ArrayList GetStats()
{
    ArrayList arrayList 
= new ArrayList();
    
foreach (string server in serverList)
    {
        arrayList.Add(server);
    }
    
return GetStats(arrayList, Stats.Default, null);
}
/// <summary>
/// 获取服务器端缓存的数据信息
/// </summary>
/// <param name="serverArrayList">要访问的服务列表</param>
/// <returns>返回信息</returns>
public static ArrayList GetStats(ArrayList serverArrayList, Stats statsCommand, string param)
{
    ArrayList statsArray 
= new ArrayList();
    param 
=  Utils.StrIsNullOrEmpty(param) ? "" : param.Trim().ToLower();
    
string commandstr = "stats";
    
//转换stats命令参数
    switch (statsCommand)
    {
        
case Stats.Reset: { commandstr = "stats reset"break; }
        
case Stats.Malloc: { commandstr = "stats malloc"break; }
        
case Stats.Maps: { commandstr = "stats maps"break; }
        
case Stats.Sizes: { commandstr = "stats sizes"break; }
        
case Stats.Slabs: { commandstr = "stats slabs"break; }
        
case Stats.Items: { commandstr = "stats"break; }
        
case Stats.CachedDump:
        {
            
string[] statsparams = Utils.SplitString(param, " ");
            
if(statsparams.Length == 2)
                
if(Utils.IsNumericArray(statsparams))
                    commandstr 
= "stats cachedump  " + param;
            
break;                     
        }
        
case Stats.Detail:
            {
                
if(string.Equals(param, "on"|| string.Equals(param, "off"|| string.Equals(param, "dump"))
                    commandstr 
= "stats detail " + param.Trim();
                
break;
            }
        
default: { commandstr = "stats"break; }
    }
    
//加载返回值
    Hashtable stats = MemCachedManager.CacheClient.Stats(serverArrayList, commandstr);
    
foreach (string key in stats.Keys)
    {
        statsArray.Add(key);
        Hashtable values 
= (Hashtable)stats[key];
        
foreach (string key2 in values.Keys)
        {
            statsArray.Add(key2 
+ ":" + values[key2]);
        }
    }
    
return statsArray;
}
/// <summary>
/// Stats命令行参数
/// </summary>
public enum Stats
{
    
/// <summary>
    
/// stats : 显示服务器信息, 统计数据等
    
/// </summary>
    Default = 0,
    
/// <summary>
    
/// stats reset : 清空统计数据
    
/// </summary>
    Reset = 1,
    
/// <summary>
    
/// stats malloc : 显示内存分配数据
    
/// </summary>
    Malloc = 2,
    
/// <summary>
    
/// stats maps : 显示"/proc/self/maps"数据
    
/// </summary>
    Maps =3,
    
/// <summary>
    
/// stats sizes
    
/// </summary>
    Sizes = 4,
    
/// <summary>
    
/// stats slabs : 显示各个slab的信息,包括chunk的大小,数目,使用情况等
    
/// </summary>
    Slabs = 5,
    
/// <summary>
    
/// stats items : 显示各个slab中item的数目和最老item的年龄(最后一次访问距离现在的秒数)
    
/// </summary>
    Items = 6,
    
/// <summary>
    
/// stats cachedump slab_id limit_num : 显示某个slab中的前 limit_num 个 key 列表
    
/// </summary>
    CachedDump =7,
    
/// <summary>
    
/// stats detail [on|off|dump] : 设置或者显示详细操作记录   on:打开详细操作记录  off:关闭详细操作记录 dump: 显示详细操作记录(每一个键值get,set,hit,del的次数)
    
/// </summary>
    Detail = 8
}

    当然在配置初始化缓存链接池时使用了配置文件方式(memcached.config)来管理相关参数,其info信息
类说明如下(Discuz.Config/MemCachedConfigInfo.cs):

/// <summary>
/// MemCached配置信息类文件
/// </summary>
public class MemCachedConfigInfo : IConfigInfo
{
    
private bool _applyMemCached;
    
/// <summary>
    
/// 是否应用MemCached
    
/// </summary>
    public bool ApplyMemCached
    {
        
get
        {
            
return _applyMemCached;
        }
        
set
        {
            _applyMemCached 
= value;
        }
    }
    
private string _serverList;
    
/// <summary>
    
/// 链接地址
    
/// </summary>
    public string ServerList
    {
        
get
        {
            
return _serverList;
        }
        
set
        {
            _serverList 
= value;
        }
    }
    
private string _poolName;
    
/// <summary>
    
/// 链接池名称
    
/// </summary>
    public string PoolName
    {
        
get
        {
            
return Utils.StrIsNullOrEmpty(_poolName) ? "DiscuzNT_MemCache" : _poolName;
        }
        
set
        {
            _poolName 
= value;
        }
    }
    
private int _intConnections;
    
/// <summary>
    
/// 初始化链接数
    
/// </summary>
    public int IntConnections
    {
        
get
        {
            
return _intConnections > 0 ? _intConnections : 3;
        }
        
set
        {
            _intConnections 
= value;
        }
    }
    
private int _minConnections;
    
/// <summary>
    
/// 最少链接数
    
/// </summary>
    public int MinConnections
    {
        
get
        {
            
return _minConnections > 0 ? _minConnections : 3;
        }
        
set
        {
            _minConnections 
= value;
        }
    }
    
private int _maxConnections;
    
/// <summary>
    
/// 最大连接数
    
/// </summary>
    public int MaxConnections
    {
        
get
        {
            
return _maxConnections > 0 ?_maxConnections : 5;
        }
        
set
        {
            _maxConnections 
= value;
        }
    }
    
private int _socketConnectTimeout;
    
/// <summary>
    
/// Socket链接超时时间
    
/// </summary>
    public int SocketConnectTimeout
    {
        
get
        {
            
return _socketConnectTimeout > 1000 ? _socketConnectTimeout : 1000;
        }
        
set
        {
            _socketConnectTimeout 
= value;
        }
    }
    
private int _socketTimeout;
    
/// <summary>
    
/// socket超时时间
    
/// </summary>
    public int SocketTimeout
    {
        
get
        {
            
return _socketTimeout > 1000 ? _maintenanceSleep : 3000;
        }
        
set
        {
            _socketTimeout 
= value;
        }
    }
    
private int _maintenanceSleep;
    
/// <summary>
    
/// 维护线程休息时间
    
/// </summary>
    public int MaintenanceSleep
    {
        
get
        {
            
return _maintenanceSleep > 0 ? _maintenanceSleep : 30;
        }
        
set
        {
            _maintenanceSleep 
= value;
        }
    }
    
private bool _failOver;
    
/// <summary>
    
/// 链接失败后是否重启,详情参见http://baike.baidu.com/view/1084309.htm
    
/// </summary>
    public bool FailOver
    {
        
get
        {
            
return _failOver;
        }
        
set
        {
            _failOver 
= value;
        }
    }
    
private bool _nagle;
    
/// <summary>
    
/// 是否用nagle算法启动socket
    
/// </summary>
    public bool Nagle
    {
        
get
        {
            
return _nagle;
        }
        
set
        {
            _nagle 
= value;
        }
    }
}     

     这些参数我们通过注释应该有一些了解,可以说memcached的主要性能都是通过这些参数来决定的,大家
应根据自己公司产品和应用的实际情况配置相应的数值。
     当然,做完这一步之后就是对调用“缓存策略”的主体类进行修改来,使其根据对管理后台的设计来决定
加载什么样的缓存策略,如下:

/// <summary>
/// Discuz!NT缓存类
/// 对Discuz!NT论坛缓存进行全局控制管理
/// </summary>
public class DNTCache
{
    .
    
    
//通过该变量决定是否启用MemCached
    private static bool applyMemCached = MemCachedConfigs.GetConfig().ApplyMemCached;     
    
/// <summary>
    
/// 构造函数
    
/// </summary>
    private DNTCache()
    {
        
if (applyMemCached)
            cs 
= new MemCachedStrategy();
        
else
        {
            cs 
= new DefaultCacheStrategy();
            objectXmlMap 
= rootXml.CreateElement("Cache");
            
//建立内部XML文档.
            rootXml.AppendChild(objectXmlMap);
            
//LogVisitor clv = new CacheLogVisitor();
            
//cs.Accept(clv);

            cacheConfigTimer.AutoReset 
= true;
            cacheConfigTimer.Enabled 
= true;
            cacheConfigTimer.Elapsed 
+= new System.Timers.ElapsedEventHandler(Timer_Elapsed);
            cacheConfigTimer.Start();
        }
    }


    到这里,主要的开发和修改基本上就告一段落了。下面开始介绍一下如果使用Stats命令来查看缓存的
分配和使用等情况。之前在枚举类型Stats中看到该命令有几个主要的参数,分别是:
 

    stats
    stats reset
    stats malloc
    stats maps
    stats sizes
    stats slabs
    stats items
    stats cachedump slab_id limit_num
    stats detail [on|off|dump]

    
    而JAVAEYE的 robbin 写过一篇文章:贴一段遍历memcached缓存对象的小脚本,来介绍如何使用其中的  
“stats cachedump”来获取信息。受这篇文章的启发,我将MemCachedClient.cs文件中的Stats方法加以修
改,添加了一个command参数(字符串型),这样就可以向缓存服务器发送上面所说的那几种类型的命令了。
    测试代码如下:
    

protected void Submit_Click(object sender, EventArgs e)
{
    ArrayList arrayList 
= new ArrayList();
    arrayList.Add(
"10.0.1.52:11211");//缓存服务器的地址

    StateResult.DataSource 
= MemCachedManager.GetStats(arrayList, (MemCachedManager.Stats)         
                                     Utils.StrToInt(StatsParam.SelectedValue, 
0), Param.Text);
    StateResult.DataBind();            
}

    页面代码如下:


     我这样做的目的有两个,一个是避免每次都使用telnet协议远程登陆缓存服务器并输入相应的命令行
参数(我记忆力不好,参数多了之后就爱忘)。二是将来会把这个页面功能内置到管理后台上,以便后台
管理员可以动态监测每台缓存服务器上的数据。
     好了,到这里今天的内容就差不多了。在本文中我们看到了使用设计模式的好处,通过它我们可以让
自己写的代码支持“变化”。这里不妨再多说几句,大家看到了velocity在使用上也是很方便,如果可以
的话,未来可以也会将velocity做成一个“缓存策略”,这样站长或管理员就可以根据自己公司的实际情
况来加以灵活配置了。
    
    
      相关资料:   
      memcached 全面剖析.pdf   
      memcached 深度分析    

      Facebook 对memcached的提升


    原文链接:http://www.cnblogs.com/daizhj/archive/2009/02/09/1386652.html
    作者: daizhj, 代震军
    Tags: memcached,discuz!nt,缓存,设计模式,策略模式,strategy pattern
    
    网址: http://daizhj.cnblogs.com/  

[Memcached].NET下实现分布式缓存系统Memcached

mikel阅读(570)

转载:http://tech.it168.com/a2009/0907/675/000000675239.shtml

  【IT168 技术文档】在Web应用程序中,数据通常保存在RDBMS中,应用服务器从数据库中读取数据并在浏览器中显示。但随着数据量的增大、访问的集中,就会出现RDBMS的负载加重、数据库响应变慢、网站显示延迟等重大影响。为了缓解数据库的压力,提升Web应用程序的响应速度,人们提出了Web缓存的概念,这里缓存的概念不同于计算机硬盘控制器上的一块内存芯片。Web缓存位于Web服务器(1 个或多个,内容源服务器)和客户端之间(1个或多个),缓存会根据进来的请求保存输出内容的副本,例如html页面, 图片,文件(统称为副本),然后,当下一个请求来到的时候,如果是相同的URL,缓存直接使用副本响应访问请求,而不是向内容源服务器再次发送请求。使用 缓存可以减少相应延迟,因为请求在缓存服务器(离客户端更近)而不是源服务器被相应,这个过程耗时更少,让web服务器看上去相应更快;当副本被重用时还 可以减少网络带宽消耗。

  缓存的工作方式

  缓存的工作方式如下图所示:

   上图中的缓存服务器维护一个集中缓存并在其中存放经常被请求的对象,任何 Web 浏览器客户端都可以访问该缓存。来自内存/磁盘缓存的对象所需的处理资源比来自其他网络的对象所需的处理资源要少得多。因此,这可以提高客户端浏览器性 能、缩短用户响应时间并减少Internet 连接所消耗的带宽。

  上图1到6标示了当用户请求对象时,缓存服务器是如何响应的,主要经过下列步骤:

  第一个用户(客户端 1)请求 Web 对象。

  缓存服务器检查该对象是否存在于缓存中。由于该对象不存在于缓存服务器缓存中,因此,缓存服务器从Internet中的服务器请求该对象。

  Internet上的服务器将该对象返回给缓存服务器计算机。

  缓存服务器将该对象的一个副本保留在其缓存中,并将对象返回给客户端 1。

  客户端 2请求相同的对象。

  缓存服务器从其缓存中返回该对象,而不是从Internet中获取该对象。

   一般在组织的Web服务器前面部署缓存服务器。Web服务器是主持商业 Web 业务或可由业务合作伙伴访问的服务器。使用传入的Web请求,缓存服务器可以充当外部环境的 Web 服务器,并通过其缓存来完成客户端对Web内容的请求。只有在缓存无法处理请求时,缓存服务器才将请求转发到Web服务器。

  目前实现缓存的机制有几种,Memcached就是其中的一种。本文介绍了Memcached的概念,基本原理以及工作机制,并介绍了如何在ASP.NET中使用Memcache进行开发Web应用程序以提升Web应用程序的性能。

  Memcached介绍

   Memcached是一个高性能的分布式的内存对象缓存系统。Memcached是为了加快http://www.livejournal.com/访 问速度而诞生的一个项目,由Danga Interactive开发的,它通过在内存里维护一个统一的巨大的hash表来存储各 种格式的数据,包括图像、视 频、文件以及数据库检索的结果等。虽然最初为了加速 LiveJournal 访问速度而开发的,但是后来被很多大型的网站采用。它的缓存是一种分布式的,也就是可以允许不同主机上的多个用户同时访问这个缓存系统,这种方法不仅解决 了共享内存只能是单机的弊端,同时也解决了数据库检索的压力,最大的优点是提高了访问获取数据的速度,Memcached用于在动态应用中减少数据库负 载,提升访问速度,但是用来加速Web应用、降低数据库负载时比较多。Memcached也完全可以用到其他地方,比如分布式数据库,分布式计算等领域。

  Memcache的特点

  Memcached作为高速运行的分布式缓存服务器,具有以下的特点。

   协议简单。Memcached的服务器客户端通信并不使用复杂的XML等格式, 而使用简单的基于文本行的协议。因此,通过telnet也能在memcached上保存数据、取得数据。

   基于libevent的事件处理,libevent是一个事件触发的网络库,适用于windows、linux、bsd等多种平台,内部使用select、epoll、kqueue等系统调用管理事件机制。而且libevent在使用上可以做到跨平台,而且根据libevent官方网站上公布的数据统计,似乎也有着非凡的性能。

   内置内存存储方式。为了提高性能,memcached中保存的数据都存储在memcached内置的内存存储空间中。 由于数据仅存在于内存中,因此重启memcached、重启操作系统会 导致全部数据消失。 另外,内容容量达到指定值之后,就基于LRU(Least Recently Used)算法自动删除不使用的缓存。 memcached本身是为缓存而设计的服务器,因此并没有过多考虑数据的永久性问题。memcached默认情况下采用了名为Slab Allocator的机制分配、管理内存。 在该机制出现以前,内存的分配是通过对所有记录简单地进行malloc和free来进行的。 但是,这种方式会导致内存碎片,加重操作系统内存管理器的负担,最坏的情况下,会导致操作系统比memcached进程本身还慢。

   memcached不互相通信的分布式。memcached尽管是“分布式”缓存服务器,但服务器端并没有分布式功能。各个memcached不会互相通 信以共享信息。那么,怎样进行分布式呢?这完全取决于客户端的实现。Cache::Memcached的分布式方法简单来说,就是“根据服务器台数的余数 进行分散”。 求得键的整数哈希值,再除以服务器台数,根据其余数来选择服务器。

  Memcached的缓存是一种分布式的,可以让不同主机上的多个用户同时访问, 因此解决了共享内存只能单机应用的局限,更不会出现使用数据库做类似事情的时候,磁盘开销和阻塞的发生。

  Memcached使用了libevent(如果可以的话,在linux下使用epoll)来均衡任何数量的打开链接,使用非阻塞的网络I/O, 对内部对象实现引用计数(因此,针对多样的客户端,对象可以处在多样的状态), 使用自己的页块分配器和哈希表, 因此虚拟内存不会产生碎片并且虚拟内存分配的时间复杂度可以保证为O(1)。

  许多语言都实现了连接memcached的客户端,其中以Perl、PHP为主。 仅仅memcached网站上列出的语言就有Perl、PHP、Python、Ruby、C#、C/C++等等。

  Memcached的工作机制

   Memcached通过在内存中开辟一块区域来维持一个大的hash表来加快页面访问速度,虽然和数据库是独立的,但是目前主要用来缓存数据库的数据。 允许多个server通过网络形成一个大的hash,用户不必关心数据存放在哪,只调用相关接口就可。存放在内存的数据通过LRU算法进行淘汰出内存。同 时可以通过删除和设置失效时间来淘汰存放在内存的数据。

  Memcached在.NET中的应用

  一.Memcached服务器端的安装(此处将其作为系统服务安装)

  下载文件:memcached 1.2.1 for Win32 binaries (Dec 23, 2006)

  下载地址:http://jehiah.cz/projects/memcached-win32/files/memcached-1.2.1-win32.zip

  1.解压缩文件到c:\memcached

  2.命令行输入 c:\memcached\memcached.exe -d install'

  3.命令行输入 c:\memcached\memcached.exe -d start ,该命令启动 Memcached ,默认监听端口为 11211

  通过 memcached.exe -h 可以查看其帮助,查看memcache状态,telnet 192.168.0.98 11211。输入stats查询状态

   stats

   STAT pid 8601

   STAT uptime 696

  STAT time 1245832689

   STAT version 1.2.0

   STAT pointer_size 64

   STAT rusage_user 0.007998

   STAT rusage_system 0.030995

   STAT curr_items 1

   STAT total_items 1

   STAT bytes 76

   STAT curr_connections 2

   STAT total_connections 4

   STAT connection_structures 3

   STAT cmd_get 1

   STAT cmd_set 1

   STAT get_hits 1//命中次数

   STAT get_misses 0 //失效次数

   STAT bytes_read 97

   STAT bytes_written 620

   STAT limit_maxbytes 134217728

   END

   -d选项是启动一个守护进程

   -m是分配给Memcache使用的内存数量,单位是MB,我这里是10MB

   -u是运行Memcache的用户

   -l是监听的服务器IP地址,如果有多个地址的话,我这里假定指定了服务器的IP地址为本机ip地址

      -p是设置Memcache监听的端口,我这里设置了12000,最好是1024以上的端口

   -c选项是最大运行的并发连接数,默认是1024,我这里设置了256,按照你服务器的负载量来设定

   -P是设置保存Memcache的pid文件

  二..NET memcached client library(memcached的.NET客户端类库)

  下载memcached的.NET客户端类库,下载地址:https://sourceforge.net/projects/memcacheddotnet/里面有.net1.1 和 .net2.0的两种版本,里面还有.NET应用memcached的例子。

  三.应用

  1.新建ASP.NET站点,将Commons.dll,ICSharpCode.SharpZipLib.dll,log4net.dll,Memcached.ClientLibrary.dll添加到web引用。

   2.为了进行后续的测试,我们创建两个aspx页面,memcache.aspx和nomemcache.aspx,memcache.aspx是使用 MemcacheClient类加入了缓存机制的页面。nomemcache.aspx是没有加入缓存机制的页面,直接连接的数据库。一会我们通过观察数 据库事件和进行压力测试来测试在压力测试的情况下应用程序的性能。

  3.memcache.aspx.cs中添加对Memcached.ClientLibrary.dll的引用,即:using Memcached.ClientLibrary;Page_Load()中加入如下代码。

  protected void Page_Load(object sender, EventArgs e)

  {

  string[] serverlist = new string[] { "127.0.0.1:11211" };

  string poolName = "MemcacheIOPool";

  SockIOPool pool = SockIOPool.GetInstance(poolName);

  //设置连接池的初始容量,最小容量,最大容量,Socket 读取超时时间,Socket连接超时时间

  pool.SetServers(serverlist);

  pool.InitConnections = 1;

  pool.MinConnections = 1;

  pool.MaxConnections = 500;

  pool.SocketConnectTimeout = 1000;

  pool.SocketTimeout = 3000;

  pool.MaintenanceSleep = 30;

  pool.Failover = true;

  pool.Nagle = false;

  pool.Initialize();//容器初始化

  //实例化一个客户端

  MemcachedClient mc = new MemcachedClient();

  mc.PoolName = poolName;

  mc.EnableCompression = false;

  string key = "user_info";//key值

  object obj = new object();

  if (mc.KeyExists(key)) //测试缓存中是否存在key的值

  {

  obj = mc.Get(key);

  User user2 = (User)obj;

  Response.Write("
" + user2.Name + "," + user2.Pwd + "
");

  }

  else {

  string conStr = System.Configuration.ConfigurationManager.ConnectionStrings["ConnectionString"].ConnectionString;

  SQLConnection conn = new SQLConnection(conStr);

  conn.Open();

  string sql = "Select * From T_User Where id=1";

  SqlCommand cmd = new SqlCommand(sql, conn);

  SqlDataReader dr = cmd.ExecuteReader();

  User user = new User();

  while (dr.Read())

  {

  user.Name = dr["name"].ToString();

  user.Pwd = dr["pwd"].ToString();

  }

  dr.Close();

  conn.Close();

  mc.Set(key, user, System.DateTime.Now.AddMinutes(2)); //存储数据到缓存服务器,这里将user这个对象缓存,key 是"user_info1"

  Response.Write("
姓名:" + user.Name + ",密码:" + user.Pwd + "
");

  }

  }

  4.nomemcache.aspx是没有加缓存机制的直接连接数据库的页面。nomemcache.aspx.cs中的代码:

  protected void Page_Load(object sender, EventArgs e)

  {

  string conStr = System.Configuration.ConfigurationManager.ConnectionStrings["ConnectionString"].ConnectionString;

  SqlConnection conn = new SqlConnection(conStr);

  conn.Open();

  string sql = "Select * From T_User Where id=2";

  SqlCommand cmd = new SqlCommand(sql, conn);

  SqlDataReader dr = cmd.ExecuteReader();

  User user = new User();

  while (dr.Read())

  {

  user.Name = dr["name"].ToString();

  user.Pwd = dr["pwd"].ToString();

  }

  dr.Close();

  conn.Close();

  Response.Write("
姓名:" + user.Name + ",密码:" + user.Pwd + "
");

  }

  }

  5.测试

   测试memcache.aspx页面,该测试的主要目的是访问memcache.aspx页面,看是否看该页面走的是memcached而非访问的数据 库(第一次是访问数据库)。首先,我们运行memcache.aspx页面,通过Sql Server Profiler来查看运行memcache.aspx页面对数据库的操作情况。第一次运行memcache.aspx的时候,Sql Server Profiler里面显示memcache.aspx对数据库的操作,即执行了Select * From T_User Where id=1。

  memcache.aspx页面上第一次运行的时候显示如下信息:

  通过读取数据库得到的数据:

  姓名:lucy,密码:lucy。

  接着我们刷新memcache.aspx页面,页面上还显示上述信息:

  通过读取缓存得到的数据:

  姓名:lucy,密码:lucy

  但从Sql Server Profiler观察,memcache.aspx页面没有对数据库进行任何操作。说明我们第二次访问该页面是读取的缓存,接着不停的刷新页面,都显示的是通过读取缓存得到的数据。直到到达缓存失效时间。

   测试nomemcache.aspx,我们运行nomemcache.aspx页面,每刷新一次(包括第一次),Sql Server Profiler都记录了,nomemcache.aspx页面对数据库进行的操作,即之行了Select * From T_User Where id=2语句。说明每访问一次该页面,都要进行一次数据库的访问操作。

 四.压力测试以及性能分析

  这里我们使用Microsoft Web Application Stress Tool对web进行压力测试,Microsoft Web Application Stress Tool 是由微软的网站测试人员所开发,专门用来进行实际网站压力测试的一套工具。透过这套功能强大的压力测试工具,您可以使用少量的客户端计算机仿真大量用户上 线对网站服务所可能造成的影响,在网站实际上线之前先对您所设计的网站进行如同真实环境下的测试,以找出系统潜在的问题,对系统进行进一步的调整、设置工 作。就是因为这些特性,才使它具备了DOS轰炸的功能。

  1、工具简单设置

  打开Web Application Stress Tool,很简洁的一个页面,上面是工具栏,左下方是功能选项,右下方是详细设置选项。在对目标Web服务器进行压力测试之前,先对它进行一些必要的设置。

   (1).在“settings”的功能设置中(如下图),一个是Stress level (threads)这里是指定程序在后台用多少线程进行请求,也就是相当于模拟多少个客户机的连接,更加形象的就是说设置多少轰炸的线程数。一般填写 500~1000,因为这个线程数是根据本机的承受力来设置的,如果你对自己的机器配置有足够信心的话,那么设置的越高,轰炸的效果越好。

  (2).在“Test Run Time”中来指定一次压力测试需要持续的时间,分为天、小时、分、秒几个单位级别,你根据实际情况来设置吧!这里面设置测试时间为1分钟。

  (3).其余的选项大家可以根据自己的情况设置。

  2、压力测试

  步骤1:在工具中点右键,选择Add命令,增加了一个新的测试项目:memcache,对它进行设置,在主选项中的server中填写要测试的服务器的 IP地址,这里我们是在本机上进行测试,所以填写localhost。在下方选择测试的Web连接方式,这里的方式Verb选择 get,path选择要测试的Web页面路径,这里填写/WebMemCache/memcache.aspx,即加入缓存的memcache.aspx 页面(如下图)。

  步骤2:在“Settings”的功能设置中将Stress level (threads)线程数设置为500。完毕后,点工具中的灰色三角按钮即可进行测试(如下图)。

  同理,我们在建一个nomemcach的项目用来测试nomemcache.aspx页面。Memcach和nomemcach测试完毕后,点击工具栏上的Reports按钮查看测试报告:

  3.性能分析

  Memcache.aspx的测试报告:

  Overview

  ================================================================================

  Report name: 2009-7-20 10:52:00

  Run on: 2009-7-20 10:52:00

  Run length: 00:01:12

  Web Application Stress Tool Version:1.1.293.1

  Number of test clients: 1

  Number of hits: 2696

  Requests per Second: 44.93

  Socket Statistics

  ——————————————————————————–

  Socket Connects: 3169

  Total Bytes Sent (in KB): 646.80

  Bytes Sent Rate (in KB/s): 10.78

  Total Bytes Recv (in KB): 2019.37

  Bytes Recv Rate (in KB/s): 33.65

  Socket Errors

  ——————————————————————————–

  Connect: 0

  Send: 0

  Recv: 0

  Timeouts: 0

  RDS Results

  ——————————————————————————–

  Successful Queries: 0

  Page Summary

  Page Hits TTFB Avg TTLB Avg Auth Query

  ================================================================================

  GET /WebMemCache/memcache.aspx 2696 1.94 1.95 No No

  Nomemcache.aspx的测试报告:

  Overview

  ================================================================================

  Report name: 2009-7-20 10:54:01

  Run on: 2009-7-20 10:54:01

  Run length: 00:01:12

  Web Application Stress Tool Version:1.1.293.1

  Number of test clients: 1

  Number of hits: 2577

  Requests per Second: 42.95

  Socket Statistics

  ——————————————————————————–

  Socket Connects: 2860

  Total Bytes Sent (in KB): 589.32

  Bytes Sent Rate (in KB/s): 9.82

  Total Bytes Recv (in KB): 1932.75

  Bytes Recv Rate (in KB/s): 32.21

  Socket Errors

  ——————————————————————————–

  Connect: 0

  Send: 0

  Recv: 0

  Timeouts: 0

  RDS Results

  ——————————————————————————–

  Successful Queries: 0

  Page Summary

  Page Hits TTFB Avg TTLB Avg Auth Query

  ================================================================================

  GET /WebMemCache/nomemcache.aspx 2577 4.75 4.79 No No

   从测试报告上看出memcache.aspx页面在一分钟内的Hits(命中次数)2696,平均TTFB是(Total Time to First Byte)1.94,平均TTLB(Total Time to Last Byte)是1.95。这些参数都低于nomemcache.aspx。另外memcache.aspx的Requests per Second(每秒请求的次数)是 44.93高于nomemcache.aspx页面的42.95.这些参数都说明memcache.aspx页面的执行性能要高于 nomemcache.aspx页面。缓存起到了提高性能的作用。当然我这里面进行的测试只是模拟500个用户在1分钟内的访问对Web服务器性能的影 响。

  总结

  本文简单介绍了Memcached的基本原理,特点以及工作方式,接下来介绍了 Windows下Memcached服务器端程序的安装方法、在.NET应用程序中使用.NET memcached client library。接下来通过运行分析程序来了解memcached的工作原理机制,最后通过压力测试工具对没有加入Memcached机制的页面和加入 Memcached页面进行了压力测试,对比加入Memcached机制前后Web应用程序的性能。了解Memcached内部构造, 就能知道如何在应用程序中使用memcached才能使Web应用的速度更上一层楼。提升web应用程序的性能和访问速度。