【简 介】
所谓的映像劫持(IFEO)就是Image File Execution Options,位于注册表的 HKEY_LOCAL_MACHINE\SOFTWARE\Microsoft\Windows NT\CurrentVersion\Image File Execution Options 由于这个项主要是用来调试程序用的,对一般用户意义不大。默认是只有管理员和local system有权读写修改。
映像劫持的定义
所谓的映像劫持(IFEO)就是Image File Execution Options,位于注册表的
HKEY_LOCAL_MACHINE\SOFTWARE\Microsoft\Windows NT\CurrentVersion\Image File Execution Options 由于这个项主要是用来调试程序用的,对一般用户意义不大。默认是只有管理员和local system有权读写修改。
通俗一点来说,就是比如我想运行QQ.exe,结果运行的却是FlashGet.exe,也就是说在这种情况下,QQ程序被FLASHGET给劫持了,即你想运行的程序被另外一个程序代替了。
映像劫持病毒
虽然映像劫持是系统自带的功能,对我们一般用户来说根本没什么用的必要,但是就有一些病毒通过映像劫持来做文章,表面上看起来是运行了一个程序,实际上病毒已经在后台运行了。
大部分的病毒和木马都是通过加载系统启动项来运行的,也有一些是注册成为系统服务来启动,他们主要通过修改注册表来实现这个目的,主要有以下几个方面:
HKEY_LOCAL_MACHINE\SOFTWARE\Microsoft\Windows\CurrentVersion\Run
HKLM\SOFTWARE\Microsoft\Windows NT\CurrentVersion\Windows\AppInit_DLLs
HKEY_LOCAL_MACHINE\SOFTWARE\Microsoft\Windows NT\CurrentVersion\Winlogon\Notify
HKEY_LOCAL_MACHINE\SOFTWARE\Microsoft\Windows\CurrentVersion\RunOnce
HKEY_LOCAL_MACHINE\Software\Microsoft\Windows\CurrentVersion\RunServicesOnce
但是与一般的木马,病毒不同的是,就有一些病毒偏偏不通过这些来加载自己,不随着系统的启动运行,而是等到你运行某个特定的程序的时候运行, 这也抓住了一些用户的心理,一般的用户,只要发觉自己的机子中了病毒,首先要察看的就是系统的加载项,很少有人会想到映像劫持,这也是这种病毒高明的地 方。
映像劫持病毒主要通过修改注册表中的HKEY_LOCAL_MACHINE\SOFTWARE\Microsoft\Windows NT\CurrentVersion\Image File Execution options 项来劫持正常的程序,比如有一个病毒 vires.exe 要劫持 qq 程序,它会在上面注册表的位置新建一个qq.exe项,再这个项下面新建一个字符串的键值 Debugger 内容是:C:\WINDOWS\SYSTEM32\VIRES.EXE(这里是病毒藏身的目录)即可。当然如果你把该字符串值改为任意的其他值的话,系统 就会提示找不到该文件。
映像胁持的基本原理
WINDOWS NT系统在试图执行一个从命令行调用的可执行文件运行请求时,先会检查运行程序是不是可执行文件,如果是的话,再检查格式的,然后就会检查是否存在。如果 不存在的话,它会提示系统找不到文件或者是“指定的路径不正确等等。把这些键删除后,程序就可以运行!
映像劫持的应用
★ 禁止某些程序的运行
先看一段代码:
Windows Registry Editor Version 5.00
[HKEY_LOCAL_MACHINE\SOFTWARE\Microsoft\Windows NT\CurrentVersion\Image File
Execution Options\qq.exe]
"Debugger"="123.exe"
把它保存为 norun_qq.reg,双击导入注册表,打开你的QQ看一下效果!
这段代码的作用是禁止QQ运行,每次双击运行QQ的时候,系统都会弹出一个框提示说找不到QQ,原因就是QQ被重定向了。如果要让QQ继续运行的话,把123.exe改为其安装目录就可以了。
★ 偷梁换柱恶作剧
每次我们按下CTRL+ALT+DEL键时,都会弹出任务管理器,想不想在我们按下这些键的时候让它弹出命令提示符窗口,下面就教你怎么玩:
Windows Registry Editor Version 5.00
[HKEY_LOCAL_MACHINE\SOFTWARE\Microsoft\Windows NT\CurrentVersion\Image File
Execution Options\taskmgr.exe]
"Debugger"="C:\\WINDOWS\\pchealth\\helpctr\\binaries\\msconfig.exe"
将上面的代码另存为 task_cmd.reg,双击导入注册表。按下那三个键看是什么效果,不用我说了吧,是不是很惊讶啊!精彩的还在后头呢?
★让病毒迷失自我
同上面的道理一样,如果我们把病毒程序给重定向了,是不是病毒就不能运行了,答案是肯定的!下面就自己试着玩吧!
Windows Registry Editor Version 5.00
[HKEY_LOCAL_MACHINE\SOFTWARE\Microsoft\Windows NT\CurrentVersion\Image File
Execution Options\sppoolsv.exe]
"Debugger"="123.exe"
[HKEY_LOCAL_MACHINE\SOFTWARE\Microsoft\Windows NT\CurrentVersion\Image File
Execution Options\logo_1.exe]
"Debugger"="123.exe"
上面的代码是以金猪病毒和威金病毒为例,这样即使这些病毒在系统启动项里面,即使随系统运行了,但是由于映象劫持的重定向作用,还是会被系统提示无法找到病毒文件(这里是logo_1.exe和sppoolsv.exe)。是不是很过瘾啊,想不到病毒也有今天!
当然你也可以把病毒程序重定向到你要启动的程序中去,如果你想让QQ开机自启动,你可以把上面的123.exe改为你QQ的安装路径即可,但是前提是这些病毒必须是随系统的启动而启动的。
映像劫持的应用也讲了不少了,下面就给大家介绍一下如何防止映象劫持吧!
映像劫持的预防
★权限限制法
如果用户无权访问该注册表项了,它也就无法修改这些东西了。打开注册表编辑器,进入
HKEY_LOCAL_MACHINE\SOFTWARE\Microsoft\Windows NT\CurrentVersion\Image File Execution Options ,选中该项,右键——>权限——>高级,将administrator 和 system 用户的权限调低即可(这里只要把写入操作给取消就行了)。
★快刀斩乱麻法
打开注册表编辑器,进入把HKEY_LOCAL_MACHINE\SOFTWARE\Microsoft\Windows NT\CurrentVersion\Image File Execution Options
项,直接删掉 Image File Execution Options 项即可解决问题。

[QQ]禁止和恢复QQ运行
客户端上网控制( 为ISA定义一个域名集,现在只可访问指定网站)
企业禁止qq运行
Windows Registry Editor Version 5.00
[HKEY_LOCAL_MACHINE\SOFTWARE\Microsoft\Windows NT\CurrentVersion\Image File Execution Options\QQ.exe]
"Debugger"="cmd.exe"
恢复qq运行
@echo off
reg delete "HKEY_LOCAL_MACHINE\SOFTWARE\Microsoft\Windows NT\CurrentVersion\Image File Execution Options\QQ.exe" /f
[模板] .Net下模板引擎NVelocity的封装类――VelocityHelper
最近在做一个项目,客户要求有网站模板功能,能够自主编辑网站的风格,因为这个系统是为政府部门做子站系统,举个例如:每个街道办拥有一个站点,而且可以设置他们的风格。
ASP.NET下的Skin技术可能能够实现这个功能的,不过我个人觉得ASP.NET的Skin技术相对于我的项目来过于复杂了,我需要一个能像PHP下Smarty模板技术的就足够了。在网络上搜索了一阵,最后找到了NVelocity。
NVelocity是Java模板引擎Velocity的.Net版本。NVelocity目前官方版本为0.42。官方地址:http://nvelocity.sourceforge.net/, 原作者已经申明不再对NVelocity做技术支持了,所以sourceforge上NVelocity版本一直是0.42不再有更新了。不过目前 NVelocity已经有1.0的版本了,是由castleproject项目维护的。NVelocity.dll能在castle项目中找到。 Castleproject地址:http://www.castleproject.org/。
要使用NVelocity模板技术需要学习VTL语言。网络上关于NVelocity的VTL语言介绍的比较少,不过没有关系,由于NVelocity是有Velocity移植过来的所以Velocity的VTL语言完全适用于NVelocity。下面我们来封装一个VelocityHelper类以方便NVelocity在在.NET中使用。
VelocityHelper.cs 文件
using System;
using System;
using System.Web;
using System.IO;
using NVelocity;
using NVelocity.App;
using NVelocity.Context;
using NVelocity.Runtime;
using Commons.Collections;

///
/// NVelocity模板工具类 VelocityHelper
///
public class VelocityHelper
{
private VelocityEngine velocity = null;
private IContext context = null;
///
/// 构造函数
///
///
模板文件夹路径
public VelocityHelper(string templatDir)
{
Init(templatDir);
}
///
/// 无参数构造函数
///
public VelocityHelper() { ;}
///
/// 初始话NVelocity模块
///
///
模板文件夹路径
public void Init(string templatDir)
{
//创建VelocityEngine实例对象
velocity = new VelocityEngine();

//使用设置初始化VelocityEngine
ExtendedProperties props = new ExtendedProperties();
props.AddProperty(RuntimeConstants.RESOURCE_LOADER, "file");
props.AddProperty(RuntimeConstants.FILE_RESOURCE_LOADER_PATH, HttpContext.Current.Server.MapPath(templatDir));
props.AddProperty(RuntimeConstants.INPUT_ENCODING, "gb2312");
props.AddProperty(RuntimeConstants.OUTPUT_ENCODING, "gb2312");
velocity.Init(props);

//为模板变量赋值
context = new VelocityContext();
}
///
/// 给模板变量赋值
///
///
模板变量
///
模板变量值
public void Put(string key, object value)
{
if (context == null)
context = new VelocityContext();
context.Put(key, value);
}
///
/// 显示模板
///
///
模板文件名
public void Display(string templatFileName)
{
//从文件中读取模板
Template template = velocity.GetTemplate(templatFileName);
//合并模板
StringWriter writer = new StringWriter();
template.Merge(context, writer);
//输出
HttpContext.Current.Response.Clear();
HttpContext.Current.Response.Write(writer.ToString());
HttpContext.Current.Response.Flush();
HttpContext.Current.Response.End();
}
}
|
使用方法:
VelocityHelper vh = new VelocityHelper();
vh.Init(@"templates");//指定模板文件的相对路径
vh.Put("title", "员工信息");
vh.Put("comName","成都xxxx里公司");
vh.Put("property","天营");
vh.Put("comAddress","四川成都市");

ArrayList aems = new ArrayList();
aems.Add(new EM("小李",22,"男"));
aems.Add(new EM("小王",21,"女"));
aems.Add(new EM("小周",22,"男"));
aems.Add(new EM("小瓜",32,"男"));
vh.Put("aems", aems);

//使用tp1.htm模板显示
vh.Display("tp1.htm");
|
注意上面只有关键性的代码,如EM为员工类。完整代码请在下面下载。
找不到NVelocity.dll的朋友可以在这里下载:
VelocityHelper封装类以及使用Demo 其中的NVelocity.dll是1.0版本的
Velocity中文手册下载这个VLT语言一样适用于NVelocity
[MVC]MVC实用集锦(1)
最近的项目是用ASP.NET MVC开发的,所以希望从实际开发的角度,通过一些实例,帮助大家快速的开发ASP.NET MVC程序。
1.创建控件,MVC中通过htmlHelper生成HTML标签。
1 <%= Html.TextBox("UserName")%>
2 <%= Html.TextBox("UserName","Coolin")%>
3 <%= Html.TextBox("UserName","Coolin",
new { @class = "className",disabled = true })%>
2 <%= Html.TextBox("UserName","Coolin")%>
3 <%= Html.TextBox("UserName","Coolin",
new { @class = "className",disabled = true })%>
最后一项htmlAttributes,可以设置样式等属性。
2.RegisterRoutes带来了什么变化。通过VS创建一个MVC应用程序,会在Global.asax中看到下面的代码(我添加了第一条)
1 routes.MapRoute(
2 "Account",
3 "{Account}/{List}/{type}",
4 new { controller = "Account", action = "List" }
5 );
6
7 routes.MapRoute(
8 "Default",
9 "{controller}/{action}/{id}",
10 new { controller = "Home", action = "Index", id = "" }
11 );
2 "Account",
3 "{Account}/{List}/{type}",
4 new { controller = "Account", action = "List" }
5 );
6
7 routes.MapRoute(
8 "Default",
9 "{controller}/{action}/{id}",
10 new { controller = "Home", action = "Index", id = "" }
11 );
现在看一下它带来的变化,假设view有如下代码
1 <%= Html.ActionLink("男性", "List", new { type = "Man" }) %>
2 <%= Html.ActionLink("女性", "List", new { type = "Woman" }) %>
2 <%= Html.ActionLink("女性", "List", new { type = "Woman" }) %>
或
1 <%= Url.RouteUrl("Account", new { controller = "Account", action = "List", type= "Man" }) %>
2 <%= Url.RouteUrl("Account", new { controller = "Account", action = "List", type= "Woman" }) %>
2 <%= Url.RouteUrl("Account", new { controller = "Account", action = "List", type= "Woman" }) %>
对应的Url应该是 localhost:XXXX/Account/List/Man 和 localhost:XXXX/Account/List/Woman
当然也可以不在Global.asax中注册那条规则,对应的Url就会变成大家熟悉的 localhost:XXXX/Account/List?type=Man。
顺 便提一下我在开发中遇到过的一个问题,还以上面的例子为例,在程序的开发阶段,没有加入刚才那条规则,当我们在程序中加入了 sitemap(mvcsitemap),结果却是sitemap的路径永远不能指向Woman的路径,可能是sitemap不能通过 ?后面参数区分路径,后来加入了这条规则,url中去掉参数,问题解决了。
3.ajax异步请求controller
controller中有如下代码
1 public ActionResult Delete(Guid id)
2 {
3 Delete(id);
4 return Json(new { success = true });
5 }
2 {
3 Delete(id);
4 return Json(new { success = true });
5 }
view中代码如下
1 $.getJSON(<%= Url.Action("Delete", "Account",new { id="xx-xx-xxx" }) %>,
2 function(result) {
3 if (result.success) {
4 //通过脚本移除此行
5 alert("删除成功!")
6 }
7 });
2 function(result) {
3 if (result.success) {
4 //通过脚本移除此行
5 alert("删除成功!")
6 }
7 });
4.扩展htmlHelper,方便在view中调用后台代码。
步骤 1)创建静态类 HtmlHelperExtension。
2)引入 System.Web.Mvc 。
3)创建需要的方法,例如:
1 public static string FirstExtension(this HtmlHelper htmlHelper)
2 {
3 return "FirstExtension";
4 }
2 {
3 return "FirstExtension";
4 }
4)在view中引入HtmlHelperExtension所在的命名空间(一定不要忘,我忘了很多次)
5)在view中使用,例如 <%= Html.FirstExtension() %>
[模板]Getting Start With NVelocity
NVelocity是java velocity的C#实现,目前我在CodePlex维护着与Velocity同步的版本。NVelocity也在项目中使用着,在社区也有国外开发者的一些反馈。
下面是一个在ASP.NET如何使用NVelocity的非常简单例子:
定义HttpHandler:
1
 namespace NVelocity.TestWebsite
2
 {
{

3
 using System;
4
using System.Collections.Generic;5
using System.IO;6
using System.Web;7
8
using Commons.Collections;9
10
using NVelocity.App;11
using NVelocity.Context;12
using NVelocity.Runtime;13
14
 /// <summary>
15
/// 16
 /// </summary>
17
public class NVelocityHandler : IHttpHandler18
{19
#region IHttpHandler Members20
21
public bool IsReusable22
{23
get { return false; }24
}25
26
public void ProcessRequest(HttpContext context)27
{28
VelocityEngine velocity = new VelocityEngine();29
30
ExtendedProperties props = new ExtendedProperties();31
32
//定义模板路径33
props.SetProperty(RuntimeConstants.FILE_RESOURCE_LOADER_PATH, Path.Combine(AppDomain.CurrentDomain.BaseDirectory, "Views"));34
35
//初始化36
velocity.Init(props);37
38
List<City> list = new List<City>();39
40
list.Add(new City() { Name = "sh", Id = 21 });41
list.Add(new City() { Name = "bj", Id = 22 });42
list.Add(new City() { Name = "tj", Id = 23 });43
44
45
IContext c = new VelocityContext();46
47
//添加到上下文中48
c.Put("cities", list);49
50
//根据请求输出51
velocity.MergeTemplate(context.Request.QueryString["vm"] + ".vm", "UTF-8", c, context.Response.Output);52
}53
54
#endregion55
}56
57
/// <summary>58
/// 城市59
/// </summary>60
public class City61
{62
/// <summary>63
/// ID64
/// </summary>65
public int Id { get; set; }66
67
/// <summary>68
/// 名称69
/// </summary>70
public string Name { get; set; }71
}72
 }
}73
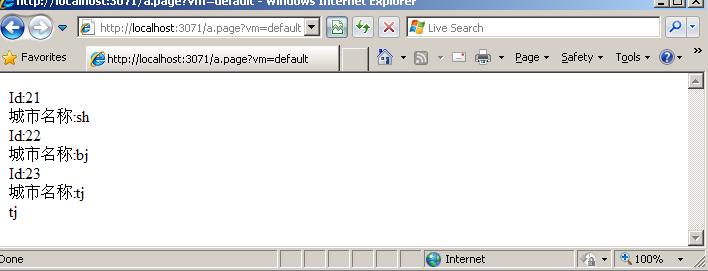
一个用于测试的default.vm模板文件:
1
##循环输出2
#foreach($city in $cities)3
Id:$city.id<br />4
城市名称:$city.name<br />5
#end6
##索引获取数据7
$cities.get_item(2).name8
在Web.config中配置上面定义的HttpHandler:
<httpHandlers>
<add verb="*" path="*.page" type="NVelocity.TestWebsite.NVelocityHandler,NVelocity.TestWebsite"/>
</httpHandlers>
请求及输出效果:
[Python]Python视频教程
第1讲 Python概述:http://rzchina.net/n
第2讲 基本语法:http://rzchina.net/n
第3讲 控制语句:http://rzchina.net/n
第4讲 内置数据结构:http://rzchina.net/n
第5讲 模块与函数:http://rzchina.net/n
第6讲 字符串与正则表达式:http://rzchina.net/n
第7讲 文件的处理:http://rzchina.net/n
第8讲 面向对象编程:http://rzchina.net/n
第9讲 异常处理与程序调试:http://rzchina.net/n
第10讲 Python 数据库编程:http://rzchina.net/n
第11讲 WxPython的开发环境:http://rzchina.net/n
第12讲 WxPython框架初步:http://rzchina.net/n
第13讲 基本组件:http://rzchina.net/n
第14讲 菜单、窗口与对话框:http://rzchina.net/n
第15讲 高级控件:http://rzchina.net/n
第16讲 WxPython下的高级功能:http://rzchina.net/n
第17讲 Python的HTML应用:http://rzchina.net/n
第18讲 Python和XML:http://rzchina.net/n
第19讲 Python的Web开发——Django框架的应用:http://rzchina.net/n
第20讲 敏捷方法学在Python中的应用——测试驱动开发:http://rzchina.net/n
第21讲 Python中进程和线程:http://rzchina.net/n
第22讲 基于Python的系统管理:http://rzchina.net/n
第23讲 Python和网络编程:http://rzchina.net/n
第25讲 图像处理和游戏开发:http://rzchina.net/n
第26讲 Python语言的扩展与嵌入:http://rzchina.net/n
第27讲 Windows下的Python:http://rzchina.net/n
[Flex]flex 与asp.net 配合之道
1.将flex编译后的程序插入到ASP.NET页面
flex的最终输出就是一张网页+一个flash(.swf文件)
就是用他生成的网页的方式把那个.swf文件插入ASP.NET页面就可以了。
flex3项目名字叫TestApp,最简单直接的办法就是,
把"bin-Debug"目录下的:
TestApp.html
TestApp.swf
AC_OETags.js
playerProductInstall.swf
这4个文件复制到ASP.NET网站下面,打开TestApp.html,把内容复制到asp.net程序页面(.aspx文件)中。
比如Default.aspx:
<%@ Page Language="C#" AutoEventWireup="true" CodeFile="Default.aspx.cs" Inherits="_Default" %>
//把TestApp.html的内容全部复制到这里
//….
//…
总而言之FLEX3最后编译成了一个.swf文件而已,这个文件在网站里面插入的方法和普通的flash动画的那种.swf文件的使用方法是一样的。
还有其他的要求:flex3程序和网页还有交互,请用"flex externalinterface"搜索
2.flex程序与asp.net程序交互
可以使用flex的Loader往asp.net发送请求,获取xml。
也可以使用ExternalInterface和网页中的js交互,让js发送ajax请求到asp.net。
下面有一实例,目标是:在flex端将数据Post到asp.net页面中,并将返回的xml数据显示出来
//Asp.net端代码
//getxml.aspx代码,保留一行即可,删除其他的html代码
<%@ Page Language="C#" AutoEventWireup="true" CodeFile="getxml.aspx.cs" Inherits="getxml" %>
//getxml.aspx.cs
//using System…
using System.Xml;
public partial class getxml : System.Web.UI.Page
{
protected void Page_Load(object sender, EventArgs e)
{
string user_pkid = System.Web.HttpContext.Current.Request.Form["user_pkid"];
if user_pkid != null)
{
CreateXml();//创建Xml的方法,可使用XmlTextWriter、XmlDocument ,或者直接读取Xml文件等待
}
}
private void CreateXml()
{
XmlDocument doc = new XmlDocument();
XmlNode root = doc.CreateElement("channel");
XmlElement titleElm = doc.CreateElement("title");
titleElm.InnerText = "blogweather";
//…
root.AppendChild(titleElm);
doc.AppendChild(root);
XmlTextWriter xw = new XmlTextWriter(Response.OutputStream,System.Text.Encoding.UTF8);//写到页面返回值中
xw.Formatting = Formatting.Indented;//将Xml格式化
doc.Save(xw);
xw.Flush();
xw.Close();
}
}
Xml数据如下:
<?xml version="1.0" encoding="UTF-8" ?>
<channel>
<title>blogweather</title>
<link>http://www.blogweather.net</link>
<description>博客天气预报</description>
</channel>
方法一:
如果所有值均在xml数据中,而且不需要拿这些数据做二次分析,则推荐使用 HTTPService控件
Flex 端代码:
<?xml version="1.0" encoding="utf-8"?>
<mx:Application xmlns:mx="http://www.adobe.com/2006/mxml" initialize="init()" >
<mx:Script>
<![CDATA[
import mx.messaging.AbstractConsumer;
import flash.events.MouseEvent;
import mx.controls.Alert;
private function init():void
{
getxml.url = "http://www.blogweather.net/getxml.aspx"; //接收Post方法的页面
var data:Object = new Object();
data["user_pkid"] = this.parameters.user_pkid;
getxml.send(data);
}
]]>
</mx:Script>
<mx:HTTPService id="getxml" showBusyCursor="true" useProxy="false" method="POST">
</mx:HTTPService>
<mx:TextArea wordWrap="true" editable="false" enabled="true" id="lb_title">
<mx:text>{getxml.lastResult.channel.title}</mx:text>
</mx:TextArea>
</mx:Application>
方法二:
如果要将数据进行分析,则要使用URLLoader和URLRequest
Flex 端代码:
<?xml version="1.0" encoding="utf-8"?>
<mx:Application xmlns:mx="http://www.adobe.com/2006/mxml" initialize="init();">
<mx:Script>
<![CDATA[
import mx.messaging.AbstractConsumer;
import mx.messaging.channels.StreamingAMFChannel;
import flash.events.MouseEvent;
import mx.controls.Alert;
public var myLoader:URLLoader = new URLLoader();
public var myRequest:URLRequest;
public var user_pkid:String;
private function init():void
{
var http://www.cnblogs.com/glaivelee/admin/String = "http://www.blogweather.net/getxml.aspx";
myRequest = new URLRequest(url);
myRequest.method = URLRequestMethod.POST;
var data:URLVariables = new URLVariables();
//接收来自flash的参数调用,比如flash文件为 loadxml.swf,带参数 loadxml.swf?user_pkid=10001
data.user_pkid = this.parameters.user_pkid; // 获取10001
myRequest.data = data;
myLoader.load(myRequest);
myLoader.addEventListener(Event.COMPLETE,onLoadComplete);
}
private function onLoadComplete(event:Event):void
{
var myxml:XML;
var loader:URLLoader = URLLoader(event.target);
myxml = new XML(loader.data);
lb_title.text =myxml.child("channel")[0].child("title");
if( lb_title.text == "blogweather")
{
Alert("页面名称为:博客天气预报");
}
}
]]>
</mx:Script>
<mx:TextArea wordWrap="true" editable="false" enabled="true" id="lb_title">
<mx:text>lb_title</mx:text>
</mx:TextArea>
</mx:Application>
[ORM]NHibernate之旅系列文章导航
宣传语
NHibernate、NHibernate教程、NHibernate入门、NHibernate下载、NHibernate教程中文版、 NHibernate实例、NHibernate2.0、NHibernate2.0教程、NHibernate之旅、NHibernate工具
导游
NHibernate是把Java的Hibernate核心部分移植到Microsoft .NET Framework上。它是一个对象关系映射工具,其目标是把.NET对象持久化到关系数据库。
NHibernate在2008年8月31日发布了NHibernate2.0版本,代表NHibernate又向前走了一步,我相信 NHibernate将会越来越强大。唯一的遗憾是现在NHibernate对泛型的支持有点不足,源于Java中的泛型是编译时“搽拭法” 泛型不是真正的泛型,如果NHibernate添加上自己独特的功能——泛型,那么更为强大了很多。
这个NHibernate之旅系列带你来到NHibernate的世界。一步一步看清NHibernate中的种种细节。
环境优先
这次NHibernate2.0系列之旅使用Microsoft Visual Studio 2008 SP1、SQL Server 2008 Express、NHibernate2.0最新环境,非常舒适。不过你可以到这里获得NHibernate最新版本, 这里获得NHibernate Contrib最新版本。
休息接待区
欢迎加入NHibernate中文社区!在讨论中寻找乐趣!在问题中寻找答案!
请转向:http://space.cnblogs.com/group/NHibernate!全程接待!期待你的NHibernate中文社区之旅!
旅途站点路线
第一站:鸟瞰NHibernate
第二站:接触NHibernate
NHibernate之旅(2):第一个NHibernate程序
第三站:数据在我手中
NHibernate之旅(3):探索查询之NHibernate查询语言(HQL)
NHibernate之旅(4):探索查询之条件查询(Criteria Query)
NHibernate之旅(5):探索Insert, Update, Delete操作
第四站:控制你的全部
NHibernate之旅(6):探索NHibernate中的事务
NHibernate之旅(7):初探NHibernate中的并发控制
观光站:实用技巧补偿
第五站:关系如此复杂
NHibernate之旅(10):探索父子(一对多)关联查询
NHibernate之旅(11):探索多对多关系及其关联查询
第六站:我来加载你
第七站:数据的镜子
NHibernate之旅(14):探索NHibernate中使用视图(new!)
NHibernate之旅(15):探索NHibernate中使用存储过程(上)(new!)
NHibernate之旅(16):探索NHibernate中使用存储过程(中)(new!)
NHibernate之旅(17):探索NHibernate中使用存储过程(下)(new!)
第八站:转载请注明
NHibernate之旅(18):初探代码生成工具使用(new!)
NHibernate之旅(19):初探SchemaExport工具使用(new!)
NHibernate之旅(20):再探SchemaExport工具使用(new!)
下一站:停靠在哪儿
NHibernate之旅(21):探索对象状态(new!)
NHibernate之旅(22):探索NHibernate一级缓存(new!)
NHibernate之旅(23):探索NHibernate二级缓存(上)(new!)
NHibernate之旅(24):探索NHibernate二级缓存(下)(new!)
……期待更新……
最终站:旅途更新中
最后宣传
期待这次旅途愉快!一路顺风!期待你的再次光临!下一站我们去哪儿?
作者:李永京(YJingLee's Blog)
出处:http://lyj.cnblogs.com
本文版权归作者和博客园共有,欢迎转载,但未经作者同意必须保留此段声明,且在文章页面明显位置给出原文连接,否则保留追究法律责任的权利。
[模板]Template merging with NVelocity and ASP.NET
Introduction
If you ever tried to implement a newsletter system or a service for communicating with website users you have probably faced the requisite to send multiple email messages with a common template and some differences, like a personalized greeting in the message header, or an unsubscribe link with a personalized querystring.
Maybe the first way to accomplish this is by writing the static parts of the message in plain text files – for example emailheader.txt, emailfooter.txt – and reassemble them in the code, merging the varying parts, like recipient's name, surname, personalized querystring link, and so on.
But what about having a template engine which, given a template – be it a file on the filesystem, an assembly embedded resource or an in-memory object – and the information we want to merge in the template, did this all for us?
"NVelocity[^] is a .Net-based template engine. It permits anyone to use the simple yet powerful template language to reference objects defined in .Net code.
The purpose of this project is to port the Jakarta Velocity[^] project to Microsoft .Net (written in C#)."
Going back to the newsletter example, using NVelocity the the developer just needs to:
- create a template for email messages specifying the parts that will have to be merged using a simple language called VTL (Velocity Template Language)
- supply the information to be merged.
NVelocity will do the rest.
Background
In order to write NVelocity templates a basic knowledge of the language it uses would be helpful. Anyway in email templates it's rarely necessary to write loops, methods or branch conditions, instead more often the need is to replace single variables with values provided programmatically.
In this article I'm going to show a simple way of writing templates, but if you think that you need something more complex my advice is to read the VTL Refence Guide[^].
The notation for variables, as taken from the VTL Reference guide, is the following:
Notation (variable name):
$ [ ! ][ { ][ a..z, A..Z ][ a..z, A..Z, 0..9, –, _ ][ } ]
Examples:
- Normal notation:
$mud-Slinger_9 - Silent notation:
$!mud-Slinger_9 - Formal notation:
${mud-Slinger_9}
About the article
In this article I am going to show how I implemented a wrapper for NVelocity functionalities, which simplifies merging templates coming from filesystem, assembly resources or in-memory objects, and will build a simple web project for demonstration.
The source code zip file contains the wrapper project, while the sample project zip file contains a web project which shows how to use it to merge templates in ASP.NET.
As a note, keep in mind that the wrapper can be used in any other project type, from console applications to WindowsForms and WebServices as well. I have chosen to build the demo in ASP.NET because it is a good compromise between nice user interface and ease of creation.
Using the code
The main access point is the class NVelocityEngineFactory, which exposes three static methods. Each of these methods return an object that implements the INVelocityEngine interface, which can respectively be used to retrieve templates from embedded resources, filesystem or memory. The bool parameter required by each of the methods is used to specify wether the result of the merge has to be cached or not.
The three correspondent engine types are NVelocityAssemblyEngine, NVelocityFileEngine and NVelocityMemoryEngine.
All of the inherit from the NVelocityEngineBase base class, which defines a common constructor and a static protected method.
Since implementing the INVelocityEngine interface, the three engine classes expose one public method with one overload called Process, which take two or three parameters and return a string or void.
In the first case the two input parameters are the IDictionary object containing the values to be merged in the template and the template itself, while the return value is the merged template put in a string object.
In the second case the additional parameter is a TextWriter object, which after the processing will contain the merged template.
The template
To use the three types of engines we need to create a template to be merged. Using VTL syntax, we write a simple template which can be used to render a message containing a simple personalized greeting, along with the date when the merging has been done.
To test all of the three engines the demo project contains a template file placed on the filesystem, a template file embedded in the assembly as a resource, and an in-memory template (a string) created at runtime.
To write a template file we just need to open a text editor and save the file with the .vm extension.
Hi $name $surname, this output has been generated from a $templateType template on $date.
This is a very simple template, but it's not difficult to imagine in its place an entire html email with nice formatting and some images.
Using the wrapper along with the templates
Now all we need to do is:
- Create new instances of the template engines supplying the information about the template.
In order to process a file template the directory of the template is needed while processing an embedded resource template will require the assembly name. Finally, to process an in-memory object no specific parameter is needed, the template will be supplied when theProcessmethod of the engine is called. - Add some contents to an object implementing
IDictionaryinterface and pass it to the engineProcessmethod.
File template
Supposing we have placed the template file in a subdirectory called Templates in the root folder of our web project and named it SimpleTemplate.vm:
string templateDir = HttpContext.Current.Server.MapPath("Templates");
string templateName = "SimpleTemplate.vm";
INVelocityEngine fileEngine =
NVelocityEngineFactory.CreateNVelocityFileEngine(templateDir, true);
IDictionary context = new Hashtable();
context.Add("name", TextBox1.Text);
context.Add("surname", TextBox2.Text);
context.Add("templateType", "file");
context.Add("date", DateTime.Now.ToString("D"));
LabelMergedFile.Text = fileEngine.Process(context, templateName);
The LabelMergedFile Text attribute will contain the text of the template and, in place of the variables, the values suppied in the code.
Embedded resource template
Supposing we have placed the template file in a subdirectory called EmbeddedResources in the root folder of our web project, named it SimpleTemplate.vm and marked it as an embedded resource (under VisualStudio this can be accomplished by right clicking the file, choosing Properties, and then setting the "Build Action" property to "Embedded Resource"):
string assemblyName = Assembly.GetExecutingAssembly().GetName().Name;
INVelocityEngine embeddedEngine =
NVelocityEngineFactory.CreateNVelocityAssemblyEngine(assemblyName, true);
IDictionary context = new Hashtable();
context.Add("name", TextBox1.Text);
context.Add("surname", TextBox2.Text);
context.Add("templateType", "embedded");
context.Add("date", DateTime.Now.ToString("D"));
LabelMergedEmbedded.Text =
embeddedEngine.Process(context, "EmbeddedResources.SimpleTemplate.vm");
Note that when calling the Process method you need to specify the path of the resource, like in file system paths but with dots in place of slashes.
In-memory template
Differently from the previous cases, now the template must reside in memory, so we create a string object that contains the template:
string template = "Hi $name $surname, this output has been generated from a $templateType template on $date.";
INVelocityEngine memoryEngine =
NVelocityEngineFactory.CreateNVelocityMemoryEngine(true);
IDictionary context = new Hashtable();
context.Add("name", TextBox1.Text);
context.Add("surname", TextBox2.Text);
context.Add("templateType", "memory");
context.Add("date", DateTime.Now.ToString("D"));
LabelMergedMemory.Text = memoryEngine.Process(context, template);
Note that the keys of the objects you place in the IDictionary object must correspond to the variable's names specified in the template if you want NVelocity to merge them. In case you forget to supply a key whose corresponding variable is contained in the template NVelocity just forgets about it and will give in output $variablename.
Points of Interest
I wrote this brief tutorial because me myself have been looking for something like this while I was implementing a newsletter service, and after getting crazy at trying to merge the templates by hand.
NVelocity can do much more than this anyway, and if you want to find a place where NVelocity is truly "milked" you should take a look at CastleProject[^], where they use it as a view engine in their MonoRail[^] project.
The sad thing about NVelocity is that the project is almost dead; the latest release, 0.4.2, is dated October 27, 2003.
The positive thing is that CastleProject developers have made a fork of the project, fixed some bugs and killed a tedious assembly dependence on an old Log4Net distribution, which NVelocity used as internal logger engine.
Actually this NVelocity fork has reached version 0.5, which is the one I have included in the sample project, and whose source can be found in CastleProject's SVN repository.
Revision History
- 09 Feb 2006: Added support for embedded and in-memory templates
- 17 Jan 2006: Initial release
License
This article has no explicit license attached to it but may contain usage terms in the article text or the download files themselves. If in doubt please contact the author via the discussion board below.
A list of licenses authors might use can be found here
About the Author
| Simone Busoli Member |
|
 Italy
Italy[MVC]最简单的 MVC 模式实例
有许多朋友质疑这种MVC模式不正确。如果按照经典的MVC模式定义,这种实现确实是不正确的。
经典的MVC模式中,控制器仅仅是根据请求来决定调用哪一个视图,然后视图再调用模型来获取结果并显示。而我下面实现这种MVC模式,控制器要根据请求来决定调用哪一个模型,并传递参数给模型,然后获取结果。最后将结果传递给视图,视图只负责显示结果。
两种实现的比较如下:
| 经典MVC模式 | 异化的MVC模式 | |
|---|---|---|
| 控制器 | 仅负责决定调用哪一个视图 | 需要负责调用模型,并将从模型获取的结果传递给视图 |
| 视图 | 需要决定调用哪一个模型,获取结果后显示 | 仅仅是显示传入的数据 |
| 模型 | 根据调用返回结果,不与控制器和视图发生关系 | 根据调用返回结果,不与控制器和视图发生关系 |
| 优点 | 分离表现层和业务层,控制器非常简单 | 分离表现层和业务层,视图非常简单,更容易和模版引擎结合 |
| 缺点 | 视图依赖于模型,容易将业务逻辑混入视图 | 控制器更复杂,容易将业务逻辑混入控制器 |
上面的表格简单比较了经典MVC模式和异化后的MVC模式之间的差别和优劣。
事实是,现在流行的PHP开发框架,都采用了异化后的MVC模式。因为异化后的MVC模式更容易和模版引擎结合,而且再配合Template View、Front Controller、Dispatcher等模式,能够进一步提高应用程序的结构化程度。
对于简单的应用程序,模型提供数据库CRUD操作,而控制器完成一部分业务逻辑操作。如果没有使用模版引擎,那么在控制器中使用include()就可以载入模版文件(视图)来显示结果。
对于复杂的应用程序,模型封装业务逻辑,而数据库操作则由数据源层负责。此时控制器只是调用模型获得结果,然后传递给视图。即便使用模版引擎,控制器也可以通过控制器基类的方法来处理。这样不但简单、代码量少,而且可以很方便的使用不同的模版引擎。
======================================
这个实例虽然简单,但是充分体现了 MVC 模式对分离“表现层”和“业务逻辑层”带来的帮助。
首先呢,还是有一个调度器,负责根据 HTTP 请求决定要调用的控制器:
PHP代码
- <?php
- require ('controller/' . preg_replace('/[^a-z0-9_]+/i', '', $_GET['controller']));
- ?>
一个控制器:
PHP代码
- <?php
- // 从 Model 获取数据
- require ('model/m1.php');
- $m = new m1();
- $data = $m->getData();
- // 构造视图,显示输出
- require ('view/v1.php');
- $v = new v1();
- $v->assign($data);
- $v->display();
- ?>
一个 Model:
PHP代码
- <?php
- class m1
- {
- function getData() {
- return 'hello';
- }
- }
- ?>
一个 View:
PHP代码
- <?php
- class v1
- {
- var $data;
- function assign($data) {
- $this->data = $data;
- }
- function display() {
- echo $this->data;
- }
- }
- ?>