ASP.NET MVC 的SignalR发布IIS后项目提示跨域不能访问localhost的问题、
问题原因:SignalR需要访问localhost的signalr/Hubs的生成的js代码文件
解决版本:IIS站点绑定的是固定IP,而不是localhost导致了上述问题,直接改绑定未未分配就行了

ASP.NET MVC 的SignalR发布IIS后项目提示跨域不能访问localhost的问题、
问题原因:SignalR需要访问localhost的signalr/Hubs的生成的js代码文件
解决版本:IIS站点绑定的是固定IP,而不是localhost导致了上述问题,直接改绑定未未分配就行了
来源: asp.net-mvc – Chrome 27中SignalR和跨域请求的问题 – 脚本之家
我在localhost:13371上有一个简单的JS / HTML站点,我正在尝试访问localhost:13371上的SignalR中心.
无论何时发出请求,我都会收到以下错误:
XMLHttpRequest cannot load
http://localhost:13370/signalr/hubs/negotiate?_=1372338722032. Originhttp://localhost:13371is not allowed by Access-Control-Allow-Origin.
我已经尝试过了:
>在Application_Start上启用SignalR上的跨域:
>在SignalR服务器的Web.Config中启用跨域:
>在JavaScript中设置信号器中心的连接URL:
>在JQuery中启用CORS:
>在Application_BeginRequest中手动设置响应头:
以上都没有,也没有上述任何组合起作用.
附加信息:
>这两个站点都在Windows 7上的IIS中运行
> SignalR站点在端口13370上运行,作为.NET 4.0下MVC 4站点的一部分.
> JS / HTML站点是端口13371上的简单Web服务器,根本没有托管代码.
> SignalR站点肯定会响应浏览器对相关资源的直接请求.
> SignalR版本是1.1.2
正如我在Stack Overflow question中发现的那样,基本上我在上面列出的“我尝试过的东西”中添加的几乎所有内容都是不必要的.修复步骤:
>删除我在上面尝试过的所有内容.这意味着在Web.Config或其他地方(如Global.asax)没有指定自定义标头,没有自定义JQuery设置等.
> ..除了RouteTable.Routes.MapHubs(new HubConfiguration {EnableCrossDomain = true});在Application_Start中.
>你还需要设置$.connection.hub.url =’http:// localhost:13370 / signalsr / hubs’;
… 而已.这可能是最好的解决方案,也是我最终使用的解决方案.
方法2.如果您在Chrome中仍然遇到问题,请使用jsonp:
如果你在Chrome中仍然遇到这样的问题,可以使用jsonp让协商脚本正确下载…将以下内容添加到我的JavaScript中心开始解决问题:
可能有一种更好的方法来测试浏览器功能并相应地设置jsonp ……看着用户代理感觉很脏……但是这解决了我在过渡时期的问题.我希望这有助于其他人.
以上是脚本之家为你收集整理的asp.net-mvc – Chrome 27中SignalR和跨域请求的问题全部内容,希望文章能够帮你解决asp.net-mvc – Chrome 27中SignalR和跨域请求的问题所遇到的程序开发问题。
来源: SignalR 和跨域问题 (ASP.NET MVC) – chen.s – 博客园
SignalR 有三块,
Server:
Hub Server
Custom Message Sender Service (Sender Proxy)
Client:
Message Sender
Message Receiver
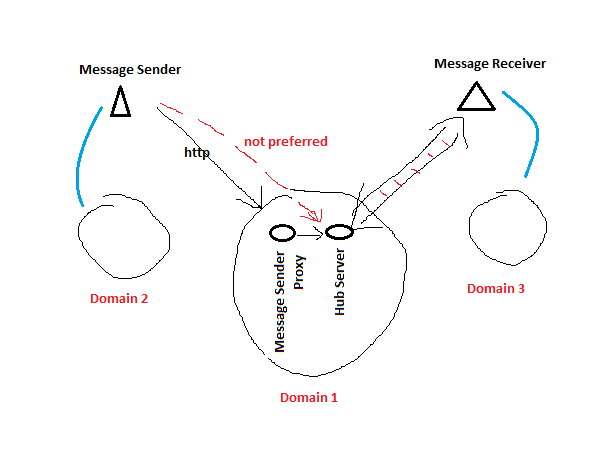
1. Hub Server & Sender Proxy Service
Hub Server 和 Custom Message Sender Service 在一个app中,“Custom Message Sender Service” 通过api直接控制Hub Server行为。(connection filtering, status, deliver message, etc )
2. 跨域
Sender, Receiver 和 Hub Server 可能都不在同一个域里。 会有跨域访问的问题。
3. 发消息的客户端,
可以有两种方式发消息给Hub Server
3.1 通过hubproxy.server.func(), 走的是signalR的persistent connection. (这种情形下一般只发一次消息,persistent connection占用了资源,浪费。 当然也可以建立完释放,persistent connection -> send message -> close persistent connection)。 这种模式下,跨域由SignalR Hub框架控制。
3.2 通过ajax调用 “Custom Message Sender Service (Proxy)”, 由Proxy调用Hub的服务。 这种结构更干净,发送者和SignalR connection没有关系, 走单独Http请求。 跨域由 “Custom Message Sender Service (Proxy)”, 一般由服务端暴露服务(MVC/WebAPI). 但是MVC和WebApi的跨域管理不太一样。(见“MVC和WebApi的跨域管理”)
3.3 有一种情况可以考虑用signalR的persistent connection发消息。 就是发消息的人,同时又是收消息的人。 那么一个persistent connection可以同时用来收发消息。
4. 收消息的客户端
这个只有一种,“持久连接,保持监听”。
4.1 SignalR保持连接的方式由协议本身定义,由服务器和浏览器支持。 WebSocket / iFrame / longPooling。 具体可google
4.2 WebSocket的效率要比其他高很多,比较reliable,比如disconnect, 其他方式可能不能直接反应客户端关闭的动作,需要等待超时发生触发disconnect. 代码和排错上有时比较费解。
4.3 【Hub Server服务端】微软的WebApp PaaS上, by default, “WebSocket”不enable。要去管理界面把它打开。
5. Hub Server
5.1 Owin中map /signalr 作为SignalR routing的开始
(https://docs.microsoft.com/en-us/aspnet/signalr/overview/guide-to-the-api/hubs-api-guide-server#tracing If you are adding SignalR functionality to an ASP.NET MVC application, make sure that the SignalR route is added before the other routes. For more information, see Tutorial: Getting Started with SignalR 2 and MVC 5.)
5.2 跨域访问由Owin框架自己处理, 如果再由IIS web.config来控制CORS, 会产生冲突。
5.3 Hub Server中的方法,只是个签名,具体实现不重要(无需写实现,除非客户端用hub.server.func()发消息)。 主要作用
5.3.1 生成客户端代理类。
5.3.2 让代理类绑定本地方法,以被服务端调用
6. Sender Message Proxy
6.1 如果用MVC做,有个很大的问题就是,跨域。
6.1.1 如果浏览器是IE, 问题不是很大。 貌似preflight request 被省略了。 request 被直接提交到MVC层, 可以自定义Action属性, 加入”Access-Control-Allow-Origin“。
6.1.2 如果浏览器是Chrome, “preflight request”不会被忽略. http option verb会发过来。 这个时候MVC就有问题了, 无论从owin还是application_beginRequest,都无法获得这个request,无法修改http头,使得CORS通过。 (MVC 不能intercept http option request,而webapi能,webapi 是不是因为引用了system.web.http.webhost 才能intercept?)
6.1.3 对于simple CORS, IE 和 Chrome (Chrome 无须preflight), 如果用Get/Post传数据,由于不走preflight, 自定义Action属性修改http header是可行的。 但是如果用ajax, 有content type header的话, 那就必须要走preflight.
7. IIS setting, web.config
实际使用当中,如果使用MVC 和 SignalR, 客户端用ajax post json (content type = application / json), 那么需要考虑直接使用直接从服务器设置应用CORS。 这个时候SignalR的CORS需要被取消(//map.UseCors(CorsOptions.AllowAll) )
<add name=”Access-Control-Allow-Origin” value=”https://localhost:44300″ />
<add name=”Access-Control-Allow-Headers” value=”Content-Type” />
<add name=”Access-Control-Allow-Credentials” value=”true” />
CORS 介绍
一篇很好的文章介绍CORS:https://staticapps.org/articles/cross-domain-requests-with-cors/
注意Simple CORS / Complex CORS 的区别
备注
尽量少用IE来做测试,用Chrome或firefox比较标准,会得到和预期一致的结果。 IE的结果经常莫名其妙,比如SignalR不enable CORS (map.UseCors(CorsOptions.AllowAll);)在localhost下,跨域的连接居然也能成功。
常用代码
var heartBeat = GlobalHost.DependencyResolver.Resolve<ITransportHeartbeat>();

var connectionAlive = heartBeat.GetConnections().FirstOrDefault(c=>c.ConnectionId == connection.ConnectionId);

if (connectionAlive.IsAlive)

{//Do whatever...}
======================================================
IHubContext context = GlobalHost.ConnectionManager.GetHubContext<MyHub>();

IHubContext context = GlobalHost.ConnectionManager.GetHubContext(“MyHub”);
======================================================
public class EnableCorsAttribute : ActionFilterAttribute
{
public override void OnActionExecuting(ActionExecutingContext filterContext)
{
filterContext.RequestContext.HttpContext.Response.AddHeader(“Access-Control-Allow-Origin”, “*”);
base.OnActionExecuting(filterContext);
}
}
来源: asp.net core 使用SignalR跨域请求出现的坑 – a914541185的博客 – CSDN博客
前段时间因为工作需要,认识到了SignalR,这个东西本身挺好用,但是在处理跨域问题上是遭遇了很大的坑。
我在本地通过localhost连接的时候毫无问题,但是当我在前端使用IP来连接我的后台,则会出现连接失败的问题。查阅了很多,询问公司内的大牛之后,找到一个正确解决方案,特记录如下:
首先,在Strartup.cs文件下处理跨域问题
public const string CorsName = “SignalRCors”;
// This method gets called by the runtime. Use this method to add services to the container.
public void ConfigureServices(IServiceCollection services)
{
services.Configure<CookiePolicyOptions>(options =>
{
// This lambda determines whether user consent for non-essential cookies is needed for a given request.
options.CheckConsentNeeded = context => true;
options.MinimumSameSitePolicy = SameSiteMode.None;
});
services.AddSignalR();
services.AddCors(options =>
{
options.AddPolicy(CorsName,
policy => policy.AllowAnyOrigin()
.AllowAnyHeader()
.AllowAnyMethod()
.AllowCredentials());
});
services.AddMvc((opt) =>
{
opt.Filters.Add(new CorsAuthorizationFilterFactory(CorsName));
}).SetCompatibilityVersion(CompatibilityVersion.Version_2_1);
//services.AddMvc().SetCompatibilityVersion(CompatibilityVersion.Version_2_1);
}
// This method gets called by the runtime. Use this method to configure the HTTP request pipeline.
public void Configure(IApplicationBuilder app, IHostingEnvironment env)
{
if (env.IsDevelopment())
{
app.UseDeveloperExceptionPage();
}
else
{
app.UseExceptionHandler(“/Error”);
app.UseHsts();
}
app.UseCors(CorsName);
之后右键你的项目进入属性-调试,记下你的http端口号以及htts的端口号
然后找到applicationhost.config文件,一般路径是项目文件夹\.vs\config\applicationhost.config。找到如下代码
<sites>
<site name=”WebSite1″ id=”1″ serverAutoStart=”true”>
<application path=”/”>
<virtualDirectory path=”/” physicalPath=”%IIS_SITES_HOME%\WebSite1″ />
</application>
<bindings>
<binding protocol=”http” bindingInformation=”:8080:localhost” />
</bindings>
</site>
<site name=”signalrTotest” id=”2″>
<application path=”/” applicationPool=”Clr4IntegratedAppPool”>
<virtualDirectory path=”/” physicalPath=”C:\Users\JC.YX\Desktop\signalrTotest\signalrTotest” />
</application>
<bindings>
<binding protocol=”https” bindingInformation=”:44331:localhost” />
<binding protocol=”http” bindingInformation=”:35000:localhost” />
</bindings>
</site>
可以看到有https和http的端口设置,以及允许localhost连接。这时我们只需要在它们下面添加自己的IP地址就可以了。添加之后的代码如下
<sites>
<site name=”WebSite1″ id=”1″ serverAutoStart=”true”>
<application path=”/”>
<virtualDirectory path=”/” physicalPath=”%IIS_SITES_HOME%\WebSite1″ />
</application>
<bindings>
<binding protocol=”http” bindingInformation=”:8080:localhost” />
</bindings>
</site>
<site name=”signalrTotest” id=”2″>
<application path=”/” applicationPool=”Clr4IntegratedAppPool”>
<virtualDirectory path=”/” physicalPath=”C:\Users\JC.YX\Desktop\signalrTotest\signalrTotest” />
</application>
<bindings>
<binding protocol=”https” bindingInformation=”:44331:localhost” />
<binding protocol=”https” bindingInformation=”:44331:192.168.0.104″ />
<binding protocol=”http” bindingInformation=”:35000:localhost” />
<binding protocol=”http” bindingInformation=”:35000:192.168.0.104″ />
</bindings>
</site>
这时,将你的前端代码修改为对应IP地址加端口号,启动IIS服务,你可以尽情的和朋友在聊天室里聊天了
var connection = new signalR.HubConnectionBuilder().withUrl(“http://yourIP:35000/chatHub”).build();
注意:如果你前端写的是http协议,请在启动IIS服务之后,将默认打开的网址修改为http协议加对应的端口号。
————————————————
版权声明:本文为CSDN博主「是豆腐啊」的原创文章,遵循 CC 4.0 BY-SA 版权协议,转载请附上原文出处链接及本声明。
原文链接:https://blog.csdn.net/a914541185/article/details/83181919
使用CefSharp控件,在部分高分辨率的电脑中(显示缩放比例非100%,而是120%或者125%等)会出现以下一些情况:
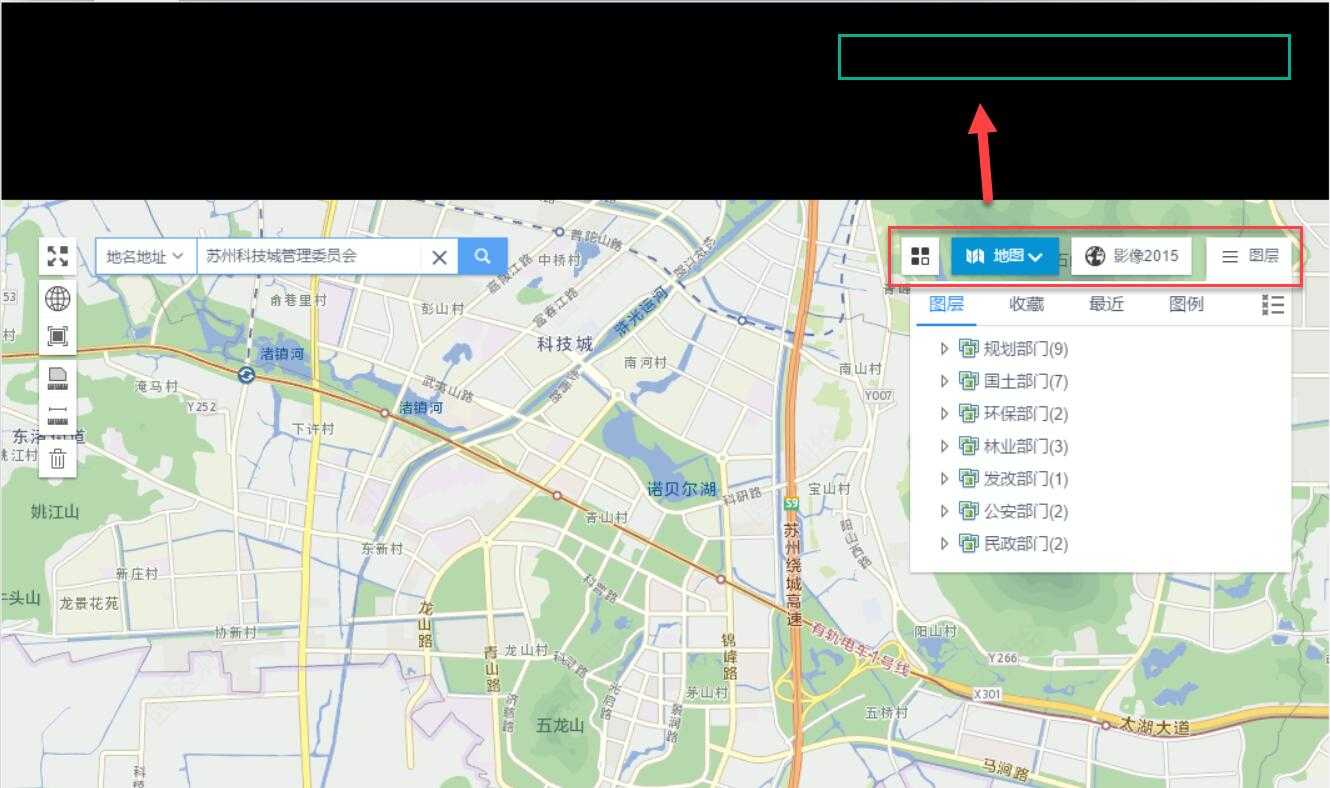
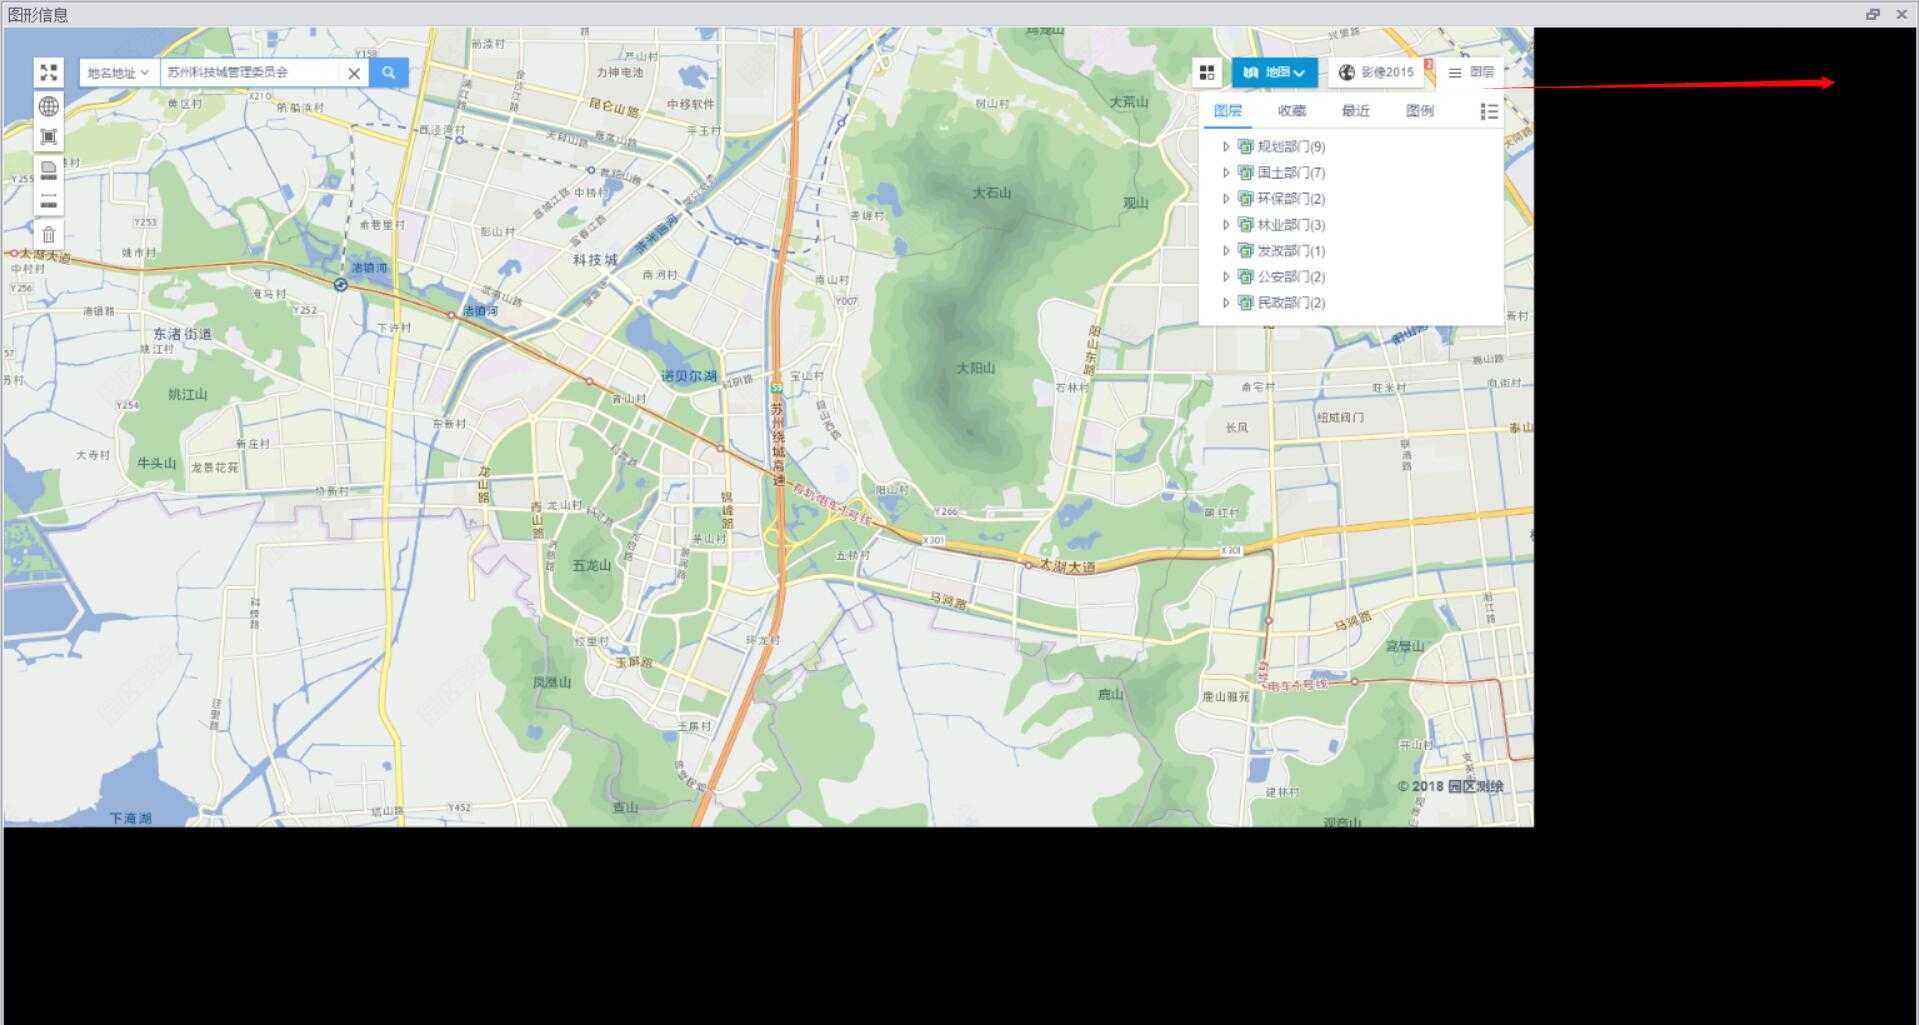
显示的页面中出现了黑边,且按钮定位也偏了,比如点击【图层】按钮,需要点击上面黑色边框中的相对位置。
解决方案:
1、在当前电脑的桌面,右键-显示设置,把显示比例调整为100%(需要重启电脑生效),这时再看,显示就正常了;
2、在当前项目中,添加一个【应用程序清单文件】(app.manifest),在根节点(assembly)下,添加以下代码,重新运行程序,则和方法1的效果就一样了:
  <application xmlns="urn:schemas-microsoft-com:asm.v3">
    <windowsSettings>
      <dpiAware xmlns="http://schemas.microsoft.com/SMI/2005/WindowsSettings">true</dpiAware>
    </windowsSettings>
  </application>
3、使用CefSharp自带的方法:
找到Cef.Initialize(setting);语句,在其下添加Cef.EnableHighDPISupport();
当程序加载了ChromiumWebBrowser控件后,就会把当前的显示比例调整为100%了
            Cef.Initialize(setting);
            Cef.EnableHighDPISupport();
优先选择 【方法3】
来源: 使用cefsharp 浏览器放大-布布扣-bubuko.com
(1)如果浏览器位置有问题,需要设置 Cef.EnableHighDPISupport();
(2)如果要放大浏览器,需要设置 browser.SetZoomLevel(1.25);
        ChromiumWebBrowser webbrowser = new ChromiumWebBrowser("");
        private void Form1_Load(object sender, EventArgs e)
        {


            Cef.EnableHighDPISupport();

            this.FormBorderStyle = FormBorderStyle.None;
            this.WindowState = FormWindowState.Maximized;


            string url = System.Configuration.ConfigurationManager.AppSettings["url"];
            webbrowser = new ChromiumWebBrowser(url);

            // Add it to the form and fill it to the form window.


            webbrowser.Dock = DockStyle.Fill;
            webbrowser.FrameLoadEnd += webbrowser_FrameLoadEnd;
            this.Controls.Add(webbrowser);
void webbrowser_FrameLoadEnd(object sender, FrameLoadEndEventArgs e) {
ChromiumWebBrowser browser = (ChromiumWebBrowser)sender;
browser.SetZoomLevel(1.25);
}
来源: cef网页缩放策略 – mmthr的博客 – CSDN博客
最近遇到一些2K屏在高DPI下由于设置cef禁止缩放导致页面文件很小,看不清导致用户体验很差的问题。
为了解决这个问题,采用了控制cef缩放比例的方式来解决。
在OnBeforeCommandLineProcessing 中通过设置
double scale = GetAutoScale();
GetAutoScale()的想法是获取当前的DPI,计算一个合适的缩放比率,来保证页面显示正常。
command_line->AppendSwitchWithValue(“–device-scale-factor”, to_string(scale)); 来获取适应的DPI。
针对某些非2K屏,可以使用command_line->AppendSwitchWithValue(“–force-device-scale-factor”, “1”); 来禁止缩放。
————————————————
版权声明:本文为CSDN博主「mmthr」的原创文章,遵循 CC 4.0 BY-SA 版权协议,转载请附上原文出处链接及本声明。
原文链接:https://blog.csdn.net/mmthr/article/details/87697172
来源: 移动硬盘无法读取分区表修复RAW格式修复 – 学而思(xiejava的blog) – CSDN博客
突然发现连在玩客云上的320G西数的移动硬盘读不出了,拔出来后连在台式机笔记本上都是无法识别。摸了一下硬盘还在转,想了好多办法都修复不了,上网查了一下应该是分区表被损坏了。
后来用台式机通过老毛桃的winpe系统,用里面的磁盘修复工具一个一个的试。首先是HDTunePro对磁盘进行健康扫描发现没有啥问题,就是读不出。说明硬盘还没有物理损坏,接着用DiskGenius修复分区表
具体是在识别到了硬盘的情况下,选中硬盘的盘符后选择“搜索已丢失分区(重建分区表)”
然后对硬盘的健康情况进行检测。 右键硬盘盘符,选择“坏道检测与修复”
检测完后发现也没有什么坏道。
重建分区表后,发现可以找到盘符了,但是有个最大的盘200G的还是没有办法打开,仔细一看文件系统是RAW,不是原来的NTFS了。看来是文件系统损坏了,又是一顿狂找资料看如何才能将RAW的文件系统还原成NTFS。后来找到一个非常有效的办法。就是用chkdsk。
在win10下用超级管理员的方式打开命令行,输入chkdsk I: /f
运行了很久以后检查完成后终于将RAW转换成了NTFS,硬盘可以正常访问,数据也没有丢失。
为什么会出现RAW呢,网上是说经常不正常插拔断电都会顺坏分区表和文件系统。移动硬盘还是很脆弱的。以后要多加小心。
————————————————
版权声明:本文为CSDN博主「xiejava1018」的原创文章,遵循 CC 4.0 BY-SA 版权协议,转载请附上原文出处链接及本声明。
原文链接:https://blog.csdn.net/fullbug/article/details/79591684
来源: [VS2017][C#]打包发布安装版程序(修改默认安装地址/卸载等) – 身披白袍’s博客 – CSDN博客
Step1:安装插件
点击工具-扩展和更新-搜索Microsoft Visual Studio 2017 Installer Projects-安装该插件,然后重启Visual Studio直至将该插件安装完毕。
Step2:打包可执行程序及依赖库
接下来要打包可执行程序和依赖库(dll ini等文件):
打开现有项目,右键新建项目:
三个文件夹,分别指向要发送到[文件安装目录下/桌面/开始菜单]中的文件。
首先,要把项目生成的exe等文件送进去,可以选择文件…添加,或是直接通过项目输出添加。
如果选择后者,注意发布的版本和位数:
然后,为输出文件添加快捷方式。右键,相关项目,选择shortcut。
快捷方式可以拖动到[桌面]或是[菜单],如果要拖动到菜单,建议先建立一个文件夹Add Folder…,然后把该快捷方式添加进去(后期可能还要添加卸载文件的快捷方式到这个文件夹中)。
最后,别忘了把依赖和所需要的一些其他文件(配置文件等),添加到Application Folder中,不然你的程序可是没法执行的。
先生成一下项目,去生成一个安装包工程的配置文件,有一定情况会生成失败,下面再继续完善这个安装包。
Step3:制作卸载程序
新建一个项目,键入以下代码,其中中间的C2B7E983-AA2A…-820B是安装包的产品号,可以在上面刚刚生成的安装包工程的配置文件中,利用Ctrl+F搜索ProductCode获得。
产品号:
修改产品号后,生成Uninstall.exe,作为一个依赖文件添加到Application Folder中(当然,你也可以给它添加快捷方式及快捷方式图标)。
其他
修改Default Company Name,还是打开刚刚生成的配置文件InstallerMakerXXXXX.vdproj,Ctrl+F搜索相关值,把其改为相应
错误
is not compatible with the project’s target platform ‘x86’
首先要确认你的项目的目标平台是否选择正确(项目属性-生成/配置-TargetPlatForm/目标平台),如果依旧报错,打开InstallerMakerXXXXX.vdproj,搜索键值TargetPlatform:
“TargetPlatform” = “3:0”
1
3:0改为3:1是x64,3:2是X86。
————————————————
版权声明:本文为CSDN博主「身披白袍」的原创文章,遵循 CC 4.0 BY-SA 版权协议,转载请附上原文出处链接及本声明。
原文链接:https://blog.csdn.net/Shenpibaipao/article/details/83152955
来源: Asp.net SignalR 实现服务端消息推送到Web端 – PetterLiu – 博客园
之前的文章介绍过Asp.net SignalR, ASP .NET SignalR是一个ASP .NET 下的类库,可以在ASP .NET 的Web项目中实现实时通信. 今天我们来实现服务端消息推送到Web端, 首先回顾一下它抽象层次图是这样的:

实际上 ASP.NET SignalR 2 实现 服务端消息推送到Web端, 更加简单. 为了获取更好的可伸缩性, 我们引入消息队列, 看如下基本流程图:
消息队列MQ监听, 在Web site 服务端一收到消息,马上通过Signalr 推送广播到客户端. 创建ASP.NET MVC WEB APP, 从NuGet 安装SignalR 2.12
Install-Package Microsoft.AspNet.SignalR
具体实现代码,是这样的,我们增加一个空的Hub:
public class FeedHub : Hub{public void Init(){}}是简单的消息模型, 标题与正文属性:
[Serializable]public class PushMessageModel{public int Id { get; set; }public string MSG_TITLE { get; set; }public string MSG_CONTENT { get; set; }}
服务端推送具体类,记录日志, 创建消息队列实例,监听, 等待收取消息. 这里我们使用的是AcitveMQ的.net客户端. ActiveMQListenAdapter是一个封装过的对象.
public class MQHubsConfig{private static ILogger log = new Logger("MQHubsConfig");/// <summary>/// Registers the mq listen and hubs./// </summary>public static void RegisterMQListenAndHubs(){var activemq = Megadotnet.MessageMQ.Adapter.ActiveMQListenAdapter<PushMessageModel>.Instance(MQConfig.MQIpAddress, MQConfig.QueueDestination);activemq.MQListener += m =>{log.InfoFormat("从MQ收到消息{0}", m.MSG_CONTENT);GlobalHost.ConnectionManager.GetHubContext<FeedHub>().Clients.All.receive(m);};activemq.ReceviceListener<PushMessageModel>();}}上面有一句关键代码GlobalHost.ConnectionManager.GetHubContext<FeedHub>().Clients.All.receive(m); 这里使用了GetHubContext方法后,直接来广播消息.
需要在MVCApplication下加载:
public class MvcApplication : System.Web.HttpApplication{protected void Application_Start(){AreaRegistration.RegisterAllAreas();FilterConfig.RegisterGlobalFilters(GlobalFilters.Filters);RouteConfig.RegisterRoutes(RouteTable.Routes);BundleConfig.RegisterBundles(BundleTable.Bundles);MQHubsConfig.RegisterMQListenAndHubs();}}同时需要增加一个Starup.cs, 用于Owin
[assembly: OwinStartup(typeof(RealTimeApp.Startup))]namespace RealTimeApp{public class Startup{public void Configuration(IAppBuilder app){// Any connection or hub wire up and configuration should go hereapp.MapSignalR();}}}接下来是客户端App.js:
function App() {var init = function () {Feed();$.connection.hub.logging = true;$.connection.hub.start().done(function() {console.log("Connected!");$(document).trigger("Connected");}).fail(function() { console.log("Could not Connect!"); });};init();};Feed.js 具体与SignalR.js通信, 创建名为receive的function, 与服务端对应
function Feed() {var chat = undefined;var init = function () {// Reference the auto-generated proxy for the hub.chat = $.connection.feedHub;// Create a function that the hub can call back to display messages.chat.client.receive = function (item) {var selector = "ul.feed-list li[data-id=" + item.Id + "]";if (!($(selector).length > 0)) {$("ul.feed-list").prepend($(".feed-template").render(item));$("ul.feed-list li:gt(3)").remove();}$.messager.show({title: 'Tips',msg: item.MSG_CONTENT,showType: 'show'});};// Start the connection.$.connection.hub.start().done(function () {chat.server.init();});};init();};
上面的JavaScript代码与服务端有通信, 具体看如下图:

在Index.cshtml, 我们需要引用SignalR客户端JS, 放置hubs, 这里我们使用了jsrender, easyui.js 来呈现推送的消息.
@model dynamic
@section Scripts {
<link href="/Content/themes/default/window.css" rel="stylesheet" />
<link href="~/Content/themes/default/progressbar.css" rel="stylesheet" />
<link href="~/Content/themes/default/linkbutton.css" rel="stylesheet" />
<script src="~/Scripts/jquery.signalR-2.1.2.min.js"></script>
<!--Reference the autogenerated SignalR hub script. -->
<script src="~/signalr/hubs"></script>
<script src="~/Scripts/jsrender.js"></script>
<script src="~/Scripts/jquery.easyui.min-1.4.1.js"></script>
@Scripts.Render("~/Scripts/project.js")
<script type="text/javascript">
$(document).ready(function () {
var app = new App();
});
</script>
}
<div class="row-fluid">
<div class="span8">
<div class="widget">
<div class="widget-header">
<h2>Feed</h2>
</div>
<div class="widget-content">
<ul class="span12 feed-list"></ul>
</div>
</div>
</div>
</div>
<script class="chat-template" type="text/x-jquery-tmpl">
<li>
<p>{{>Message}}</p>
</li>
</script>
<script class="feed-template" type="text/x-jquery-tmpl">
<li data-id="{{>Id}}">
<div class="row-fluid">
<div class="span8">
<h3>{{>MSG_CONTENT}}</h3>
</div>
</div>
</li>
</script>
上代码服务端引用js的Script.Render, 需要在BundleConfig.cs中加入以下代码:
          bundles.Add(new ScriptBundle("~/Scripts/project.js")
              .IncludeDirectory("~/Scripts/Project", "*.js", false));
同时我们构建一个WebAPI来发送需要推送的消息, 片断代码:
/// <summary>
/// SendMessage
/// </summary>
/// <param name="messagemodel">The messagemodel.</param>
/// <returns></returns>
[HttpPost]
public IHttpActionResult SendMessage(PushMessageModel messagemodel)
{
return SendToServer(messagemodel);
}
/// <summary>
/// Sends to server.
/// </summary>
/// <param name="messagemodel">The messagemodel.</param>
/// <returns></returns>
private IHttpActionResult SendToServer(PushMessageModel messagemodel)
{
if (ModelState.IsValid)
{
if (messageRepository.SendMessage(messagemodel))
{
log.Debug("发送成功!");
return Ok();
}
else
{
log.ErrorFormat("发送失败!{0}", messagemodel);
return Content(HttpStatusCode.ExpectationFailed, new Exception("send message error"));
}
}
else
{
log.ErrorFormat("参数验证失败!{0}", messagemodel);
return Content(HttpStatusCode.BadRequest, ModelState);
}
}
发送消息到ActiveMQ的关键代码:
public class MessageRepository:IMessageRepository
{
private static ILogger log = new Logger("MessageRepository");
/// <summary>
/// 发送消息
/// </summary>
/// <param name="messagemodel"></param>
/// <returns></returns>
public bool SendMessage(PushMessageModel messagemodel)
{
var activemq = new ActiveMQAdapter<PushMessageModel>(MQConfig.MQIpAddress, MQConfig.QueueDestination);
return activemq.SendMessage<PushMessageModel>(messagemodel)>0;
}
}
如果您需要运行DEMO程序,需要构建基于ActiveMQ的消息队列, 运行效果是这样的, 我们在一个静态html中, 发送一个ajax到webapi服务端, 发送后

另一个website网站收到后, 列表更新, 并在右下角弹出框

IE的控制台输出:
HTML1300: Navigation occurred.
File: Index
[11:05:25 GMT+0800 (China Standard Time)] SignalR: Client subscribed to hub ‘feedhub’.
[11:05:25 GMT+0800 (China Standard Time)] SignalR: Negotiating with ‘/signalr/negotiate?clientProtocol=1.4&connectionData=%5B%7B%22name%22%3A%22feedhub%22%7D%5D’.
[11:05:25 GMT+0800 (China Standard Time)] SignalR: This browser doesn’t support SSE.
[11:05:25 GMT+0800 (China Standard Time)] SignalR: Binding to iframe’s load event.
[11:05:25 GMT+0800 (China Standard Time)] SignalR: Iframe transport started.
[11:05:25 GMT+0800 (China Standard Time)] SignalR: foreverFrame transport selected. Initiating start request.
[11:05:25 GMT+0800 (China Standard Time)] SignalR: The start request succeeded. Transitioning to the connected state.
[11:05:25 GMT+0800 (China Standard Time)] SignalR: Now monitoring keep alive with a warning timeout of 13333.333333333332 and a connection lost timeout of 20000.
[11:05:25 GMT+0800 (China Standard Time)] SignalR: Invoking feedhub.Init
Connected!
[11:05:25 GMT+0800 (China Standard Time)] SignalR: Invoked feedhub.Init
[11:07:12 GMT+0800 (China Standard Time)] SignalR: Triggering client hub event ‘receive’ on hub ‘FeedHub’.
[11:07:18 GMT+0800 (China Standard Time)] SignalR: Triggering client hub event ‘receive’ on hub ‘FeedHub’.
[11:07:32 GMT+0800 (China Standard Time)] SignalR: Triggering client hub event ‘receive’ on hub ‘FeedHub’.
[11:07:51 GMT+0800 (China Standard Time)] SignalR: Triggering client hub event ‘receive’ on hub ‘FeedHub’.
[11:09:25 GMT+0800 (China Standard Time)] SignalR: Triggering client hub event ‘receive’ on hub ‘FeedHub’.
上面粗体是 最后我们发的第5条信息控制台的输出.
好了,到这儿, 由于篇幅有限, 示例代码没有全部展示, 可以在这儿下载, 需要安装ActiveMQ
希望对您开发实时Web App有帮助.
你可能感兴趣的文章:
如有想了解更多软件,系统 IT,企业信息化 资讯,请关注我的微信订阅号:
![MegadotnetMicroMsg_thumb1_thumb1_thu[1]](https://images0.cnblogs.com/blog/15172/201412/061436383581137.jpg "MegadotnetMicroMsg_thumb1_thumb1_thu[1]")
