前天初学ASP.NET MVC,发现有些东西用Web Form来做的确会比较方便. 但ASP.NET MVC也有它的优点. 它如果跟JQuery和JQuery UI结合起来做基于Ajax的应用实在是太方便了!!下面用图形说明:
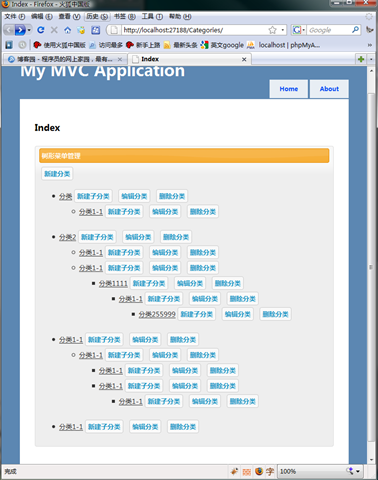
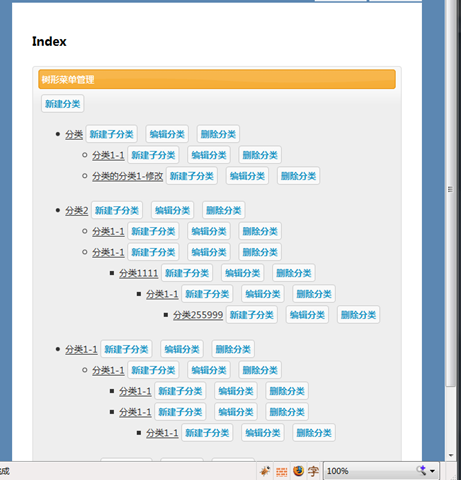
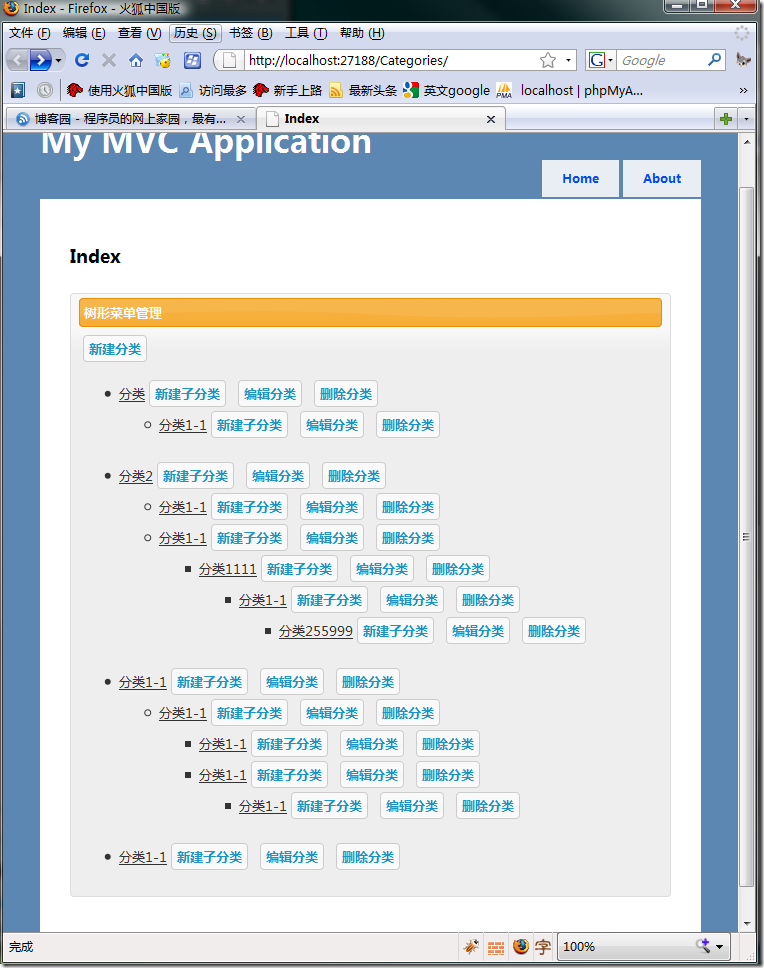
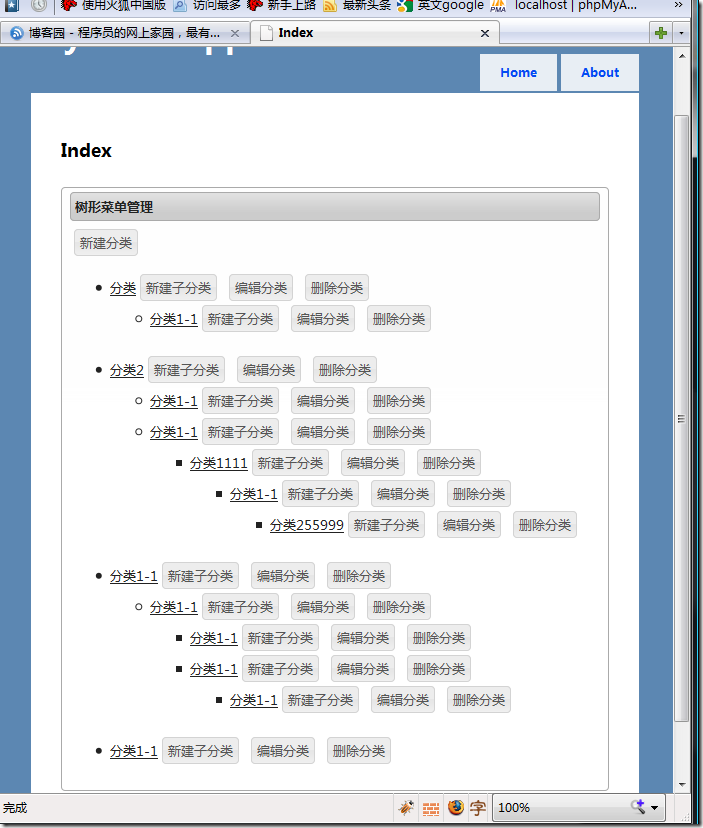
这次还是做一个树形控件.需要特别说明的是,这个Demo全部都是用Ajax做的,增删改都无刷新,而且可以方便地换肤..以下是最终的效果图:
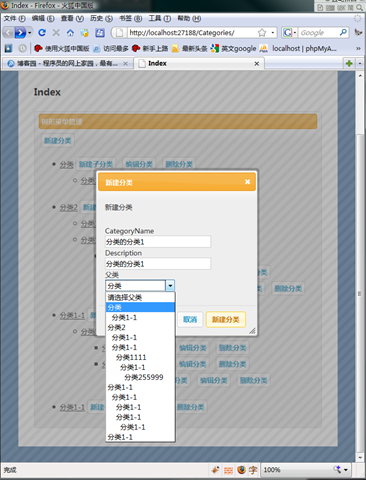
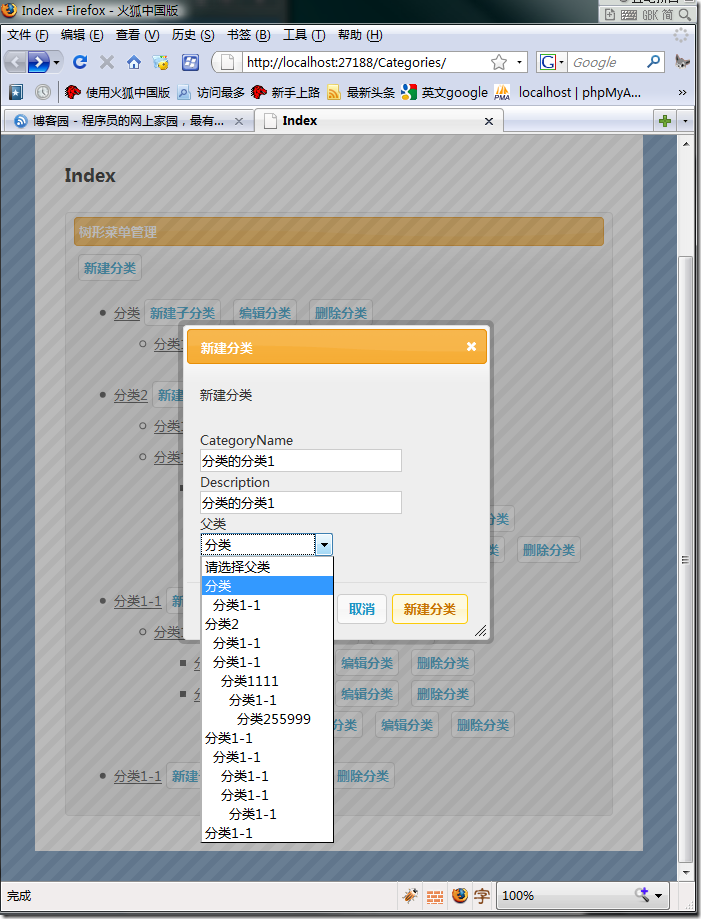
新建分类. 用上Effect就跟Flex有得拼了..而且做出这种效果非常方便.
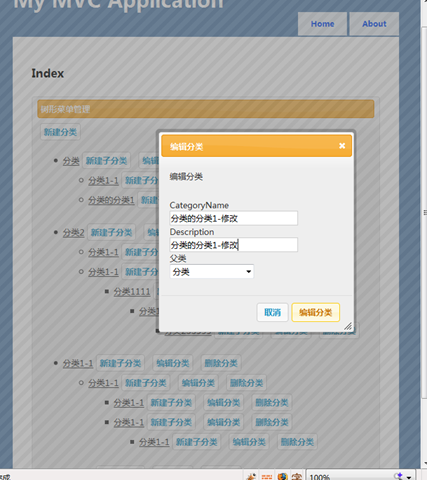
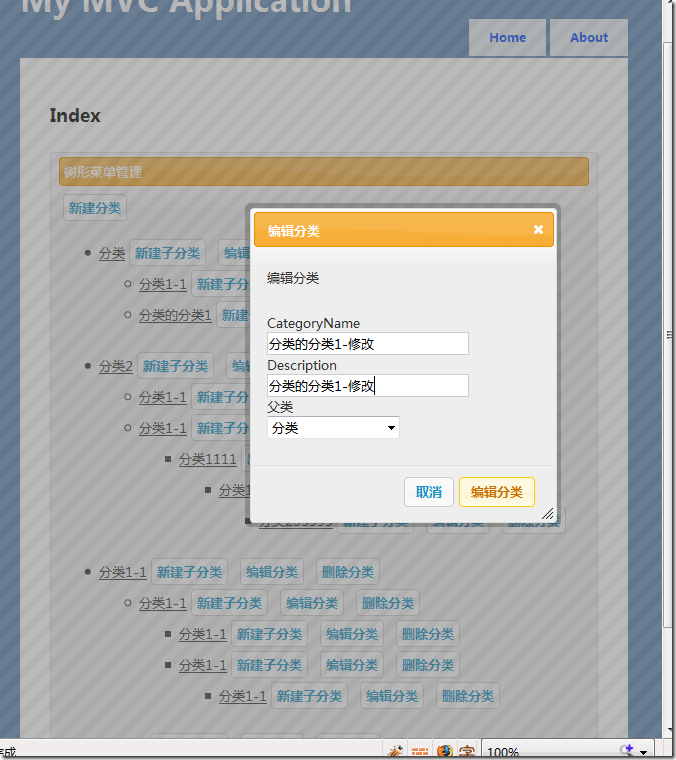
编辑分类.. 一样的开dialog

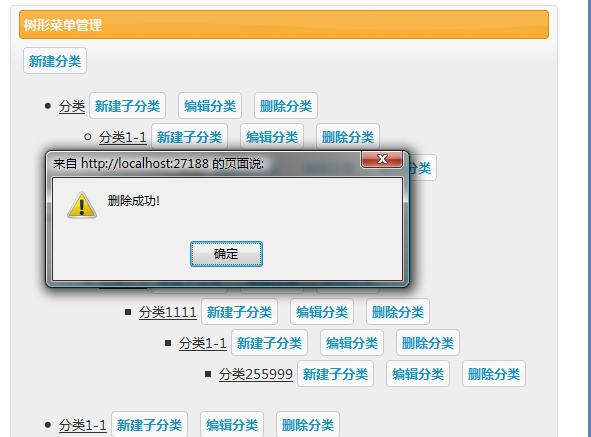
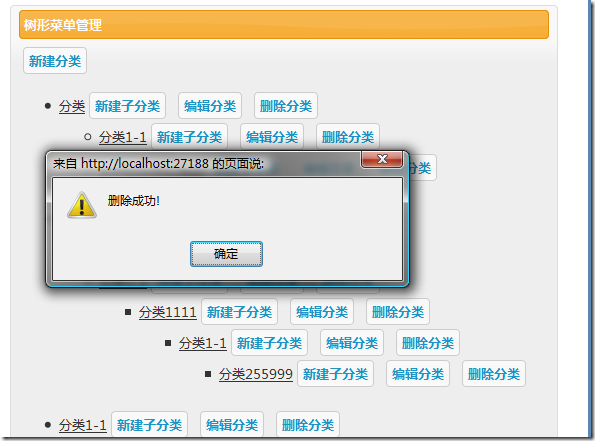
删除功能.

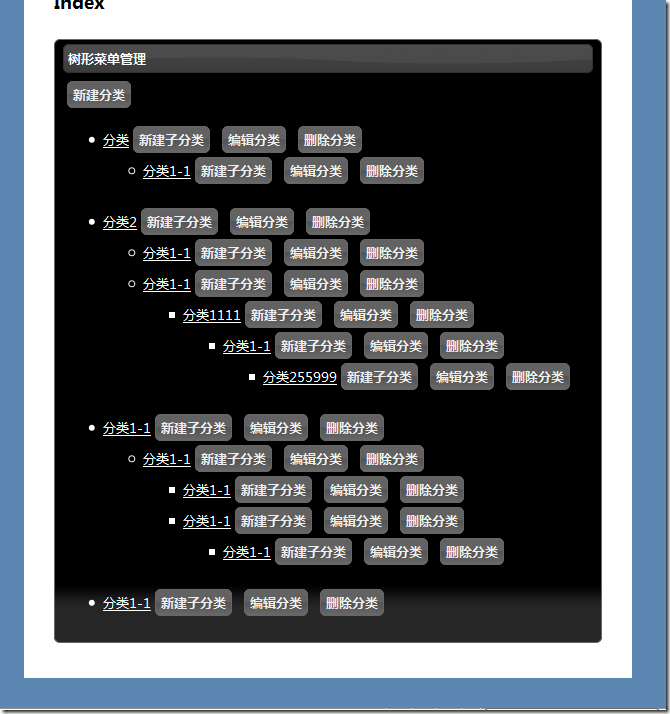
以下是另一种主题.. 换主题非常方便 .. 换个css就OK
这个是黑色的主题.. 官方也有很多下载..
感觉真是太强了..
下面简要说一下它的ajax功能怎么方便法..以下功能用到了NbearLite. 我一直很喜欢用NbearLite..
我们要做一个添加数据的功能.于是写了以下Controller
 [AcceptVerbs(HttpVerbs.Post)]
public ContentResult Create(FormCollection f)
{
int pid = 0; if (!int.TryParse(f["ParentID"], out pid)) pid = 0;
Gateways.DB.Insert(Tables.Tree)
.AddColumn(Tables.Tree.pid, pid)
.AddColumn(Tables.Tree.title, f["CategoryName"])
.AddColumn(Tables.Tree.description, f["Description"])
.Execute();
return Content("新建成功!");
}
我们一般都会写下以下的view
<button id="btn-createCategories" class="ui-button ui-state-default ui-corner-all">
新建分类</button><br />
<div id="createCategories" style="display: none;" title="新建分类">
<p>
新建分类</p>
<% using (Html.BeginForm("Create", "Categories", FormMethod.Post, new { id = "frm-CreateCategories", name = "frm-CreateCategories" }))
{
List<OtisTreeNode> treeList = this.Model as List<OtisTreeNode>;
%>
<fieldset>
<label for="CategoryName">
CategoryName</label>
<% =Html.TextBox("CategoryName")%>
<label for="Description">
Description</label>
<% =Html.TextBox("Description")%>
<label for="ParentID">
父类</label>
<% =Html.TreeSelect(treeList , "ParentID", "请选择父类", " ", "", "")%>
</fieldset>
<% } %>
</div>
可以看出,如果加上一个submit 按钮,以上,已经可以工作了.或许Controller应该要返回一个ActionResult,并做一些try{} catch{}..但基本结构是这样..
下面我们再为它加上ajax功能和用上jQuery的UI..
引入相关JavaScript和css如下:
 <link href="/Scripts/Jquery/themes/darkness/ui.all.css" rel="stylesheet" type="text/css" />
<style type="text/css">
label, input
{
display: block;
}
body
{
font-size: 12px;
}
input.text
{
margin-bottom: 12px;
width: 95%;
padding: .4em;
}
fieldset
{
padding: 0;
border: 0;
margin-top: 25px;
}
.ui-button
{
margin: 2px 4px;
padding: 2px;
text-decoration: none;
cursor: pointer;
position: relative;
text-align: center;
}
.ui-dialog .ui-state-highlight, .ui-dialog .ui-state-error
{
padding: 4px;
}
.portlet
{
padding: 4px 8px;
}
.portlet-header
{
padding: 4px;
margin-bottom: 6px;
}
</style>
<script src="/Scripts/Jquery/jquery-1.3.1.js" type="text/javascript"></script>
<script src="/Scripts/Jquery/ui/ui.core.js" type="text/javascript"></script>
<script src="/Scripts/Jquery/ui/ui.draggable.js" type="text/javascript"></script>
<script src="/Scripts/Jquery/ui/ui.resizable.js" type="text/javascript"></script>
<script src="/Scripts/Jquery/ui/ui.dialog.js" type="text/javascript"></script>
<script type="text/javascript" src="/Scripts/Jquery/ui/effects.core.js"></script>
<script type="text/javascript" src="/Scripts/Jquery/ui/effects.highlight.js"></script>
<script type="text/javascript" src="/Scripts/Jquery/external/bgiframe/jquery.bgiframe.js"></script>
现在我们要做的是捕获传统的form的post, 让它以ajax的方式提交.
第一步是收集要post的数据.于是我们写下以下JavaScript代码,为了方便,我加在jQuery的全局函数中了..
jQuery.otisAjax = {
getPostData: function(FromID) {
var ob = new Object();
$(FromID + " :input").each(function(i) {
ob[$(this).attr("name")] = $(this).val();
});
return { data: ob, action: $(FromID).attr("action"), method: $(FromID).attr("method") };
},
returnType: { text: "text", html: "html", script: "script", json: "json" },
post: function(FromID, callback, rType) {
var pInfo = this.getPostData(FromID);
$.post(pInfo.action, pInfo.data, callback, rType == undefined ? this.returnType.html : rType);
}
};
jQuery.otisAjax.getPostData的功能是捕获包含在form中的所有要Post出去的数据,并抓取要Post到的URL和method. Jquery的强大的选择功能,可以很轻松地做到.
jQuery.otisAjax.post的功能是简单地调用一下jQuery.post.
OK,好了. 现在开始构建对话框并实现ajax提交. 以下是全部代码.
 $(function() {
$("#createCategories").dialog({
bgiframe: true,
autoOpen: false,
modal: true,
buttons: {
'新建分类': function() {
$.otisAjax.post("#frm-CreateCategories",
function(data, textStatus) {
alert(data); if (textStatus == "success") { $("#createCategories").dialog('close'); getTree(); } // $("#createCategories").dialog('close');
}, "text");
},
'取消': function() {
$(this).dialog('close');
}
}
});
$("#btn-createCategories").click(function() {
$("#createCategories").dialog('open');
});
});
这就是带Ajax功能的简单的增加数据的全部代码. 因为是Demo,所以少考虑了N种情况.可以看出这种做法非常地简单,非常方便..
下载地址;http://files.cnblogs.com/OtisBlog/OtisMVCBlog.rar