[应用]轻量级网页客户端矢量图形绘制技术总结(lightweight techniques for

mikel阅读(792)

提到在线绘图,目前最流行的技术应该属Flex了(可参见另一篇文章:15个强大的在线图片编辑器 ),另外Silverlight在此方面也很有潜力。相比之下,诸多轻量级的客户端矢量图形绘制技术却显得有点鲜为人知。谨以此文总结我一年以来收集的此方面的相关资料与心得,与大家分享!

在一些web客户端客户端开发中,轻量级客户端矢量图形绘制技术还能够起到重要的作用。

1. VML 矢量标记语言

维基百科对VML的解释如下:

VML(Vector Markup Language) is an application of Extensible Markup Language (XML) 1.0 which defines a format for the encoding of vector information together with additional markup to describe how that information may be displayed and edited.

例子:使用VML与鼠标绘图:


online drawing


VML作为一种XML的扩展,还在数据处理上很有用途,这里还有个例子:

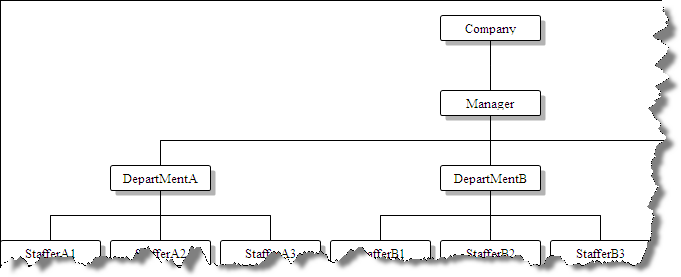
例子:VML+XML绘制树型图表(Create a Tree Graph by VML+XML)

code is pick from internet, connect me if you are the author, Thanks.


data.xml


vml.htm


VML的相关资料:

http://www.w3.org/TR/NOTE-VML
http://en.wikipedia.org/wiki/Vector_Markup_Language
http://www.vml.org/Wnew.html

VML的在线案例:

http://www.tool.la/VMLPalette/

注:VML只支持IE5 以上的IE浏览器,请参见:

http://www.causeway.co.uk/demos/vml/index.htm

To view these charts you will need a VML enabled browser; this means IE5 or above with the VML component installed. Please don't be too annoyed if this page looks a complete mess in Firefox or Opera – VML is a Microsoft-specific format and will never be supported by standards-aware browsers.


2. SVG可扩展矢量图形

W3C网站对SVG的介绍:

SVG(Scalable Vector Graphics ) is a language for describing two-dimensional graphics and graphical applications in XML. SVG 1.1 is a W3C Recommendation and forms the core of the current SVG developments. SVG Tiny 1.2 is the specification currently being developed as the core of the SVG 1.2 language (comments welcome). The SVG Mobile Profiles: SVG Basic and SVG Tiny are targeted to resource-limited devices and are part of the 3GPP platform for third generation mobile phones. SVG Print is a set of guidelines to produce final-form documents in XML suitable for archiving and printing. Read more about SVG.

严格的来说,SVG并不是一种轻量级的绘图方案,因为它需要安装Adobe的SVG Viewer插件(2.78M),但SVG同样也是基于XML的,其强大的功能可以轻松的制作出各种动态和静态图型:

大量SVG例子:

下转自中国w3c联盟

动态
普通效果
http://www.adobe.com/svg/dynamic/transformations2.html

无JS干预效果
http://www.adobe.com/svg/dynamic/declarative.html

JS干预效果
http://www.adobe.com/svg/dynamic/javascript.html

鼠标事件效果,注意可以在HTML元素中干预效果,甚至可以在各个不同的SVG间互相干预
http://www.adobe.com/svg/dynamic/mouseevents.html

键盘事件效果,鼠标点击SVG后敲击键盘,如果字体完全消失,需要再点击
http://www.adobe.com/svg/dynamic/keyboardevents.html

动态插入对象
http://www.adobe.com/svg/dynamic/insertion.html

语言支持演示,支持国际任何语言(拿了日本的语言,中国啊,自强!)
http://www.adobe.com/svg/dynamic/insertion.html

SVG优秀的压缩算法及与JPG、GIF的质量比较
http://www.adobe.com/svg/workflow/optimizing.html

浏览插件的自动安装
http://www.adobe.com/svg/workflow/autoinstall.html

SVG在GoLive、Office、FramwMaker中的使用
http://www.adobe.com/svg/workflow/workflow.html

————–
静态
点击以显示不同区域
http://www.adobe.com/svg/basics/boundbox.html

动态改变SVG字体及文字内容(无中文字体)
http://www.adobe.com/svg/basics/text.html

动态改变CSS
http://www.adobe.com/svg/basics/css.html

填充
http://www.adobe.com/svg/basics/fills.html

加边
http://www.adobe.com/svg/basics/strokes.html

渐变
http://www.adobe.com/svg/basics/grads.html

滤镜特效1、2
http://www.adobe.com/svg/basics/filtereffects.html
http://www.adobe.com/svg/basics/filtereffects2.html

与传统位图(Jpeg、Gif、Png)的结合
http://www.adobe.com/svg/basics/jpgs.html

ICC标准的色彩支持
http://www.adobe.com/svg/basics/icc.html

选择可见元素的设置
http://www.adobe.com/svg/basics/printing.html

SVG参考资料:

http://www.w3.org/Graphics/SVG/


3. Canvans

Firefox官方网站对Canvans的介绍:

<canvas>是一个新的HTML元素,这个元素可以被Script语言(通常是JavaScript)用来绘制图形。例如可以用它来画图、合成图象、或做简单的(和不那么简单的)动画。右面的图象展示了一些<canvas>的应用示例,我们将会在此教程中看到他们的实现。

注意:Canvans是HTML5标准中的新技术,这意味着所有不支持HTML5的浏览器都不能支持Canvans,包括IE

并不是所有现代浏览器都支持<canvas>元素,所以你需要 Firefox 1.5或更新版本、或者其他基于Gecko的浏览器例如Opera 9、或者最近版本的Safari才能看到所有示例的动作。

例子:简单Canvans例子,来自FF社区

请使用FF或Safari观看


Canvans不仅能够绘制2D、3D的矢量图形,还可以与JS交互来实现一些复杂的动画:


Canvans教程:

https://developer.mozilla.org/cn/Canvas_tutorial

  • Canvas示例集
  • Canvas articles and other resources


    4. 推荐的第三方开源框架:

    除了上述三种技术之外,一些开源的WEB绘图框架也做的很好,尤其是在浏览器兼容方面,在此向大家推荐下列两个:

    http://www.c-point.com/javascript_vector_draw.htm

    http://www.walterzorn.com/jsgraphics/jsgraphics_e.htm


    文章写的仓促,其实这方面技术有很深,不足之处请多多补充

    Thanks. 

  • 作者:Lance ZhangLance Zhang's Tech Blog
    出处:http://blodfox777.cnblogs.com/
    本文版权归作者和博客园共有,欢迎转载,但未经作者同意必须保留此段声明,且在文章页面明显位置给出原文连接,否则保留追究法律责任的权

    [C#]推荐一个操作Zip文件的开源类库:DotNetZip

    mikel阅读(1072)

    DotNetZip 是一个短小易用的用来操作 zip 文件的 .NET 类库,支持.NET的任何语言,可很方便的创建,读取,和更新zip文件。而且还可以使用在.NETCompact Framework中。

    下面是一些简单的例子:

    1.加密压缩:

    using (ZipFile zip = new ZipFile())
    {
    zip.Password = sPassword; //set pwd
    zip.AddDirectory(sZipDir);
    zip.Save(sSavePath + @"\" + sSaveName);
    }

    2.向压缩文件中添加:

    using (ZipFile zip = new ZipFile("Backup.zip"))
    {
    zip.Password= "123456!";
    zip.AddFile("ReadMe.txt");
    zip.AddFile("7440-N49th.png");
    zip.AddFile("2005_Annual_Report.pdf");
    zip.Save();
    }
    

    3.解压缩到制定目录:

    using (ZipFile zip = ZipFile.Read("D:\\test\\2007.zip"))
    {
    foreach (ZipEntry e in zip)
    {
    Console.WriteLine("file name:{0}", e.FileName);
    Console.WriteLine(e.Comment);
    e.Extract("D:\\test\\pwdata", true);  // overwrite == true
    }
    }


    其他详细的使用请参考:http://www.codeplex.com/DotNetZip

    [Flex]Flex扩展HTTPService简化调用接口定义

    mikel阅读(760)

        Flex提供MXML来描述一个HTTPService,看上可以简化开发人员的工作,但实际上这种描述HTTPService的方式很容易产生重复代码导致代码不好维护和扩展。数据交互接口唯一定义对系统的维护非常有利,但基于AS定义HTTPService也是一件烦琐的事情;那如何做才能够达到方便地定义接口呢。

    接口定义

    以下是定义一个登陆的HTTPService

        public class ILogin extends HttpBase

        {

           public function ILogin(method:String="get", result:Function=null)

           {

               super("userlogin",  method, result);

           }

           public var UserName:String;

           public var UserPWD:String;

           public var ImgSN:String;

           public var ImgKey:String;


        }

    看上非常简单,只需要继承HttpBase然后效需要提交的参数定义成Public成员即可以。对于构造函数参数下介绍HttpBase的时候讲述;对于这个接口又是怎样调用的呢。

    var send:ILogin =new ILogin(           "get",function(data:XML,error:Boolean){

                         if(!error)

                         {


                         }

                      });

                      send.UserName= txtName.text;

                      send.UserPWD=txtPWD.text;

                      send.ImgKey= ic.ImageKey();

                      send.ImgSN=ic.ImageSN();

                      send.Open();

    如果并不想考虑太多处理,只关心登陆处理可以这样定义

    var send:ILogin =new ILogin()

    send.UserName= txtName.text;

    send.UserPWD=txtPWD.text;

    send.ImgKey= ic.ImageKey();

    send.ImgSN=ic.ImageSN();

    send.Open();

    服务端代码

    对于服务端代码就可以根据自己需来处理,jsp,asp,ASP.NET,php都是一样只要接收http请求即可。为了便于理解把服务端代码顺便贴出来:

        [NClay.Web.Service.ActionMapper]

        public class UserLogin : ActionBase

        {

            protected override void OnGet()

            {

                ImageValidate.Check();

                User user= _UserService.Login(UserName, UserPWD);

                if(user ==null)

                    throw new Exception("用户名或密码不正确!");

                if (user != null && !user.Enabled)

                    throw new Exception("用户已经被系统禁用,请与管理员联系!");

                mLoginer = user;

                mIsLogin = mLoginer != null;

                FormsAuthentication.SetAuthCookie(Loginer.UserName, true);

                LoginID = Loginer.UserID;

                LoginName = Loginer.UserName;

                base.OnGet();

            }

            public string UserName

            {

                get;

                set;

            }

            public string UserPWD

            {

                get;

                set;

            }

            [NClay.Web.Service.OutputXml]

            public int LoginID

            {

                get;

                set;

            }

            [NClay.Web.Service.OutputXml]

            public string LoginName

            {

                get;

                set;

            }

            public NClay.Web.Actions.ImageValidate ImageValidate

            {

                get;

                set;

            }

        }

    HttpBase的定义

           HttpBase是针对本人现有需求所制定的,所以并不一定适合你的需要;但作为一个参考

    public  class HttpBase

        {

           private var mService:HTTPService=null

           private var mResult:Function=null;

           private var mFristSearch:Boolean=false;

           public var _TimeSlice:Date;

           public function GetService():HTTPService

           {

               return mService;

           }

           public function HttpBase(api:String,method:String="get",result:Function=null)

           {

               mService = new HTTPService();


               mService.useProxy=false;

               mService.url=GetServiceUrl()+api;

               mService.resultFormat="e4x";

               mService.method=method;

               mService.addEventListener(FaultEvent.FAULT,HFSoftCoreFun.onFault);

               mService.addEventListener(ResultEvent.RESULT,OnResult);


               mResult=result;

           }

           protected virtual function GetServiceUrl():String

           {

               return "service.aspx?do=";

           }

           private function OnResult(event:ResultEvent)

           {

               var data:XML=XML(event.result);


               var iserror:Boolean=HFSoftFx.HFSoftCoreFun.IsError(data);

               if(mResult!=null)

                  mResult(data,iserror);


           }

           public function get FirstSearch():Boolean

           {

               return mFristSearch;

           }


           public function Open(firstSearch:Boolean=false)

           {

               _TimeSlice =new Date();

               mFristSearch=firstSearch;

               mService.send(this);

           }


        }

    代码也非常简单,就是在httpservice的基础上包装一下。其实了解AS的朋友应该可以看得出对于动态语言来说直接把HttpBase定义成动态类,然后直接设置成员提交这样就省下每个交互都定义一个类型出来这么麻烦。但作为一个服务接口调用成员越明确越好,因为程序是要经常修改和维护的;不过是不是要这样做就是团队约束规范问题了。

    [MTV]藤-北京记忆主题曲

    mikel阅读(859)

    北京记忆》主题曲《藤》MV

    京电视台纪录片《北京记忆》主题曲
    《藤》
    词曲:小柯
    演唱:小柯 老狼 沙宝亮 满文军 满江 黄征 汪峰 常宽
    监制:徐鲤

    哎哦哎哎…… 小柯
    A1 当我们转过脸看太阳缓缓升 老狼
    鸽子依然落在屋脊
    沙宝亮
    却不是从前的那只 满文军

    A2 当我们抬起头已过而立年纪 满江 满文军
    看枝桠漫天的那颗
    满江
    曾经是嫩嫩的绿 黄征小柯

    B1 那么多的枝枝蔓蔓 汪峰 沙宝亮
    遮挡住的是那些往昔
    汪峰
    接着另一个往昔
    老狼
    那么长得缠绕
    满江小柯
    缠绕住的是那些回忆
    满江
    接着另一个回忆 满文军

    C1 继续卖力的生长吧 常宽 黄征 沙宝亮
    离参天还很远呢
       常宽黄征沙宝亮
    继续飞快的发芽吧
    老狼
    要遮天蔽日还要许久呢   汪峰小柯

    C2 继续卖力的生长吧    沙宝亮满江 满文军
    这刚刚才开始呢 沙宝亮 满江 满文军
    继续飞快的发芽吧
    小柯
    用枝桠缠绕往昔的回忆慢慢书 满江 沙宝亮

    A3 当我们转过脸看太阳缓缓升 黄征 沙宝亮
    鸽子依然落在屋脊 小柯
    却不是从前的那只 满文军

    A4 当我们抬起头已过而立年纪 沙宝亮满文军
    看枝桠漫天的那颗 沙宝亮
    曾经是嫩嫩的绿 满江 小柯

    B2 那么多的枝枝蔓蔓 常宽 满文军
    遮挡住的是那些往昔 常宽
    接着另一个往昔
    满文军

    那么长得缠绕 汪峰小柯
    缠绕住的是那些回忆
    汪峰
    接着另一个回忆 老狼

    C3 继续卖力的生长吧 同C1
    离参天还很远呢
    继续飞快的发芽吧
    要遮天蔽日还要许久呢

    C4 继续卖力的生长吧 同C2
    这刚刚才开始呢
    继续飞快的发芽吧
    用枝桠缠绕往昔的回忆慢慢书

    C5 继续卖力的生长吧 合
    离参天还很远呢
    继续飞快的发芽吧
    要遮天蔽日还要许久呢

    C6 继续卖力的生长吧
    这刚刚才开始呢
    继续飞快的发芽吧
    用枝桠缠绕往昔的回忆慢慢书

    [Flex]AIR应用:FedEx Desktop

    mikel阅读(938)

    FedEx是全球知名的快递公司,他们使用Adobe AIR技术提供了一个用于跟踪,查看其快递包裹的桌面应用程序,你可以从这里下载:

    http://www.fedex.com/desktop/
    此应用程序免费,仅需免费注册成为FedEx用户即可。
    那 么如果以后你的公司有国外的快递业务使用FedEx(不管你从全球哪个国家哪个购物网站使用了FedEx的快递业务,比如Amazon),你都可以使用唯 一的FedEx tracking number,来通过此工具随时查看包裹的递送状态,比如到了哪个国家,哪个机场,是否准时和延迟,状态原因描述等。

    [C#]利用ajax技术显示上传进度

    mikel阅读(996)

    我们介绍了如何从HTTP请求流中将数据部分进行截取,同时将数据相关信息进行保存。
          本篇概述:
          用过ajax的朋友应该有听过XmlHttpRequest对象,ajax其实就是通过XmlHttpRequest对象来向服务器发出异步请求,并从服务器获得数据,然后用JavaScript来操作DOM而更新页面。
          本篇就是要通过XmlHttpRequest对象来实现实时的进度显示。
          效果图:

          正文部分:
          看过有些前辈的做法是通过设置HTTP请求的Refresh头 字段来定时刷新页面从而显示进度,但是这样就会带动整个页面一起刷新,就算我们把进度条做成单独的页面,效果仍旧不是太好。我之前试过用ajax的 Timer组件,但是不知道是何原因,Timer控件在IIS下预览时总是无法正常发挥作用。苦恼了好一阵子,怀疑是MS的BUG。最后发现了一个很好的 替代办法就是利用XmlHttpRequest对象来自己实现定时刷新,这样每次只需向服务器请求很少的数据,减少了对服务器的压力,在后期的测试中,发 现这个办法确实很好用,而且在IIS下也一切正常(上图就是IIS下运行的效果)。
          当然如果光有进度条没有数据,那这个进度条也只能是个摆设,所以我把接下来的内容分成两块:进度信息的保存、进度的显示
          
          1、进度信息的保存
          首先我们要明白进度条在这里反应的是什么的进度?毫无疑问是文件上传的进度喽~~在上一篇中, 我们对上传的文件数据进行了提取,也就是说这个提取的进度就是我们要显示给客户端的进度。那就简单了,我们只要把已经提取的文件大小与总的文件大小比对一 下,就可以知道完成的百分比了。可是问题来了,我们如何知道上传了多少了呢?答案肯定是要用一个变量来保存已经上传的数据量。那这个变量要放在哪里才能让 我们既可以在进度页面中访问,又可以在HTTP上传模块中访问呢?
          大家肯定知道一般情况下,用户在多个页面之间访问,会用到Session对象或URL传值来进行页面之前的通信。但是前一篇所介绍的HTTP模块并不属于一个页面,因此我们无法简单的应用Session让进度页面与上传模块实现通信。这里主要还是借鉴高山来客的 思路:首先构建一个用于存放文件信息的类,该类主要用来保存文件信息,如:文件名,路径,当前上传的数据量,上传时间等。然后设置一个针对某次上传的唯一 ID做为页面中通信的暗号,拥有这个暗号的页面才能获取对应于某次上传的文件信息。现在已经有了两个变量了,接着就要使这两个变量可以被多个页面所使用, 方法就是在上传页面中,将这个ID变量注册为该页面的一个隐藏域,这样包含这个页面的HTTP请求流中就会包含那个上传ID。另一个类变量就保存在页面缓 存Cache中,并用上传ID做为其编号。
          现在假设已经有了这么一个用于存放文件信息的类UploadFileInfo。
          首先我们要在上传页面的PageLoad中new一个ID,然后注册一个隐藏域用来保存此ID,同时实例化UploadFileInfo类,并将相应的信息写入该类,最后把该类放入Catch:
          

    if (!IsPostBack)
    {
        UploadFileInfo ufi 
    = new UploadFileInfo();
        ufi.strFileGuid 
    = Guid.NewGuid().ToString;//用GUID来表示唯一的ID;
        ufi.strTempDir 
    = Server.MapPath("TempUpload/" + ufi.strFileGuid + "//");
        ClientScript.RegisterHiddenField(
    "UploadID", ufi.strFileGuid);//隐藏域,名字为UploadID,值为ufi.strFileGuid
        HttpContext.Current.Cache.Add(ufi.strFileGuid, ufi, null, DateTime.Now.AddDays(10), TimeSpan.Zero, System.Web.Caching.CacheItemPriority.High, null);//加入到Catch中
    }

          经过以上步骤,我们就可以在HTTP模块中访问了。
          因为在这次的HTTP请求流中包含了一个隐藏域,所以我们可以对获取的HTTP请求流进行分析,从而获取相应的上传ID,也就是我们之前说的暗号。然后通 过Cache的编号找到Cache中的文件信息对象,从而我们可以在后来的数据读取过程中对该对象的上传数据量进行修改。由于是放在Cache中,加之是 一个引用对象,所以对该对象修改后,其它代码访问到的都是最新的值。

    string sguid = GetUploadId(bPreloadedEnitityBody, eContentEncode);//GetUploadId是自己写的一个方法用来从请求流中获取上传ID
    UploadFileInfo ufiFileInfo = (UploadFileInfo)HttpContext.Current.Cache[sguid];//取出文件信息对象

          其它页面如果要使用这个对象就得先获取ID,之后就可以自由操作了。
          2、进度的显示
          从图中我们可以看到,当显示进度的时候,背后的页面成灰色,并且无法响应任何事件,有点类似模态窗口。这个效果大家可以在网上查查,还是挺容易实现的。我这里有一段js显示此效果的代码(搜集于网上):

    ModalDialogfunction ModalDialog(name,divid,width,height,leftop,topop,color)
       
    {
           
    this.name=name;//名称
           this.div=divid;//要放入窗体中的元素名称
           this.width=width;//窗体宽
           this.height=height;//窗体高
           this.leftop=leftop;//左侧位置
           this.topop=topop;//上部位置
           this.color=color;//整体颜色
           this.show=function()//显示窗体
           {
               document.all(obj.name
    +"_divshow").style.width=obj.width;
               document.all(obj.name
    +"_divshow").style.height=obj.height;
               document.all(obj.name
    +"_divshow").style.left=obj.leftop;
               document.all(obj.name
    +"_divshow").style.top=obj.topop;
               document.all(obj.name
    +"_mask").style.width=document.body.clientWidth;
               document.all(obj.name
    +"_mask").style.height=document.body.clientHeight;
               document.all(obj.name
    +"_divshow").style.visibility="visible";
               document.all(obj.name
    +"_mask").style.visibility="visible";
           }


    this.close=function()//关闭窗体
           {  
               document.all(obj.name
    +"_divshow").style.width=0;
               document.all(obj.name
    +"_divshow").style.height=0;
               document.all(obj.name
    +"_divshow").style.left=0;
               document.all(obj.name
    +"_divshow").style.top=0;
               document.all(obj.name
    +"_mask").style.width=0;
               document.all(obj.name
    +"_mask").style.height=0;
               document.all(obj.name
    +"_divshow").style.visibility="hidden";
               document.all(obj.name
    +"_mask").style.visibility="hidden";         
           }


    this.toString=function()
           
    {
               
    var tmp="<div id='"+this.name+"_divshow' style='position:absolute; left:0; top:0;z-index:10; visibility:hidden;width:0;height:0'>";
               tmp
    +="<table cellpadding=0 cellspacing=0 border=0 width=100% height=100% >";
               tmp
    +="<tr>";
               tmp
    +="<td id='"+this.name+"_content' valign=top ></td>";
               tmp
    +="</tr>"
               tmp
    +="</table>";
               tmp
    +="</div>";
               tmp
    +="<div  id='"+this.name+"_mask' style='position:absolute; top:0; left:0; width:0; height:0; background:#666; filter:ALPHA(opacity=50); z-index:9; visibility:hidden'></div>";
           
               document.write(tmp);
               document.all(
    this.name+"_content").insertBefore(document.all(this.div));
           }

            
    var obj=this;
       }

          接着讲我们的重点:如何实现定时局部刷新。
          关于XmlHttpRequest对象,我这里就不详细讲述了,提供大家一个关于此的手册下载。为了大家更容易理解,我举个小例子:
      

    小例子页面A.aspx
    function returnresponse(url)
    {
         
    var xmlHttp = new ActiveXObject('MSXML2.xmlHttp'); 
         
    if(xmlHttp!=null)
         
    {
              xmlHttp.open(
    "GET",url,true);//向URL指定的页面发送GET请求
              xmlHttp.onreadystatechange=function()
              
    {//当xmlHttp的readyState改变的时候就会引发这个事件
                   if(xmlHttp.readyState==4&& xmlHttp.status == 200)
                   
    //4 = "成功发送",200 = "所请求的页面返回正常"
                        temp=xmlHttp.responseText;//接收所请求页面发回的数据
                        alert(temp);
                   }

              }

              xmlHttp.send(
    null);  
          }

          
    else
          
    {
              alert(
    "浏览器不支持XmlHttp.");
          }

    }


    //URL所指向的页面B的代码.cs,当然也可以是同一个页面的cs
    if(Request.QueryString["event"]=="test")
    {
         Response.Write(
    "测试");
    }


    /*
    然后我们在A页中执行returnresponse(B.aspx?event="test");
    很快就会发现在A页中弹出一个窗口,内容是"测试"。
    */


          通过以上小例子,大家应该已经对该对象有所了解了吧。为实现定时刷新,我把进度条单独放在一个页面中(如A.aspx),通过js的setTimeout 来定时执行类似returnresponse这样的方法,然后在A.aspx.cs代码中获取文件信息对象,接着通过Response来反馈进度信息。这 样在A.aspx页面中就可以获取到信息,并进行显示了。但是执行ActiveXObject将要花费不少代价,而且我们是定时执行该方法,显然会造成性 能下降。在参考了构建一个pool来管理无刷新页面的xmlhttp对象后,决定采用这一方法,事实证明该方法确实有效。

    利用pool后的代码function xmlHttpPoolFactory()
        
    {
            
    this.XmlHttpPool = new Array();
            
    this.MaxPoolLength = 10;
            
    this.Add=function()
            
    {
                
    if ( this.XmlHttpPool.length < this.MaxPoolLength ) 
                
    {
                    xmlHttp
    =null;
                    
    if (window.XMLHttpRequest)
                    
    {// code for all new browsers
                        xmlHttp=new XMLHttpRequest();
                    }

                    
    else if (window.ActiveXObject)
                    
    {// code for IE5 and IE6
                        try 
                        

                            xmlHttp 
    = new ActiveXObject('MSXML2.xmlHttp'); 
                        }
     
                        
    catch(e) 


    try 
                            

                                xmlHttp 
    = new ActiveXObject('Microsoft.xmlHttp'); 
                            }
     
                            
    catch(e2) 
                            
    {
                            }
     
                        }
     

                    }

                    
    if ( xmlHttp!=null ) 


    this.XmlHttpPool.push(xmlHttp); 
                    }
     
                    
    return xmlHttp; 
                }

            }
    ;
            
    this.GetXmlHttp = function()
            
    {
                
    var xmlHttp = null
                
    var pool = this.XmlHttpPool; 
                
    for ( var i=0 ; i < pool.length ; ++i ) 


    if ( pool[i].readyState == 4 || pool[i].readyState == 0 ) 
                    

                        xmlHttp 
    = pool[i]; 
                        
    break
                    }
     
                }
     
                
    if ( xmlHttp == null ) 


    return this.Add(); 
                }
     
                
    return xmlHttp; 

            }
    ;
            
    this.returnresponse= function(url,div)
            
    {
                
    var xmlHttp = this.GetXmlHttp();
                
    var param = div.split(',');
                
    if(xmlHttp!=null)
                
    {
                    xmlHttp.open(
    "GET",url,true);
                    xmlHttp.onreadystatechange
    =function()
                    
    {
                        
    if(xmlHttp.readyState==4&& xmlHttp.status == 200)
                        
    //4 = "loaded",200 = "OK"

                            temp
    =xmlHttp.responseText;
                            
    var temparray = temp.split(",");
                            document.getElementById(param[
    0]).innerText=temparray[0];
                            document.getElementById(param[
    1]).innerText=temparray[1]+"KB/S";
                            document.getElementById(param[
    2]).innerHTML="<table width='"+temparray[2]*3+"'><tr><td></td></tr></table>";
                            document.getElementById(param[
    3]).innerText=temparray[2]+"%";
                        }

                    }

                    xmlHttp.send(
    null);  
                }

                
    else
                
    {
                    alert(
    "Your browser does not support xmlHttp.");
                }

            }
    ;
            
    this.AportAll = function()
            
    {
                
    for ( var i=0 ; i < this.XmlHttpPool.length ; ++i )  
                
    {  
                    
    this.XmlHttpPool[i].abort();  
                }
      
            }
    ;   
         }

        
    var a = new xmlHttpPoolFactory();//建立一个全局的工厂实例
        var strevent = "";
        
    function refresh(url,interval,div)
        
    {//该方法我用来定时刷新,因为除了SetTimeout还有一些其它活要干
            var str1 = "";   
            
    for(i=2;i<arguments.length;i++)
            
    {//因为可能需要刷新的div不只一个,所以利用js的arguments来解决动态参数的问题
                if(i!=arguments.length1)
                
    {
                    str1 
    = str1 +arguments[i]+",";
                }

                
    else
                
    {
                    str1 
    = str1 +arguments[i];
                }

            }

            a.returnresponse(url,str1);  
    //调用该方法实现异部通信

            
    var str="";
            
    for(i=0;i<arguments.length;i++)
            
    {
                
    if(i!=arguments.length1)
                    str 
    = str + "'"+arguments[i]+"',";
                
    else
                    str 
    = str+"'"+arguments[i]+"'";
            }

            setTimeout(
    "refresh("+str+")", interval );//定时执行该方法
            

        }

           到这就差不多整个专题都结束了,接下来几天,我会把代码稍微调整下,然后传上来。
           由于这段时间要上班,实在抽不出时间来整理,如果大家需要可以先拿去看看。不过代码写的有点乱,而且有些功能也没有完善,时间实在太少,大家见谅。
           粗糙的工程

    [CMS]N2CMS开源CMS框架使用指南

    mikel阅读(1229)

    Installation

    This section covers installation of the examples. The requirements for the examples are Visual Studio 2005 and SQL Express 2005.

    Step 1: Download from CodePlex

    Released files

    The best place to start is in the download section on codeplex. Along the source code there are a number of examples that should speed you right along using N2. This guide will focus on the Templates Examples. This the code of a skeleton project along with compiled versions of the templates and edit interface code. Here's a quick overview of the other released files.

    Step 2. Unzip

    Unzipped files


    Now that you've downloaded the Templates Examples unzip and venture into the downloaded goodies. The package includes an Sql Server 2005 Express database (mdb file) with a few pages.

    If you don't want to use SQL express you can install the required tables in another database by configuring the connection string in web.config and following the installation guide located in the /edit/install directory.

    Step 3: Open in Visual Studio 2008

    Visual studio

    As you can see there isn't much in this project. However. There's more, but it's all compiled and not included in the project. If you're new to N2 I can reccoment not digging into the source code just yet. Just play along fow now.

    Step 4: Compile and Run (Ctrl+F5)

    Hit the universal compile and run command in visual studio Ctrl+F5 to see how this site looks like right now. Visual Studio has a little web server that will serve us just fine right now.

    Run


    Beautiful…

    Step 5: Log in and play around

    Why not log in and play around a bit. The username and password should be admin/changeme. 

    Log in

    Edit

    Step 6: Look at some code

    Back in visual studio you can see two files included in the project. This is the definition of a content item we can use when we edit. For an item to be available for editing you need create a class and decorate it with the [Definition] attribute.

    content definition

    To be able to view it you also need to point out a template from within the definition. This is a template, it has a designer file:

    a template

    The template uses a master page and a theme which is set at runtime. To change edit the start page.

    This is the code-behind file:

    a template

    Step 7: Verify the example code

    Switch back to the browser and create a new item (right click on the startpage and choo new). Notice that there's a choice "My First Page"? That's defined by the code in the example project you just looked at.

    a template

    When we click on it we start start editing the page. The fields that are there by default are inherited from AbstractContentPage (if you didn't notice before go back to Visual Studion and "MyPagePage.cs" and take a look) .

    Some results

    [CMS]NetCMS开源CMS项目

    mikel阅读(1150)

    安装环境

    SQL Server 版基本安装环境
    操作系统: Windows Server 2003(推荐)、Windows 2000、Windows XP
    数据库 :SQL Server 2000(推荐)、SQL Server 2005
    Web服务器: IIS 5.0及以上版本(推荐IIS6.0)
    其它:.NET Framework 2.0

    下载NetCMS 1.7.0.1125

    更新列表
    NetCMS 1.7.0 build1125 正式版(最后更新 2008年11月25日) 
    NetCMS 1.7.0 build1125 源码版(最后更新 2008年11月25日) 
    NetCMS 1.7.0 build1125 正式版(中国站长站分流)(最后更新 2008年11 月25日) 
    NetCMS 1.7.0 build1125 源码版(中国站长站分流)(最后更新 2008年11 月25日) 

    下载NetSNS1.5.1 1209

    NetSNS V1.5.1 build1209正式版(最后更新 2008年12月09日) 
    NetSNS V1.5.1 build1209源码版(最后更新 2008年12月09日) 
    NetSNS V1.5.1 build1209正式版(中国站长站分流)(最后更新 2008年12月09日) 
    NetSNS V1.5.1 build1209源码版(中国站长站分流)(最后更新 2008年12月09日) 
    NETSNS功能使用说明(最后更新 2008年7月15日)
    由于大头贴文件过大,单独提供下载,请解压后放到inc/cam文件夹下(最后更新 2008年12月08日) 
    请在SQL数据库查询分析器中执行database/sql/1.sql(表结构),database/sql/2.sql(初始值),SQL脚本也可以在这里单独下载(最后更新 2008年12月09日) 
    管理员帐号:admin,密码:admin888

    下载用户手册

    点击下载 (最后更新 2008年4月21日)

    下载数据库设计文档

    点击下载(最后更新 2008年4月11日)

    下载标签说明

    点击下载 (最后更新 2008年05月09日)

    下载模板风格

    查看(最后更新 2008年05月09日)

    [C#]利用Windows系统服务自动更新网站

    mikel阅读(1125)

    利用Windows系统服务自动更新网站


           Tag: windows服务   自动更新 自动发布 网站自动更新

    应用背景:作为一个站长,为了管理好网站,也为了讨好搜索引擎,每天都需要在不同的时段更新网站的内容,有的站长需要维护几个网站,每天的工作量可想而知,如果逢年过节,站长没有在电脑旁边或者无法上网,这个维护工作也就无法进行。

           使用原理:本文介绍了一种方法来自动更新网站内容,采用一个Windows系统服务,设置好它的URL访问地址,每天在特定时间内访问需要更新内容的网站 的特殊页面(假定这个页面为A);在网站端,设置一个审核机制,只有通过审核的内容才能显示在网站前端,新加的信息默认是不审核,页面A的作用就是从未审 核信息中挑出几条进行审核,这样就更新了网站内容,对于静态首页的,页面A还可以生成下首页静态页面。当然页面A还可以做更多的用途,如备份数据库、更改 到期用户状态、删除无用的临时文件等。

           详细原理:

    1)        Windows服务端:

                  Windows服务采用.Net Framework2.0框架,所以使用时应该先安装好.Net Framework2.0,下载地址:

    http://www.microsoft.com/downloads/details.aspx?FamilyID=0856EACB-4362-4B0D-8EDD-AAB15C5E04F5&displaylang=zh-cn

           采用一个xml文件存储配置信息,里面存储需要访问的网址,示例结构如下:

    <?xml version="1.0" encoding="utf-8" ?>

    <root>

      <Urls>

        <item url="http://www.shouji138.com/" time="3:59"/>

        <item url="http://www.baidu.com/" time="11:59"/>

        <item url="http://www.baidu.com/" time="13:59"/>

        <item url="http://www.baidu.com/" time="15:59"/>

        <item url="http://www.baidu.com/" time="16:59"/>

      </Urls>

    </root>

    一个item代表一次访问,url是具体的网址,设置为网站自动更新的url地址,可以带查询字符串来设置更新的数量,time表示每天访问的时间,time只能精确到1分钟,而且必须保证每个item在同一分钟内只有一个url任务。

           程序采用一个定时器,每隔20秒扫描一下配置项中是否有需要访问的网址,如果有则访问一次这个网址。相关代码如下:

    public Job()

            {

                System.Timers.Timer myTimer = new System.Timers.Timer(20000);

                myTimer.Elapsed += new ElapsedEventHandler(myTimer_Elapsed);

                myTimer.Enabled = true;

                myTimer.AutoReset = true;

                XmlDocument xml = new XmlDocument();

                xml.Load(AppDomain.CurrentDomain.BaseDirectory + ConfigurationManager.AppSettings["xmlfile"]);

                xmllist = xml.SelectNodes("//root/Urls/item");


            }


            void myTimer_Elapsed(object source, ElapsedEventArgs e)

            {

                try

                {

                    Log.SaveNote(DateTime.Now.ToString("yyyy-MM-dd HH:mm:ss") + " Heart Work!(心跳检测)");

                    YourTask();

                }

                catch (Exception ee)

                {

                    Log.SaveException(ee);

                }

            }

            void YourTask()

            {

                count++;

                if (count > 10000)

                    count = 0;

                for (int i = 0; i < xmllist.Count; i++)

                {

                    string url = xmllist[i].Attributes["url"].Value;

                    string time = xmllist[i].Attributes["time"].Value;

                    //Log.SaveNote(url + "-" + time);


                    DateTime workTime = DateTime.Parse(DateTime.Now.ToShortDateString() + " " + time);


                    //lastwork

                    if (DateUtil.DateDiff(DateUtil.DateInterval.Minute, workTime, DateTime.Now) == 0)

                    {

                        //到了执行时间

                        if (DateUtil.DateDiff(DateUtil.DateInterval.Minute, workTime, lastworktime) != 0)

                        {

                                              //访问网址,如 手机主题 http://www.shouji138.com/

                            visit(url);

                            lastworktime = DateTime.Now;

                        }

                    }

                }

            }


            void visit(string url)

            {

                HttpWebRequest myHttpWebRequest = null;

                HttpWebResponse myHttpWebResponse = null;

                Stream receiveStream = null;

                try

                {

                    myHttpWebRequest = (HttpWebRequest)WebRequest.Create(url);

                    myHttpWebResponse = (HttpWebResponse)myHttpWebRequest.GetResponse();

                    receiveStream = myHttpWebResponse.GetResponseStream();//得到回写的字节流

                    Log.SaveNote("访问:" + url);

                }

                catch (Exception ex)

                {

                    Log.SaveNote("访问失败:" + url);

                    Log.SaveException(ex);

                }

                finally

                {

                    if (receiveStream != null)

                        receiveStream.Close();

                    if (myHttpWebResponse != null)

                        myHttpWebResponse.Close();

                }

            }

    2)        网站端:

    网站端应该采用审核机制,比如一个表News表,设置字段isaccept为审核字段,1表示已审核,0表示未审核,新增的内容默认为未审核0。我 们在平时的时候多添加一些内容到未审核库中,然后交给程序来自动更新。更新程序可以采用任何动态网页技术,asp、php、jsp都可以,该程序的作用就 是把未审核的内容更改为审核状态,为了灵活起见,可以设置一个表示更新数量的查询字符串变量给程序,如num,则更新3条的网址就变成http://www.shouji138.com/A.asp?num=3这 种形式,这个网址可以在Windows服务的配置文件中设置好。本文的重点是讲采用Windows服务来进行网站更新,所以具体网站端的代码我就没有写出 来了,各位站长可以根据自己网站的情况来编写。Windows服务是与网站端没有业务逻辑关联的,windows服务只管定期的来访问网站端的更新网址, 而网站端的更新网址只管更新的业务逻辑。


    最后,提供下工具和源代码的下载地址:

    Windows服务工具下载:http://www.shouji138.com/aspnet2/files/autopub.rar

    Windows服务源码下载: http://www.shouji138.com/aspnet2/files/autopubsource.rar