[转载]Filter ComboGrid - jQuery EasyUI

mikel阅读(1498)

[转载]Filter ComboGrid – jQuery EasyUI.

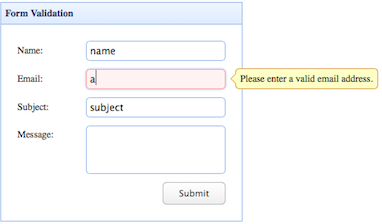
The combogrid component has the same functionalities as the combobox component except that the drop down panel is based on a datagrid. The combogrid component can be filtered, paged and some other datagrid capabilities. This tutorial will show you how to filter data records in a combogrid component.

Create ComboGrid

  1. <input id=“cg” style=“width:150px”>
  1. $(‘#cg’).combogrid({
  2. panelWidth:500,
  3. url: ‘form5_getdata.php’,
  4. idField:‘itemid’,
  5. textField:‘productid’,
  6. mode:‘remote’,
  7. fitColumns:true,
  8. columns:[[
  9. {field:‘itemid’,title:‘Item ID’,width:60},
  10. {field:‘productid’,title:‘Product ID’,align:‘right’,width:80},
  11. {field:‘listprice’,title:‘List Price’,align:‘right’,width:60},
  12. {field:‘unitcost’,title:‘Unit Cost’,align:‘right’,width:60},
  13. {field:‘attr1’,title:‘Attribute’,width:150},
  14. {field:‘status’,title:‘Stauts’,align:‘center’,width:60}
  15. ]]
  16. });

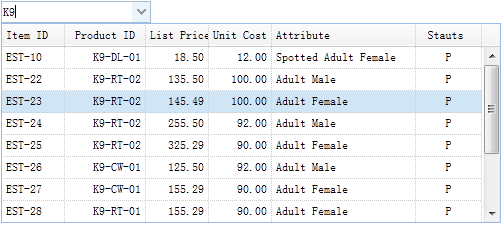
The combogrid component should define ‘idField’ and ‘textField’ properties. The ‘idField’ property store the component value and ‘textField’ property display the text message on the input box. The combogrid can filter its records in ‘local’ or ‘remote’ mode. On remote mode the combogrid will post the ‘q’ parameter to remote server when users typeing chars in input box.

The Server Code

form5_getdata.php
  1. $q = isset($_POST[‘q’]) ? strval($_POST[‘q’]) : ;
  2. include ‘conn.php’;
  3. $rs = mySQL_query(“select * from item where itemid like ‘%$q%’ or productid like ‘%$q%'”);
  4. $rows = array();
  5. while($row = mySQL_fetch_assoc($rs)){
  6. $rows[] = $row;
  7. }
  8. echo json_encode($rows);

Download the EasyUI example:


[转载]jQuery.Easyui 1.2.4 CHM API 下载

mikel阅读(1016)

[转载]jQuery.Easyui 1.2.4 CHM API 下载 – 疯狂秀才 – 博客园.

JQuery easyui 1.2. 4

ChangeLog

Bug

  • menu: The menu position is wrong when scroll bar appears. fixed.
  • accordion: Cannot display the default selected panel in JQuery 1.6.2. fixed.
  • tabs: Cannot display the default selected tab panel in jQuery 1.6.2. fixed.

Improvement

  • menu: Allow users to disable or enable menu item.
  • combo: Add ‘delay’ property to set the delay time to do searching from the last key input event.
  • treegrid: The ‘getEditors‘ and ‘getEditor‘ methods are supported now.
  • treegrid: The ‘loadFilter‘ option is supported now.
  • messager: Add ‘progress’ method to display a message box with a progress bar.
  • panel: Add ‘extractor’ option to allow users to extract panel content from ajax response.

New Plugins

  • searchbox: Allow users to type words into box and do searching operation.
  • progressbar: To display the progress of a task.

[转载]Documentation TreeGrid- jQuery EasyUI

mikel阅读(1049)

[转载]Documentation – jQuery EasyUI.

TreeGrid

Extend from $.fn.datagrid.defaults. Override defaults with $.fn.treegrid.defaults.

Dependencies

  • datagrid

Usage

  1. <table id=“tt”></table>
  1. $(‘#tt’).treegrid({
  2. url:‘treegrid_data.json’,
  3. treeField:‘name’,
  4. columns:[[
  5. {title:‘Task Name’,field:‘name’,width:180},
  6. {field:‘persons’,title:‘Persons’,width:60,align:‘right’},
  7. {field:‘begin’,title:‘Begin Date’,width:80},
  8. {field:‘end’,title:‘End Date’,width:80}
  9. ]]
  10. });

Properties

The properties extend from datagrid, below is the added properties for treegrid.

Name Type Description Default
treeField string Defines the tree node field. null
animate boolean Defines if to show animation effect when node expand or collapse. false

Events

The events extend from datagrid, below is the added events for treegrid.

Name Parameters Description
onClickRow row Fires when user click a node.
onDblClickRow row Fires when user dblclick a node.
onBeforeLoad row, param Fires before a request is made to load data, return false to cancel this load action.
onLoadSuccess row, data Fires when data loaded successfully.
onLoadError arguments Fires when data loaded fail, the arguments parameter is same as the ‘error’ function of JQuery.ajax.
onBeforeExpand row Fires before node is expanded, return false to cancel this expand action.
onExpand row Fires when node is expanded.
onBeforeCollapse row Fires before node is collapsed, return false to cancel this collapse action.
onCollapse row Fires when node is collapsed.
onContextMenu e, row Fires when node is right clicked.
onBeforeEdit row Fires when user start editing a node.
onAfterEdit row,changes Fires when user finish editing.
onCancelEdit row Fires when user cancel editing a node.

Methods

Name Parameter Description
options none Return the options of treegrid.
resize options Set treegrid size, the options contains two properties:
width: the new width of treegrid.
height: the new height of treegrid.
fixRowHeight id fix the specified row height.
loadData data Load the treegrid data.
reload id Reload treegrid data.
reloadFooter footer Reload footer data.
getData none Get the loaded data.
getFooterRows none Get the footer data.
getRoot none Get the root node, return node object
getRoots none Get the root nodes, return node array.
getParent id Get the parent node.
getChildren id Get the children nodes.
getSelected none Get the selected node and return it, if no node selected return null.
getSelections none Get all selected nodes.
getLevel id Get the specified node level.
find id Find the specifed node and return the node data.
select id Select a node.
unselect id Unselect a node.
selectAll none Select all nodes.
unselectAll none Unselect all nodes.
collapse id Collapse a node.
expand id Expand a node.
collapseAll id Collapse all nodes.
expandAll id Expand all nodes.
expandTo id Expand from root to specified node.
toggle id Toggles expanded/collapsed state of the node.
append param Append nodes to a parent node. The ‘param’ parameter contains following properties:
parent: DOM object, the parent node to append to, if not assigned, append as root nodes.
data: array, the nodes data.
remove id Remove a node and it’s children nodes.
refresh id Refresh the specified node.
beginEdit id Begin editing a node.
endEdit id End editing a node.
cancelEdit id Cancel editing a node.
getEditors id Get the specified row editors. Each editor has the following properties:
actions: the actions that the editor can do.
target: the target editor JQuery object.
field: the field name.
type: the editor type.
getEditor options Get the specified editor, the options contains two properties:
id: the row node id.
field: the field name.

[转载]Mozilla Firefox 8.0 正式发布

mikel阅读(822)

[转载]Mozilla Firefox 8.0 正式发布

Mozilla FTP的releases目录已经出现了Mozilla Firefox 8.0 正式版的身影,现在已经可以下载,本次发布包含全平台全语种,这意味着微软的蛋糕又要送出了。

  • Add-ons installed by third party programs are now disabled by default
  • Added a one-time add-on selection dialog to manage previously installed add-ons
  • Added Twitter to the search bar
  • Added a preference to load tabs on demand, improving start-up time when windows are restored
  • Improved tab animations when moving, reordering, or detaching tabs
  • Improved performance and memory handling when using <audio> and <video> elements
  • Added CORS support for cross-domain textures in WebGL
  • Added support for HTML5 context menus
  • Added support for insertAdjacentHTML
  • Improved CSS hyphen support for many languages
  • Improved WebSocket support
  • Fixed several stability issues

下载:Mozilla Firefox 8.0

[转载]注册Sqldmo.dll

mikel阅读(1092)

[转载]注册SQLdmo.dll

.

在不安装客户端实用程序的情况下启用 SQL DMO 客户端
(http://support.microsoft.com/kb/248241/zh-cn)

概要
本文介绍在无需安装 SQL Server 客户端实用程序的情况下启用 SQL Server 分布式管理对象 (SQL-DMO) 客户端功能所需的步骤。

典型情况
您 编写一个利用 SQL Server 中的 SQL-DMO 对象模型的应用程序。您的应用程序在服务器计算机中能正常运行,而在安装 了 SQL Server 客户端实用程序的客户端计算机中也能正常运行。但是,该应用程序无法单独运行。此外,您还可能看到几个与此相关的错误。最常见 的错误是:
ActiveX can’t create object
Field is not bound correctly
Cannot find entry point
注意:安装  Microsoft 数据访问组件 (MDAC) 无法解决此问题。

MDAC 不 会安装 Sqldmo.dll 文件或与该文件关联的许多从属 DLL 中的任何一个。MDAC 所包括的是 SQL-DMO 客户端连接使用的许多相 关 DLL。无论如何,将 MDAC 与您的应用程序安装绑定都不是最理想的解决办法,因为要使您的 DMO 连接工作,您无需安装所有 的 MDAC DLL。另外,MDAC 还会在客户端计算机上安装许多您可能永远都不会用到的其他功能。这里的主要意思是,您不必安装所有 MDAC 来 获取您需要的功能,而是只安装必需的 DLL 即可。本文后面将介绍这些 DLL。

在讨论不同类型的 DLL 以及需要将它们放置在哪里 之前,让我们偏离一下主题,简要回顾一下基于 Win32 和 COM 的 DLL。在本文中,您只需了解如何区分这些 DLL 以及在识别它们之后如何 处理它们。了解这一点之后,看看以下您需要了解的内容: • 您需要通过 Regsvr32 实用程序注册基于 COM 的 DLL。
• 您需要将本机 Win32 DLL 放置在应用程序路径中。
• 可能还需要将本机 Win32 DLL 放置在 Win32 目录中。
有时候很难区分基于 COM 的 DLL 和非基于 COM 的 DLL;但是,通常情况下,基于 COM 的 DLL 始终具有以下入口点:
• DllGetClassObject
• DllRegisterServer
• DllUnregisterServer
• DllCanUnloadNow
要查看入口点,请右键单击 DLL,然后单击快捷菜单中的“快速查看”。所显示的信息记录在 DLL 信息的“导出表”部分中。

以下是您从客户端启用 DMO 所需的与 SQL-DMO 有关的 DLL 列表:
• Sqldmo.dll
• Sqldmo.rll
• Sqlsvc.dll
• Sqlsvc.rll
• Sqlwoa.dll
• Sqlresld.dll
• Sqlwid.dll
• W95scm.dll
在上面的 DLL 列表中,Sqldmo.dll 是唯一您需要在客户端计算机上注册的 DLL。但是,要成功注册 Sqldmo.dll 文件,Sqldmo.rll 文件必须存在于客户端计算机上的以下目录中:
(服务器端位置):c:\Mssql7\Binn\Resources\1033
(客户端位置):c:\Winnt\System32\Resources\1033
Sqldmo.rll 文 件总是会引发问题。.rll 文件是本地化的资源文件。资源目录会根据 SQL Server 和客户端安装上配置的国家/地区语言的不同而异。在本例 中,目录 1033 是语言标识符 0X0409 的十进制表示,代表美国英语。将该 .rll 文件放置在适当的位置之后,可以通过调 用 Regsvr32 实用程序来注册 Sqldmo.dll 文件。注册该文件的命令是: C:\Regsvr32 Sqldmo.dll

注册成功后,应收到以下消息:
SQLDMO.dll 中的 DLLRegisterServer 成功。
如果您希望在您的应用程序安装例行过程中自动进行此类注册,请参见与 Regsvr32 实用程序关联的各个开关。以静默方式注册该文件的命令是: c:\regsvr32 /s- sqldmo.dll

客户端计算机上包含 Sqldmo.dll 文件的目录必须具有特定的结构,否则您可能会收到类似如下的错误消息:
LoadLibrary(“C:\Winnt\System32\sqldmo.dll”) 失败。
GetLastError 返回 0x0000007e
该 错误意味着发生了错误 126(以十进制表示),该错误对应于“找不到指定模块”错误。在本例中,此错误与 Sqldmo.rll 文件有关。 即,Regsvr32 实用程序找到了 Sqldmo.dll 文件,但无法完成该文件的注册,因为 Sqldmo.rll 文件不在预期 的 1033 子目录中。

要避免该问题,请执行下列操作:
1. 在 Sqldmo.dll 所在的目录中添加名为“Resources”的目录。
2. 在“Resources”目录下添加名为“1033”的子目录。
3. 将 Sqldmo.rll 文件复制到该目录中。
完成后,目录结构应类似如下:
包含 Sqldmo.dll 的目录\Resources\1033
且该 1033 目录应包含 Sqldmo.rll 文件。

除了前面提到的 DLL,您还需要确保您安装了正确的网络库 DLL。您在此需要的主要网络库 DLL 为: • 命名管道:Dbnmpntw.dll
• 套接字:Dbmssocn.dll
• 多协议:Dbmsrpcn.dll
这些 DLL 都是基于 Win32 的 DLL,因此您不必注册它们。只需将这些 DLL 放入  Microsoft Windows NT 的 System32 目录中,或  Microsoft Windows 95/Windows 98 的 System 目录中。

完成前面的步骤之后,客户端应用程序应当能够正常启动,不会出现最初由于缺少必要文件而导致的任何问题。

2008/01/17
实际案例:
在一台机器上布置SQLWEBADMIN后发现运行时出现如下错误:

Retrieving the COM class factory for component with CLSID {10020200-E260-11CF-AE68-00AA004A34D5} failed due to the following error: 80040154.

解决方案:
根据上面的文档,找到相应的文件,

Sqldmo.dll,Sqlsvc.dll,Sqlwoa.dll,Sqlresld.dll,Sqlwid.dll,W95scm.dll
复制到 %windir%\system32

Sqldmo.rll
Sqlsvc.rll
复制到 %windir%\system32\Resources\1033\
或(和)%windir%\system32\Resources\2052\
然后运行:regsvr32 Sqldmo.dll
成功注册,最终也解决了上述布署过程中遇到的问题.

[转载]Build CRUD Application with edit form in expanded row details - jQuery EasyUI

mikel阅读(1173)

[转载]Build CRUD Application with edit form in expanded row details – jQuery EasyUI.

When switch the datagrid view to ‘detailview’, users can expand a row to show any details below that row. This feature allows you to provide any possible layout for its edit form that placed in detail row panel. In this tutorial, we are using datagrid component to reduce the space occupied by the edit form.

Step 1: Create DataGrid in HTML tag

  1. <table id=“dg” title=“My Users” style=“width:550px;height:250px” url=“get_users.php” toolbar=“#toolbar” fitcolumns=“true” singleselect=“true”>
  2. <thead>
  3. <tr>
  4. <th field=“firstname” width=“50”>First Name</th>
  5. <th field=“lastname” width=“50”>Last Name</th>
  6. <th field=“phone” width=“50”>Phone</th>
  7. <th field=“email” width=“50”>Email</th>
  8. </tr>
  9. </thead>
  10. </table>
  11. <div id=“toolbar”>
  12. <a href=“#” class=“easyui-linkbutton” iconcls=“icon-add” plain=“true” onclick=“newItem()”>New</a>
  13. <a href=“#” class=“easyui-linkbutton” iconcls=“icon-remove” plain=“true” onclick=“destroyItem()”>Destroy</a>
  14. </div>

Step 2: Apply Detail View for DataGrid

  1. $(‘#dg’).datagrid({
  2. view: detailview,
  3. detailFormatter:function(index,row){
  4. return ‘<div class=”ddv”></div>’;
  5. },
  6. onExpandRow: function(index,row){
  7. var ddv = $(this).datagrid(‘getRowDetail’,index).find(‘div.ddv’);
  8. ddv.panel({
  9. border:false,
  10. cache:true,
  11. href:‘show_form.php?index=’+index,
  12. onLoad:function(){
  13. $(‘#dg’).datagrid(‘fixDetailRowHeight’,index);
  14. $(‘#dg’).datagrid(‘selectRow’,index);
  15. $(‘#dg’).datagrid(‘getRowDetail’,index).find(‘form’).form(‘load’,row);
  16. }
  17. });
  18. $(‘#dg’).datagrid(‘fixDetailRowHeight’,index);
  19. }
  20. });

To use the detail view for datagrid, include the ‘datagrid-detailview.js’ file to your page header.

We use the ‘detailFormatter’ function to generate the row detail content. In this case, we return the empty <div> that the edit form will be placed in. When users click the row expand button(‘+’), the ‘onExpandRow’ event will be triggered and we can load the edit form via ajax. Call ‘getRowDetail’ method to get the row detail container, so we can find the row detail panel. Create the panel in row details and load the edit form that returned from ‘show_form.php’.

Step 3: Create Edit Form

The edit form is loaded from server.

show_form.php
  1. <form method=“post”>
  2. <table class=“dv-table” style=“width:100%;background:#fafafa;padding:5px;margin-top:5px;”>
  3. <tbody><tr>
  4. <td>First Name</td>
  5. <td><input name=“firstname” class=“easyui-validatebox” required=“true”></td>
  6. <td>Last Name</td>
  7. <td><input name=“lastname” class=“easyui-validatebox” required=“true”></td>
  8. </tr>
  9. <tr>
  10. <td>Phone</td>
  11. <td><input name=“phone”></td>
  12. <td>Email</td>
  13. <td><input name=“email” class=“easyui-validatebox” validtype=“email”></td>
  14. </tr>
  15. </tbody></table>
  16. <div style=“padding:5px 0;text-align:right;padding-right:30px”>
  17. <a href=“#” class=“easyui-linkbutton” iconcls=“icon-save” plain=“true” onclick=“saveItem(<?php echo $_REQUEST[‘index’];?>)”>Save</a>
  18. <a href=“#” class=“easyui-linkbutton” iconcls=“icon-cancel” plain=“true” onclick=“cancelItem(<?php echo $_REQUEST[‘index’];?>)”>Cancel</a>
  19. </div>
  20. </form>

Step 4: Save or Cancel editing

Call the ‘saveItem’ function to save a user or ‘cancelItem’ function to cancel the editing.

  1. function saveItem(index){
  2. var row = $(‘#dg’).datagrid(‘getRows’)[index];
  3. var url = row.isNewRecord ? ‘save_user.php’ : ‘update_user.php?id=’+row.id;
  4. $(‘#dg’).datagrid(‘getRowDetail’,index).find(‘form’).form(‘submit’,{
  5. url: url,
  6. onSubmit: function(){
  7. return $(this).form(‘validate’);
  8. },
  9. success: function(data){
  10. data = eval(‘(‘+data+‘)’);
  11. data.isNewRecord = false;
  12. $(‘#dg’).datagrid(‘collapseRow’,index);
  13. $(‘#dg’).datagrid(‘updateRow’,{
  14. index: index,
  15. row: data
  16. });
  17. }
  18. });
  19. }

Determine what is the URL to post to first and then find form object and call ‘submit’ method to post the form data. Collapse and update the row data while saving data successfully.

  1. function cancelItem(index){
  2. var row = $(‘#dg’).datagrid(‘getRows’)[index];
  3. if (row.isNewRecord){
  4. $(‘#dg’).datagrid(‘deleteRow’,index);
  5. else {
  6. $(‘#dg’).datagrid(‘collapseRow’,index);
  7. }
  8. }

When cancel the editing action, if the row is new and not save yet, delete the row directly, otherwise collapse the row.

Download the EasyUI example:

[转载]使用Power Designer正反向数据库及生成设计报告

mikel阅读(852)

[转载]使用Power Designer正反向数据库及生成设计报告 – shishanyuan – 博客园.

正反向数据库及生成设计报告

最近使用Power Designer 12 越发觉得这个工具的强大,特此总结共享给大家。共享主要是经常正向、反向数据库,以及每次手工写数据库设计说明书的工作可以让Power Designer来实现,而且生成的类型丰富、格式可自定义。
1. 反向数据库
这个工作一般是在没有E-R设计的数据库进行的,可以反向生成数据库的E-R设计。其步骤如下:
1.1. 设置当前操作数据库系统
选择菜单Database->Change Current DBMS


弹出如下窗口,选择Oracle10g(具体按实际情况),并确认。


1.2. 设置ODBC数据源
有两种方式可以设置ODBC数据源:
(1)通过系统ODBC设计进行
首先选择“管理工具->数据源(ODBC)”


打开如下界面,选择“系统DSN”,然后点击“添加”按钮


选择“Oracle in OraDb10g home1”选项,点击”完成“按钮


在如下窗口中填入相关连接信息,并进行测试连接
数据源:设置ODBC连接名称
TNS名称:在Oracle设置实例访问的名称
用户:反向用户名

输入密码,点击“OK”按钮

测试成功


即成功加入ODBC数据源

(2)通过PowerDesigner反向提示进行
选择菜单“Database->Reverse engineer Database”

在该界面上,如果存在反向数据库则选择即可;如果没有存在反向数据库的连接则如图示点击按钮进行新增

在该界面上点击“Add”按钮进入系统ODBC增加页面


1.3. 选择需要反向的数据库ODBC源
选择菜单“Database->Reverse engineer Database”,点击数据库连接按钮

设置用户名和密码,然后点击”Connect“


选定了需连接的数据源


1.4. 选择反向对象生成E-R关系图
在上图中点击“确定”按钮,进入了反向对象界面,在该界面上可以选择表、视图、用户等对象类型,然后点击“OK”按钮


进入如下图


生成的关系图如下


2. 生成数据库
2.1. 设置当前操作数据库系统

按照1.1项设置当前操作数据库系统
2.2. 设置生成数据库选项
选择菜单atabase->Generate Database”


进入如下界面,在该界面设置生成脚本的文件夹、文件名,并且可以选择不同的选项卡进行


在“Options”选项卡中,选择生成脚本不同内容


在”Selection”选项卡中,选择生成脚本不同对象


2.3. 生成数据库脚本
在设置界面上,选择”Check model”值,进行有效性检查

正在生成数据库脚本


成功生成


3. 生成数据设计报告
在了解PowerDesigner报告生成方式以后我只能感叹该功能太强大了,没有做不到,只有想不到!可向导、定模板、直接生成报告等方式生成,生成的类型有html、RTF等,具体提供功能如下,在下面我介绍直接生成报告方式。


3.1. 新建报告内容模板
选择菜单”Report->Reports”,进入如下界面,点击新增报告按钮


设置报告名称、语言和模板,设置完毕后点击“OK“按钮


进入如下界面,在中间栏中是数据库设计中所有可以选择内容,右栏是设置报告格式


3.2. 设置报告格式
双击中间栏中的”Titile“格式,自动加载到右栏中,右键选择编辑,进入如下界面设置该级标题,

分别选择E-R关系图、表属性说明和表字段说明

3.3. 生成数据设计报告
设置完毕后,选择菜单”Report->Generate RTF”


设置文件生成的文件名称,确认生成即可


生成的样式如下,可以调整该报告的格式行程最终的数据库说明书

[转载]Form Validation - jQuery EasyUI

mikel阅读(924)

[转载]Form Validation – jQuery EasyUI.

This tutorial will show you how to validate a form. The easyui framework provides a validatebox plugin to validate a form. In this tutorial we will build a contact form and apply the validatebox plugin to validate the form. You can then adapt this form to your own requirements.

Build form

Let’s build a simple contact form with name, email, subject and message field:

  1. <div style=“padding:3px 2px;border-bottom:1px solid #ccc”>Form Validation</div>
  2. <form id=“ff” method=“post”>
  3. <div>
  4. <label for=“name”>Name:</label>
  5. <input class=“easyui-validatebox” type=“text” name=“name” required=“true”></input>
  6. </div>
  7. <div>
  8. <label for=“email”>Email:</label>
  9. <input class=“easyui-validatebox” type=“text” name=“email” required=“true” validType=“email”></input>
  10. </div>
  11. <div>
  12. <label for=“subject”>Subject:</label>
  13. <input class=“easyui-validatebox” type=“text” name=“subject” required=“true”></input>
  14. </div>
  15. <div>
  16. <label for=“message”>Message:</label>
  17. <textarea name=“message” style=“height:60px;”></textarea>
  18. </div>
  19. <div>
  20. <input type=“submit” value=“Submit”>
  21. </div>
  22. </form>

We add a class named easyui-validatebox to input markup so the input markup will be applied the validation according the validType attribute.

Prevent the form to submit when invalid

When users click the submit button of form, we should prevent the form to submit if the form is invalid.

  1. $(‘#ff’).form({
  2. url:‘form3_proc.php’,
  3. onSubmit:function(){
  4. return $(this).form(‘validate’);
  5. },
  6. success:function(data){
  7. $.messager.alert(‘Info’, data, ‘info’);
  8. }
  9. });

If the form is invalid, a tooltip message will show.

Download the EasyUI example:

[转载]easyui表单数据验证

mikel阅读(902)

[转载]easyui表单数据验证.

   <form id="ff" method="post">
        <div>
            <label for="name">
                Name:</label>
            <input class="easyui-validatebox" type="text" name="name" required="true" validtype="length[5,12]"></input>
        </div>
        <div>
            <label for="email">
                Email:</label>
            <input class="easyui-validatebox" type="text" name="email" required="true" validtype="email" invalidMessage="邮箱格式错误"></input>
        </div>
        <div>
            <label for="subject">
                Subject:</label>
            <input class="easyui-validatebox" type="text" name="subject" required="true" missingMessage="不能为空"></input>
        </div>
        <div>
            <label for="message">
                Message:</label>
            <textarea name="message" style="height: 60px;"></textarea>
        </div>
        <div>
            <input type="submit" value="Submit">
        </div>
        </form>

Validate Rule

The validate rule is defined by using required and validType property, here are the rules already implemented:

  • email: Match email regex rule.
  • url: Match URL regex rule.
  • length[0,100]: Between x and x characters allowed.
  • remote[‘http://…/action.do’,’paramName’]: Send ajax request to do validate value, return ‘true’ when successfully.

Properties

Name Type Description Default
required boolean Defines if the field should be inputed. false
validType string Defines the field valid type, such as email, url, etc. null
missingMessage string Tooltip text that appears when the text box is empty. This field is required.
invalidMessage string Tooltip text that appears when the content of text box is invalid. null

http://www.jeasyui.com/documentation/validatebox.php

[转载]SQL Server插入记录后获取自动增长的列值

mikel阅读(954)

[转载]SQL Server插入记录后获取自动增长的列值 – Allen_Li – 博客园.

在关系数据库中,我们经常会给一个表的主键设置为自增列,而在开发过程中,有时又会需要在插入一条记录后获得它的主键值,我们可以通过创建带有输出参数的 存储过程来完成这一任务。在T-SQL中,有三个函数可以用来检索标识列值:SCOPE_IDENTITY, @@IDENTITY, IDENT_CURRENT.

其中,SCOPE_IDENTITY为微软推荐使用函数,它返回当前执行范围内的最后一个标识值,大部分情况下都适用;@@IDENTITY函数包含当前 会话中任何表生成的最后一个标识值,由于这个函数受触发其影响,可能不会返回我们预期的值;IDENT_CURRENT函数返回在任何会话中以及任何范围 内为特定表生成的最后一个标识值。推荐大家使用SCOPE_IDENTITY函数。

下面我们就来创建一个可以返回标识值的存储过程:

   1: CREATE PROCEDURE dbo.CustomerInsert
   2:   @Name varchar(15),
   3:   @Age int,
   4:   @Sex bit,
   5:   @id int OUT
   6: AS
   7: INSERT INTO Customer(Name,Age,Sex) VALUES(@Name,@Age,@Sex)
   8: SET @id = SCOPE_IDENTITY()

然后我们可以在数据访问层写这样一个方法:

   1: /// <summary>
   2:     /// 插入一条Customer记录
   3:     /// </summary>
   4:     /// <param name="cus">要插入的Customer</param>
   5:     /// <param name="dt">要更新的数据表</param>
   6:     /// <returns>插入的Customer的id值</returns>
   7:     public int InsertCustomer(Customer cus, DataTable dt)
   8:     {
   9:         using (SqlConnection con = new SqlConnection("Data Source=.;Initial Catalog=test;Integrated Security=True"))
  10:         {
  11:             // 创建SqlDataAdapter
  12:             SqlDataAdapter adp = new SqlDataAdapter();
  13:
  14:             //创建InsertCommand命令
  15:             adp.InsertCommand = new SqlCommand("dbo.CustomerInsert", con);
  16:             //指定InsertCommand类型为存储过程
  17:             adp.InsertCommand.CommandType = CommandType.StoredProcedure;
  18:
  19:             //向InsertCommand加入参数
  20:             adp.InsertCommand.Parameters.Add(new SqlParameter("@Name", SqlDbType.VarChar, 20, "Name"));
  21:             adp.InsertCommand.Parameters.Add(new SqlParameter("@Age", SqlDbType.Int, 4, "Age"));
  22:             adp.InsertCommand.Parameters.Add(new SqlParameter("@Sex", SqlDbType.Bit, 1, "Sex"));
  23:             SqlParameter parId = adp.InsertCommand.Parameters.Add(new SqlParameter("@id", SqlDbType.Int, 0, "id"));
  24:
  25:             //指定id为输出参数
  26:             parId.Direction = ParameterDirection.Output;
  27:
  28:             DataRow row = dt.NewRow();
  29:             row["Name"] = cus.Name;
  30:             row["Sex"] = cus.Sex;
  31:             row["Age"] = cus.Age;
  32:             dt.Rows.Add(row);
  33:
  34:             //更新数据库
  35:             adp.Update(dt);
  36:
  37:             //返回id值
  38:             return Convert.ToInt32(row["id"].ToString());
  39:         }
  40:     }

传入的DataTable为数据库中现有数据填充后的表,在需要插入后得到id的时候调用这样的方法就可以接收到返回的id值了。